Sunday, December 21, 2014

Chinese Rice Soup (Jook)

Oh the wonders of hindsight! This was my first Thanksgiving away from my family and Thanksgiving is not complete without some jook! I took the turkey bones from my fiance's family dinner and decided to make my first attempt!

Jook is Chinese porridge rice soup. In my family we serve it after dessert - around the time when lots of families are having some left over turkey sandwiches.

Once the turkey is served the bones are thrown into a pot withe some rice and cooked in that broth until thick. This is served with some green onions, crispy noodles, and some of the left over meat.

What I did:
Picked most of the meat off the turkey bones. Put the bones into the largest pot in the kitchen. Filled the pot with water until it was covered and then added in 3 cups of rice. This made a TON of soup. I ended having to take some out of that pot and starting a second pot. Once the rice was tended and mushy the soup was done. Carefully pick out all the bones and then we eat!

Next time:
I will make the broth first. Put bones in a large pot, cover with water, let simmer 30-40 minutes. Strain the broth with a sieve to catch all the bones, bone parts, and weird floating things. Pour the broth back into the pot and then add the rice to the broth (1 cup rice to 3 cups broth). Let it simmer until thick, approx 20-30 minutes. Then add the turkey meat and serve!

Update: The steps for "Next Time" worked great!

Saturday, December 20, 2014

Homemade Shake n' Bake Chicken

Need a dinner idea? This ended up being a crowd pleaser and I will make this again. I was going to purchase store brand Shake n' Bake or Oven Fry but both use High Fructose Corn Syrup. Since it was mostly breading I figured I would try and make it at home and I would also save some money!

I decided to use this recipe from The Black Peppercorn. I did make a few changes based on what was available in our house. I omitted the onion flakes, reduced the sugar to 1 tsp and reduced the black pepper to 1/2 tsp. Instead of a mix of parsley, basil, and oregano I used 2 tsp of Italian seasoning. I did use the 1/2 tsp cayenne but I would use 1/4 tsp or omit next time. It was ok, but the kids commented that there was a bit of spice (not that it stopped them from eating it).

Instead of shaking the chicken in a plastic bag I used a glass pie plate and dipped the chicken.

I used almost all of the seasoning on 6 flattened chicken breast so I estimate that the full amount of seasoning made below would coat 8 chicken breasts.

I served this with mashed potatoes and Oven Roasted Broccoli. I cooked the broccoli for about 15 minutes while the chicken was baking.

Homemade Shake n Bake Seasoning 
3 cups Panko bread crumbs
¼ cup vegetable oil
just under 1 tbsp salt
3 tsp paprika
1 tsp sugar
1 tsp garlic powder
½ tsp black pepper
¼ tsp cayenne pepper
2 tsp Italian seasoning

Mix all ingredients in a large bowl until evenly mixed and the bread crumbs are no longer 'clumpy' from the oil. Pour jar or plastic container and store in the freezer for 1-2 months.

Shake n Bake Chicken
  • Preheat oven to 400F. 
  • Pound chicken breast to about ¼- ½ inch thick. 
  • Rinse chicken in cold running water. Let excess water drain off.
  • Place chicken, one piece at a time, in the bag with a couple cups of the shake n bake.
  • Seal and shake the bag so that the chicken is totally coated in the breading.
  • Remove the chicken from the bag, shaking off excess breading.
  • Place on a cookie sheet lined with aluminum foil or on a silpat mat
  • Bake boneless chicken for 20-25 minutes.
Note: 3 cups makes a lot. If you are making 4 large chicken breast I would suggest halving the recipe or even using 1/3.

Tuesday, November 11, 2014

Dinner Rolls

These rolls are easy and can be prepped ahead of time. I followed this recipe from The Kitchn. I made these to go with The North Carolina Pulled Pork. While great as regular dinner rolls, these would work smaller for sliders or larger for burger buns. 

from the fridge overnight 
1 hour from the fridge
cooked!
with the pulled pork
Dinner Rolls
Makes 12 rolls

Ingredients
1 tablespoon active-dry yeast
1/2 cup warm water
1/2 cup milk (I used almond milk)
1 large egg
2 tablespoons vegetable oil
2 tablespoons sugar
1 teaspoon salt
3 cups all-purpose flour
1 tablespoon butter

Instructions
1. In a stand mixer: stir the yeast into the warm water and let it sit until dissolved.
2. In a separate bowl, whisk together the milk, egg, oil, sugar, and salt. Add this to the yeast mixture and stir until combined.
3. Add all the flour and stir until it forms a shaggy dough.
4. Knead the dough at low speed for 8-10 minutes, until smooth but slightly tacky. It should spring back when poked.
5. Cover the mixing bowl and let the dough rise in a warm spot until doubled in bulk, about an hour.
6. Dust your work surface with a little flour and turn the risen dough out on top. Divide the dough into 12 pieces. Roll the dough against the counter or between your palms until round.
7. Line a 9x13 pan with parchment and spray with nonstick coating. Arrange the rolls inside the pan spaced a little apart*.
8. Let the rolls rise until they fill the pan roughly 30-40 minutes. While the rolls are rising, pre-heat the oven to 375°F.
9. Brush the rolls with butter. Melt the butter and brush it over the risen dinner rolls. This helps the tops to brown and keeps the crust soft. (I forgot this step)
10. Bake the rolls until golden, 15-18 minutes.
11. Lift the rolls from the pan using the parchment and let the rolls cool on a wire rack until cool enough to handle.

*At this point you can also cover the rolls and put into the fridge to rise over night for dinner the next day. The next day let the rolls come to room temp (about 1 hour) prior to baking. Then continue with step 8.

Saturday, November 8, 2014

Homemade French Fries

"These taste like real french fries!!" The kids were pretty impressed that I was able to turn potatoes into french fries at home.

Super easy and a relatively healthy side dish. The silpat mat helps make the fries extra crispy.

Often these are served with Mr. Tom's Chicken and Oven Roasted Broccoli.


French Fries
1 potato = 1 to 2 people

Directions
Preheat oven to 400F. 
Peel raw potatoes. Slice them up. Thinner will cook faster.
Put sliced potatoes on silpat/foil/parchment lined cookie sheet.
Drizzle with olive oil and your choice of seasonings. I do a little garlic powder, salt, and pepper. Toss to coat all the potato pieces. If it was for adults I would add some cayanne or oregano.
Bake 25-45 minutes. The difference will be how thick the potatoes were cut and how crispy you want the fries. Fries are done when you pierce with a fork and the potato is tender.

Enjoy!


Saturday, October 11, 2014

Peanut Butter Cookies

Cookie time! I made this recipe with some homemade peanut butter. But other then that it is a very basic cookie dough and most people will have all the ingredients on hand.

I used a small cookie scoop so these cookies are all bite sized. I'm not sure why but I almost always make cookies that are small. But between the size and the sticky dough, the criss cross pattern was not meant to be. The recipe recommended rolling the cookies in granulated white sugar then doing the criss cross. If I did that, I would have reduced the white sugar in the cookies to 3/4 cup. But rolling the cookie in the sugar would have prevented the fork from sticking. Another thought that I think could have helped was if the cookies were larger and the fork was floured or buttered. 

Long story short, instead of making the fork prints - I gently pressed them flat with my fingers. That means I touched EVERY COOKIE! Touch it you take it, right?

Since I didn't want to wait 3 hours to chill the dough so I put it in the freezer for 30 minutes then popped it in the fridge for another 15 while I waited for the oven to free up. Yes, I would love to have double ovens in my kitchen!

What was interesting was the difference in the cookies with chilled batter vs not chilled batter. In this picture the top left is the 1st sheet from the fridge, top left is the 1st sheet without the criss-cross, bottom left is the 2nd round of cookies. Then I put the dough in the fridge between the 3rd and 4th cookie. Taste didn't change but the look certainly varied.

Regardless, these cookies didn't spread very much and I was able to fit 20 cookies on a regular sized cookie sheet.

The recipe said they would look kind of underdone when I take them off the sheet so I probably overcooked them, but we all thought they were great! I cooked them for 12 minutes.

The recipe below is adapted from Sally’s Baking Addiction. The site says that the cookies will store at room temperature for up to one week and that the baked cookies or dough will freeze for up to 3 months.

Peanut Butter Cookies
Makes 80 small cookies

1 cup unsalted butter, softened to room temperature
1 cup granulated sugar
3/4 cup light brown sugar
2 large eggs, room temperature preferred
2 tsp vanilla extract
1 cup creamy peanut butter
3 cups + 2 tbsp all-purpose flour
1 tsp baking soda
1 tsp baking powder
1/2 tsp salt

Using a stand mixer with paddle attachment, cream the butter and sugars until smooth. Add the egg and mix on high until combined, about 1 minute. Scrape down the sides and bottom of the bowl as needed. Add the vanilla and peanut butter and mix on high until combined. Set aside.

In a separate bowl, toss the flour, baking soda, baking powder, and salt together. Add the dry ingredients to the wet ingredients and mix on low until combined. Dough will be thick, yet very sticky. Cover dough tightly and chill for at least 3 hours in the refrigerator.

Preheat oven to 350F degrees. Line two large baking sheets with parchment paper or silicone baking mats.

Press fork into the tops to create the criss-cross pattern. Bake for 12 minutes or until very lightly browned on the sides. The centers will look very soft and undone. The cookies will continue to "set" on the baking sheet during this time.

Dutch Oven Bread

I know bread is intimidating but this bread really was easy. I adapted it from The Lean Green Bean. It was very sticky dough so when you do take it out to knead make sure that your hands are well coated in flour. I let the dough rise next to the slow cooker while it was cooking this beef stew.

Oh my. This bread was so crusty and soft and chewy and just so easy. I will be making this recipe again. Ideas for future loaves include adding garlic, oregano, thyme, or rosemary to the dough.

When dealing with yeast I heat the water on the stove with a thermometer until it reaches 111F. Then I take it off the stove and pour it into a glass Pyrex. I figure 111F will be good because it may continue to get warmer in the pot and if the water is too hot it will kill the yeast. I add the yeast then and let is sit. You’ll know when it starts to activate as it will get a gloopy and start to have a scent.

It took about 10 minutes to get the dough combined then another 20 minutes of work with kneading it twice. There is about 5 hours worth of down time for errands, house cleaning, sports, and reading. Again, not a huge amount of time invested in this bread.

This is cooked the dough in this enamel cast iron casserole pan that has a cover. 
Dutch Oven Bread
Makes 6 large slices

1½ c warm water (110F-115F)
2¾ tsp active dry yeast
1 tsp sugar
3 c all-purpose flour
1 tsp salt

Heat water to 110-115F. Add yeast and pinch of sugar, let sit for 5 minutes.
Add salt and flour and stir until a shaggy ball of dough is formed.
Cover and let rise in a warm place for 4 hours.
Turn dough out onto a floured surface. With well floured hands, knead the dough 5-10 times.
Return dough to the bowl and let rise for another 30 minutes.
While dough is rising, place your dutch oven (uncovered) in the oven and preheat to 430F.
After 30 minutes, use floured hands to reshape dough into a ball and carefully drop into the dutch oven.
Cover and let bake for 30 minutes.
Uncover and let bake 10-15 minutes longer.
Remove loaf from dutch oven and let cool.

Beef Stew

Here is a yummy (and easy) slow cooker beef stew recipe! I found the recipe off All Recipes. I selected it based off the over 2000 reviews. Because this was a meal that included kids (and they will refuse to eat a meal based on seeing certain ingredients) I blitzed the onions and celery in the food processor so that there were no visuals. Keep the potatoes and the carrots in the larger chunk sizes so that way they aren't mush after cooking for so long.

I prepped and assembled the meal the night before and kept it in the fridge. I woke up on Saturday morning, plugged in the slow cooker, then we ran our errands and attended our sporting events. We came back to a delish and warm stew!

I also made a loaf this dutch oven bread.

My dad's tomato based beef stew recipe can be found here!

Slow Cooker Beef Stew
Serves 6-8

3 - 4 pounds beef stew meat, cut into 1 inch cubes
3/4 cup all-purpose flour
1/2 tsp salt
1/2 tsp ground black pepper
1 1/2 tsp oregano
1 heaping tsp paprika
1 heaping tsp garlic powder
2 bay leaf
2 tsp Worcestershire sauce
1 tsp of gravy master
1 onion, chopped
2 stalks celery, sliced
4 potatoes, large dice
4 carrots, sliced thick
2 cups beef broth
12 oz frozen peas

Put all the ingredients (minus broth and peas) in the slow cooker and stir together so everything is coated. Then add the beef broth and give another stir. Everything will be a soupy mess.
Cover and cook on low for 10-12 hours or on high for 4-6 hours.
About 20 minutes before serving add the bag of frozen peas.

Saturday, September 6, 2014

Chicken Rice Soup

While it is almost 90F… fall is coming! I swear it! So here is a quick and easy chicken soup recipe that you can quickly assemble for those cool evenings. The roux will create a creamer thicker broth for the soup.

If you are cooking for picky kids puree the onion, garlic, and celery in the food processor. You’ll get the flavor but none of the texture. Rice can be substituted for pasta. Left over chicken would work too. And any veggies that may be having a slow death in your crisper drawer could be included in this as well! Flavors that would be tasty would include a few slices of ginger in the broth while cooking (remove before serving) or lemon juice in the broth.

This soup freezes well, just omit the rice/pasta. When you are ready to eat make the pasta/rice when the soup is heating up and then combine. This prevents the rice/pasta from being gummy and mushy.

Chicken Rice Soup
Makes 4-6 servings

2 tbsp oil
Small Onion, diced
3 garlic cloves, minced
3 carrots, sliced
3 stalks of celery, sliced
4 tbsp flour
2 tbsp butter
1 tbsp seasoning (oregano, Italian seasoning, or parsley)
1 can of corn (optional)
4-5 cans of chicken broth (it seems like a lot of broth but it will absorb and thicken as then soup sits in the fridge)
3 chicken breasts (cooked)
1 cup brown rice (uncooked)
Salt and pepper

To Cook Chicken:
Preheat oven to 350F. Season chicken with salt and pepper. Cook for about 30 minutes. When it is done take it out and let it cool. Shred and put aside.

To Cook Rice:
1 cup rice in 1 ½ cups of liquid (I do a split between water and chicken both). Bring to a boil then reduce to a simmer. When liquid is mostly absorbed (after approx. 25 minutes) turn off the heat and put aside.

To Make Soup:
While the chicken and rice are cooking, start making the soup! Heat large pot. Add a little oil and add in the garlic, onion, carrots, and celery. Season with salt and pepper. Let it sauté 5 minutes. Add butter and stir into the veggies. When melted add in the flour. Stir to coat the veggies. Add in seasoning of your choice. Season with salt and pepper. Add ½ can of broth and stir so the broth doesn’t become lumpy. When broth is smooth add in rest of the broth. Add chicken and rice when they are done cooking.

Friday, September 5, 2014

Roasted Lemon Broccoli


Here is a recipe for a fast and easy dinner veggie! The broccoli shrinks a lot when it gets roasted so we can eat 3-4 broccoli crowns for 2 people.

Update 12/20 - Finally had some left over and remembered to take a picture. This is also tasty with a little Parmesan cheese sprinkled over the top!

Roasted Lemon Broccoli
serves 2-4

2+ Crowns of Broccoli
1 Lemon
2-3 tsp Olive Oil
1-2 tsp Garlic powder

Preheat oven to 400F or 450F. Line cookie sheet with foil or use a silpat mat.

Wash and cut broccoli. Squeeze the lemon for the juice, drizzle olive oil, and spring garlic powder, over the broccoli. Toss to combine. Spread over the broccoli across the cookie sheet

Roast for 10-15 minutes. Take out when tender and crisped to your preference.

Wednesday, September 3, 2014

Mr. Tom's Grilled Chicken

Mr. Tom (aka my dad) made this grilled chicken when we were on vacation in Hilton Head. Everyone loved it so much I've made it almost every week since then! It is moist, light, and flavorful. Best part? It is 2 ingredients.

This chicken has also been used as the base for taco meat (shred and add taco seasoning), sandwiches (grilled chicken and cheese panini!), and salads.


Mr. Tom's Grilled Chicken
One pound of meat = 2-4 servings

Chicken breast and Chicken thighs
Italian Vinaigrette Salad Dressing

Clean up the chicken (pick off any fatty pieces you don't want). Then pour the salad dressing over the chicken. It doesn't have to soak/be submerged, but the chicken should be coated. Let it marinade for 4-5 hours.

When it is dinner time...turn the grill up to medium high. It is about 5-6 minutes per side for the breast (they are super thick and I forget I wanted to thin them until after they are on the grill). And it is 3-4 minutes per side for the thighs.

Tuesday, August 26, 2014

2014 Hilton Head, South Carolina


Hilton Head, South Carolina

Accommodations: Marriott’s Sea Pines Resorts
Hotel Activities: Beach, Pool
Outside Hilton Head: 2 Hour Kayaking Tour from Shelter Cove Marina
Restaurants: One Hot Mama’s Restaurant

What a great vacation! We had a wonderful week long trip to Hilton Head South Carolina. The 12 hour drive was a bit tiresome for the 4 of us, but we had scavenger hunts, the license plate game, bingo boards and some books on tape to entertain ourselves! 

I had spent a few hours putting together the 100 item scavenger hunt for the drive. This was good for both the 7 and 9 year old but the 9 year old was more interested in the license plate game than the 7 year old. I'll post a link for these files to this post. If you have younger kids you could do this with pictures instead of text and they could find the pictures. 

We also played word games such as picking a category and then listing items that start with the last letter of the previous word "a is for alligator, r is for rhino, o is for ostrich..." another game was listing out animals in alphabetical order.

Almost all of our time was spent relaxing at the beach, playing with our boogie boards and building sand castles. There are lots of sand dollars in the shallow part of the beach that you might step on and we found many pretty shells. The kids had never been to an ocean beach before and were very concerned about being in the water. This was an awesome first beach experience. The water was warm and there was no undertow. The beach was clean and had soft sand (aka I grew up with the Maine rocky beaches). 

There were 2 pools and a kid’s sprinkler pool. The hotel offers activities that families can join. There were cook outs, tie dye shirts, limbo, complimentary exercise classes, hammocks, corn hole, shuffle board, and more. We brought bikes because there are many bike trails but we were having too much fun at the beach to go exploring too far. They also have bike rentals for tandem bikes, kid attachment bikes, and the bike trailers.


The first day there were jellyfish in the water. But we think it may have been because there had been a rain storm. Jellyfish stings are treated with spray bottle of salt water and vinegar. If you do get stung, use a lot of the spray! The spray will neutralize the stings and any stingers that are left on the skin. 

Our one adventure off the resorts property was with Outside Hilton Head. We went on a 2 hour kayaking tour from Shelter Cove Marina. A bit pricey but well worth it. We saw dolphins, birds, and were able to learn about the salt marshes. The salt marshes flood and then drain with each tide. Cordgrass is one of the main plants in the area and it can survive in that diverse environment. The cordgrass creates shelter and food for the fish, oysters, clams, and crabs.  
Baby lizard!
After kayaking we decided to check out One Hot Mama’s restaurant. Between the four of us we were able to have a good sample of the menu: pasta and sauce, brisket chili, baby back rib tips, grilled chicken breast, homemade kettle chips, baked beans, mac and cheese, and The Big Daddy super sandwich (beef brisket, pulled pork, pepper jack cheese, chipotle mayo, coleslaw, onion rings, on a homemade roll). Would we come back? Maybe. The food was tasty but I think there are many other restaurants in the area we would want to try out before coming back.

Friday, August 15, 2014

Corn, Tomato, and Avocado Salsa

Quick, light, and easy summer salsa. I brought this for a work potluck and served with chips. I had the leftovers that night on tacos. I prepared the salsa the night before to let the flavors mingle. Other versions include cumin for some kick. Enjoy!

Corn, Tomato, and Avocado Salsa

1 ear roasted corn, off the cob
1 Red (or orange, yellow, or green) Pepper, diced
2 Roma Tomato, diced
1 cup Cilantro, chopped
1 can Chickpeas (or beans of your choice)
1 lime, juiced
Salt and pepper to taste
1 Avocado, sliced

Combine all the ingredients above except the avocado. Add the avocado right before serving. Keep refrigerated until ready to serve.

Monday, June 9, 2014

Chocolate Brownies

Late night craving for brownies! In less than 30 minutes I had fresh brownies to serve with a scoop of vanilla ice cream. These are more cakey and less fudgey than the Brooke's Bombshell Brownies from the Slutty Brownies (layers of brownie + chocolate chip cookie dough + Oreo's).

I started to half the recipe and then forgot I was doing that... so the recipe had half the amount of butter and chocolate and then the regular amounts for the rest of the ingredients. I just went with it rather than trying to adjust the butter once I read these Brownie Tips. This make the brownie more cake like than fudge like. I liked these better than the other brownies I've made in the past.

I baked these in muffin tins using the silicon muffin holder-things and the brownies don't stick very much to those.


Chocolate Brownies

¼ cup unsalted butter
4 - 8 ounces coarsely chopped quality semi-sweet chocolate (4 oz was plenty chocolate-y)
¾ cup granulated sugar
¼ cup light brown sugar
3 large eggs
1 teaspoon vanilla extract
½ cup + 2 tablespoons all-purpose flour
2 Tablespoons unsweetened cocoa powder
¼ teaspoon salt
½ cup semi-sweet chocolate chips (optional)
½ cup chopped nuts (optional)

Preheat oven to 350F degrees. Line the bottom and sides of a 9x9 inch square baking pan with aluminum foil, leaving an overhand on all sides. Set aside. (If using cupcake tin use cupcake papers or use non-stick spray, seriously, they will stick).

In a medium microwave safe bowl melt butter and chocolate, at 20 second increments, stirring after each, in the microwave. Remove from the heat, pour into a large mixing bowl, and allow to slightly cool for 10 minutes.

Whisk the granulated and brown sugars into the cooled chocolate/butter mixture. Add the eggs, one at a time, whisking until smooth after each addition. Whisk in the vanilla. Gently fold in the flour, cocoa powder, and salt. Once combined, fold in the chocolate chips and nuts.

Pour batter into the prepared baking pan and bake for 30-35. Mini-cupcakes take about 20 minutes, regular size cupcakes take about 30 minutes. A toothpick inserted in the center should come out with only a few moist crumbs when the brownies are done.

Let brownies to cool completely in the pan set on a wire rack. Once cooled, lift the foil out of the pan using the overhang on the sides and cut into squares. For neat squares, use a very sharp knife and wipe it clean with a paper towel after each cut.

The brownies will stay fresh in an airtight container at room temperature for 1 week.

Friday, May 30, 2014

Yellow Cake with Chocolate Frosting

Great moist cake and sugary sweet frosting! By the time I realized we should take pictures we had eaten most of the cake...out of the baking pan! Next time...

Yellow Cake
adapted from Allrecipes.com
makes one 8in cake

½ cup butter
¾ cups white sugar
3 eggs
1/2 cup milk
1 cup flour
1 tsp baking powder
¼ tsp salt

Preheat oven to 350F. Grease and flour 8 inch round pan or 9x9 baking pan. 

Combine flour, baking powder and salt. Set aside.

In a large bowl, cream together the butter and sugar until light and fluffy. Beat in the egg yolks one at a time. Stir in flour mixture and milk, mixing just until incorporated. Pour batter into prepared pan.


Bake in the preheated oven for 25 to 30 minutes, or until tops spring back when lightly tapped. Cool 15 minutes before turning out onto cooling racks.

Chocolate Frosting
Adapted from Allrecipes
Makes about 2 cups of frosting

2 ¾ cups confectioners' sugar
6 tbsp unsweetened cocoa powder
6 tbsp butter
5 tbsp milk
1 tsp vanilla extract

Sift together the confectioners' sugar and cocoa, and set aside.

In a large bowl, cream butter until smooth, then gradually beat in sugar mixture and milk. 

Blend in vanilla. 

Beat until light and fluffy. If necessary, adjust consistency with more milk or sugar.

Friday, May 9, 2014

Fast Blueberry Muffins

Uh oh! I have breakfast duty for work tomorrow! What can I make without having to go to the store? I had some dried blueberries in the pantry, so muffins it is!

I hydrated 1/2 cup of the blueberries by soaking them in hot water for 30 minutes. While they were soaking I made the batter. Frozen blueberries would work as well. The original recipe had a yummy crumble on top, but that would require taking out the food processor which would then need to be washed...so I didn't add it, but I'm sure it would have been incredible! I did sprinkle a little sugar over the tops of the muffins before baking.

Blueberry Muffins
Adapted from All Recipes

1 1/2 cups all-purpose flour
3/4 cup white sugar
1/2 teaspoon salt
2 teaspoons baking powder
1/3 cup vegetable oil + 1 egg + ? milk = 1 cup
1 cup fresh blueberries

Preheat oven to 400 degrees F. Grease muffin cups or line with muffin liners.

Combine flour, sugar, salt, and baking powder. Place vegetable oil into a 1 cup measuring cup; add the egg and enough milk to fill the cup. Mix this with flour mixture. Fold in blueberries. Fill muffin cups right to the top.

Bake for 20 to 25 minutes.

Thursday, May 8, 2014

2013-2014 D.C. Activities and Food

D.C. 
Here are some of the places I have visited in D.C.. Please let me know if you have any questions!

SMITHSONIAN MUSEUMS
Air and Space Museum - This is one of the most popular museums but I wasn't crazy about it. The Air and Space Museum has several examples of different airplanes, there is a space shuttle you can sit in, and there are several exhibits on flying and space. Because this is one of the most popular museums there are often lines to get into the museum and it can be crowded inside.

Air and Space Museum - Udvar-Hazy Center - Located in Chantilly, VA (near Dulles Airport). This has the space shuttle, blackbird, concord, Enola Gay, and lots of other airplanes and engines. There is a $15 fee for parking but the entrance is free.

American History Museum - Lots of random exhibits here, but something for everyone! Food history, military, American history, trains, or art, this museum has it all. The First Lady dress exhibit is here too. Depending on how interested you are in the exhibits you could take 20 minutes to a full day here.

Museum of Natural History - So much fun! This is home of the Hope Diamond, Dinosaur Fossils, Geology exhibits and more. Lots of things to touch for the kids and interesting things to read for the more grown up. Depending on the patience/interest of kids and grown ups this could take about 1 hour to a full day.Take the metro in and you'll be right near the National Mall for some outdoor walking and the monuments.

National Zoo - Free, open year round. Maps, strollers, and food are available onsite for a fee. There are picnic tables if you bring your own food. Very limited parking, for example late April on a Saturday the parking lots were full by 10:30am. Street parking in the neighborhoods is available and it is a short walk from a metro stop. Can easily spend a whole day there. If you go in the winter many of the animals will be inside so you won't be able to see much. There are a few inside exhibits like the Pandas, Reptiles, and Elephants so you can see a few animals in bad/cold weather.

Portrait Gallery - This museum is a toss up. If you like art you could be here for several hours checking out all the pictures and info cards. If you are only looking for a specific exhibit you could be in and out in less then 30 minutes.

NATIONAL MALL
National Mall - Bring a history buff and you'll have a lot better understanding of why these monuments were built and why they are so important. If you can't bring anyone, get a really good guide book and this will really change your view. The National Mall has lots of places to sit and enjoy the views of the Tidal Basin, Reflecting Pool, and different water fountains as well.

Cherry Blossom Festival -  Everyone goes. Be prepared for lots of crowds, think Times Square crowds and tourist groups. Everyone is taking lots of pictures, no one is walking at the same pace, and traffic is all sorts of hectic. Plan for and expect those conditions and you'll be fine. If you want a leisurely view of the blossoms you may want to try during the week when everyone is at work or a weekend ahead of the peak blossoms. I've never done it but there are lots of boat cruises along the Potomac during this time and you can rent a paddle boat in the Tidal Basin.

OTHER
Botanic Gardens - Indoor exhibit, it is open year round. The gardens are broken out into different rooms based on climate but there are also a couple areas for endangered plants and a specific orchid exhibit. There are some gardens outside but this is seasonal. Expect to spend 30-90 minutes here.

International Spy Museum - There is an entrance fee. While a lot of the museum is focused on the James Bond exhibit there is quite a bit of history regarding spy tools and the history of spying in the US. Interactive museum where you first select a spy and have to remember their information during the exhibits and there are many gadgets to test out and explore so it isn't just reading.

Marine Silent Drill Team and Marine Drum and Bugle Corp Practice at the Iwo Jima Memorial - Tuesday evenings during the spring/summer months. This Marine tradition,the Silent Drill team does not have any verbal commands during the entirely synchronized routine. The Drum and Bugle Corp is one of the elite military bands. I've never seen anything like this before and it was a great free experience that if you are in the area you shouldn't miss!

FOOD
Baked and Wired - Great bakery and coffee shop located in Georgetown. Check this place out!

Brasserie Beck - Fancy place with lots of seafood options. It was very tasty but since it was mainly seafood dishes I don't think I'd go back.

Chop't Salad - Salad chain that prepares salads to order. Great healthy lunch option that isn't too pricey when you are out and about in the city!

Daily Grill - A slightly upscale restaurant. We went for Mother's Day and the food was great! I had the pasta primavera which was a very small portion and not what I was expecting...but everyone else's food was big portions and tasted great! Between the 8 of us we had fish, crab, rice, pasta, veggies, and more. Try their fresh strawberry lemonade it was fantastic!

Founding Farmers - Wonderful food with a seasonal menu. Almost everything is made in house or sourced from certain farms. Highly recommend the green goddess and bread platter or some of their fresh made pasta. Make reservations in advance.

Matchbox - Specialty pizza restaurant that serves other incredible salads, sandwiches, and has a huge drink menu. Make reservations because there is almost always a wait outside during main dining hours.

Poets and Busboys - A fun forward thinking quirky restaurant/book store. They have a selection of book sto browse from in the front while waiting for your table. They offer vegetarian, vegan, and gluten free options. Another unique aspect is they have events in the evenings for local talent. They don't take reservations.

Sweetgreen - Home of my favorite tangy frozen yogurt! They make delish salads to order using local ingredients. There is even a blackboard that says where all the ingredients came from. Check this place out!

Tonic - Great bar food and sandwich shop with a class spin. Many beer tap options and drink options.

Z Pizza - Chain restaurant with specialty pizza shop for not super expensive. They offer salads, gluten free/vegan/vegetarian options as well.

Turkey Sausage and Sun Dried Tomato Frittata

A quiche without a crust! How easy! A frittata is a mix of eggs and stuff to make a yummy breakfast that can be served hot, room temp, or cold. This is a great make ahead brunch item. 

The stuff for this one was sun dried tomatoes, turkey breakfast sausage, and herbs. But the recipe below can easily be tweaked to your flavor preference. Swap in bacon for the sausage, use cheddar cheese or gouda instead, add in peppers or broccoli, etc

Other recipes cook at a higher temperature for a short period of time too, some add in a little flour or baking powder to give it some poof!


Turkey Sausage and Sun Tomato Frittata
serves 6-8

5 eggs - 7 eggs
1/4 cup milk
1/2 cup mozzarella cheese (or cheddar)
3 tbsp sun dried tomatoes (marinated with garlic, oregano, basil, and olive oil)
6 links of turkey breakfast sausage, pre cooked
3 tbsp each garlic chives and green onions

Scramble together: eggs, milk, and mozzarella cheese

In a frying pan, heat the Sun dried tomatoes. If a bunch of oil is in the pan pour it out or you’ll have greasy eggs.
Meanwhile, heat 6 links of turkey breakfast sausage, it in the microwave for 60 seconds, chopped it up then put it in the frying pan. Toss in about 3 tbsp each of garlic chives and green onion into the frying pan.

Put into a glass baking dish and let cool for a few minutes. Pour egg mix over the slightly cooled filling and then semi stir so everything is not at the bottom. Cook at 325F for 60 minutes.

Wednesday, May 7, 2014

Pineapple Banana Bread

Here is a fast an easy quick bread! I had some bananas and pineapple that was about to go bad, so I thought to find a recipe that used both!  The original recipe called for maraschino cherries and flaked coconut and 2 cups of sugar. I reduced the sugar to 1 cup. Next time I might sprinkle a little on top to get that crusty banana bread but not have so much sugar in it. 

I blitzed the bananas in the food processor and I did 10 oz fresh pineapple also pureed in the food processor. This made the bread very moist, almost fudge like and difficult to cut. I would stick to the 8 oz of pineapple when you try out the recipe. When you do the bananas there can't be many lumps because they will boil when the bread gets cooked and make a mess. 

Here is the original banana bread recipe that I have from my mom.

Next time I would include a handful of chocolate chips.

Pineapple Banana Bread
Adapted from All Recipes

3 cups all-purpose flour
3/4 teaspoon salt
1 teaspoon baking soda
1 cups white sugar
1 tsp ground cinnamon
1 1/2 cup chopped walnuts
3 eggs, beaten
1 cup vegetable oil
2 cups mashed very ripe banana
1 (8 ounce) can crushed pineapple, drained
2 teaspoons vanilla extract

Preheat oven to 350 degrees F. Lightly grease and then flour a 9x9 pan and a 12 muffin pan. In a large mixing bowl, combine the flour, salt, baking soda, sugar and cinnamon. Add the walnuts, eggs, oil, banana, pineapple, and vanilla; stir just until blended. Pour batter evenly into the prepared pans.

Bake for 60 minutes, or until a tooth pick inserted into the center of a loaf comes out clean. The muffins took about 40 minutes. 

Sunday, April 27, 2014

National Parks: Black Canyon of the Gunnison, Mesa Verde, Canyonland, and Arches

What an eye opening amazingly great vacation! Anthony and I spent a week checking out a few of the beautiful natural wonders in the United States. We saw parts of Black Canyon of the Gunnison, Mesa Verde, Canyonland, and Arches. We also stood at the Four Corners, saw the milky way, and saw Natural Bridges National Monument.

America the Beautiful National Park Passes: These are on the pricier side ($88/annual pass) but if you are planning on going to a few parks then it will quickly be worth it. Park entrances can be $20/vehicle. If you don't want to spend the money you can get free ones if you are in the military, if you volunteer certain hours with the parks, or have a permanent disability. There are also $10 non-expiring passes for being a senior citizen.


Flying out to Grand Junction, Colorado
We flew out early on Wednesday morning so we could have a whole day of exploring. Unfortunately there was an issue with the plane being over weight so they had to take some folks off the plane before we could take off. We missed our connection (landed at 5 pm instead of 10:30 am and lost a whole day) but United was great at redirecting our flights and luggage.
Some of you may know, I don't trust checking luggage so I was quite relieved when both giant duffle bags of camping gear and clothes made it to the final destination even with 2 connections instead of the original 1 connection.
Luckily, I did not book any camp sites for us and we had an extra day built in for additional exploring, so we had a lot of flexibility for timing and it worked out great!


Car Rental
We rented from Thrifty because we thought they would give us a Jeep. Instead, we had a Nissan Rogue. While this was perfect for 2 people and lots of gear, we really wanted the 4 wheel drive so we could do some of the off road trails. This was a big disappointment especially at Canyonlands National Park and Arches National Park where most of the park is available only by 4WD roads. If you have the option to get the 4WD, do it, but at the same time I think we were able to see everything we had wanted.


Groceries
After we picked up the rental car we went to the grocery store to pick up food, ice, propane, and wood.
We planned out our meals for several reasons 1) cost savings 2) flexibility 3) I wanted to try the stove attachment for the propane tank. I won't lie, we did bring some food with us like jerky, crackers, cheese, cereal, bread, spices, and tin foil since we already had them at home.
I did have to buy a bottle of olive oil, next time I will bring  some from home in a small container. I only used a few tablespoons and had to throw out the whole container since we didn't want to pack it in the checked luggage.
I wasn't planning on slaving over the fire for hours on end, so I tried to plan easy not messy meals:
  • Spicy Sausage with Onions, Peppers, and Potatoes (2 meals)
  • Sliced up Sausage with cut veggies in a tin foil packet with olive oil, salt, pepper, garlic powder. Cook on the fire 30-40 minutes.
  • Tristrip(?) Pre Marinated Steak with Asparagus (1 meal)
  • Steak in a foil packet. Cook 30-40 minutes.
  • Cut asparagus into 1-2 inch pieces, toss with olive oil, garlic powder, salt, and pepper. Put in a foil packet. Cook 20 minutes.
  • Taco meat nachos (1 meal)
  • Tuna sandwiches with mayo packets
  • PB and J sandwiches
  • Hard boiled eggs
  • Scrambled eggs
  • Cheese and crackers
  • Water - Most of the parks did not have running water available so we purchased 12 gallons of water for the week for the two of us, I didn't drink enough water so we ended up with about a gallon of water unused.
Gear Review
  • Suisse Sport Adventurer Mummy Ultra-Compactable Sleeping Bag - These are supposed to be good for 30F, but since I used it in 30F with 4 fleece blankets and wearing cold weather compression gear... I'd go with 40F or warmer with this bag! But the material was fine, the zippers were ok, and the bag was comfortable.
  • ALPS Mountaineering Lightweight Series Self-Inflating Air Pad - Regular size, this was comfortable and really makes a big difference compared to sleeping directly on the ground. If it doesn't inflate right away you can blow into air nozzle and it will puff up nicely.
  • ALPS Mountaineering Compression Sleeping Bag Stuff Sack - Medium size, one of the sleeping bags didn't come with a bag so I purchased this one. This was a great durable bag. The clips were strong and I was able to fit both sleeping bags in the bag.
  • Coleman PefectFlow 1-Burner Stove - This comes in two pieces, the base and the metal top that screws into the propane tank. The metal top was bigger than I expected and you could use a normal 9 inch pan. The metal top cools quickly which was nice. It was slightly challenging to pack as I was worried about the temperature nozzle sticking out and didn't know if it would cause problems if it was jostled. The only issue I had was controlling the temperature, low was still kind of hot. But if you are trying to boil water, this was great because it will heat food up fast without using too much propane.
  • Polar Bear 24 Pack Soft Cooler - I was looking for a cooler that would be easy to transport and keep meat cold for several days. Soft coolers are notorious for not keeping items cold for more than a few hours or at most a day. But I was I was very impressed with the durability of the exterior cooler. The fabric was a tough canvas and the inside is lined and waterproof. The zipper was very solid feeling as well. While I had planned on packing the cooler, the cooler didn't pack down as small as I had hoped so we filled it with clothes and gear then used it as a carry-on. As the weather stayed fairly cool during the trip we didn't need to get more ice until the 5th day!

Black Canyon of the Gunnison National Park, Colorado
This was a surprise National Park. In my guide book it shows up under the Rockies section instead of the Colorado Plateau. I was looking at the drive from Grand Junction to Mesa Verde when I saw a little patch of green on the map. Eureka! It is another National Park! It was only an hour away so I figured why not? This was such a great surprise! The park was beautiful and so different than other parks.
We arrived at the Black Canyon of the Gunnison National park around 6:30pm. Going into the park we passed a few hotels and some fast food places. It was cold, getting dark, and all the sites were covered in snow! We drove around the campground (no entrance/camping fees for winter) to see if there were any sites that were not muddy and were shoveled. But a quick trip around Loop A proved the ground was actually still frozen. We picked a site near the bathrooms (very clean pit toilets with hand sanitizer, no running water in the park) and started to unpack.
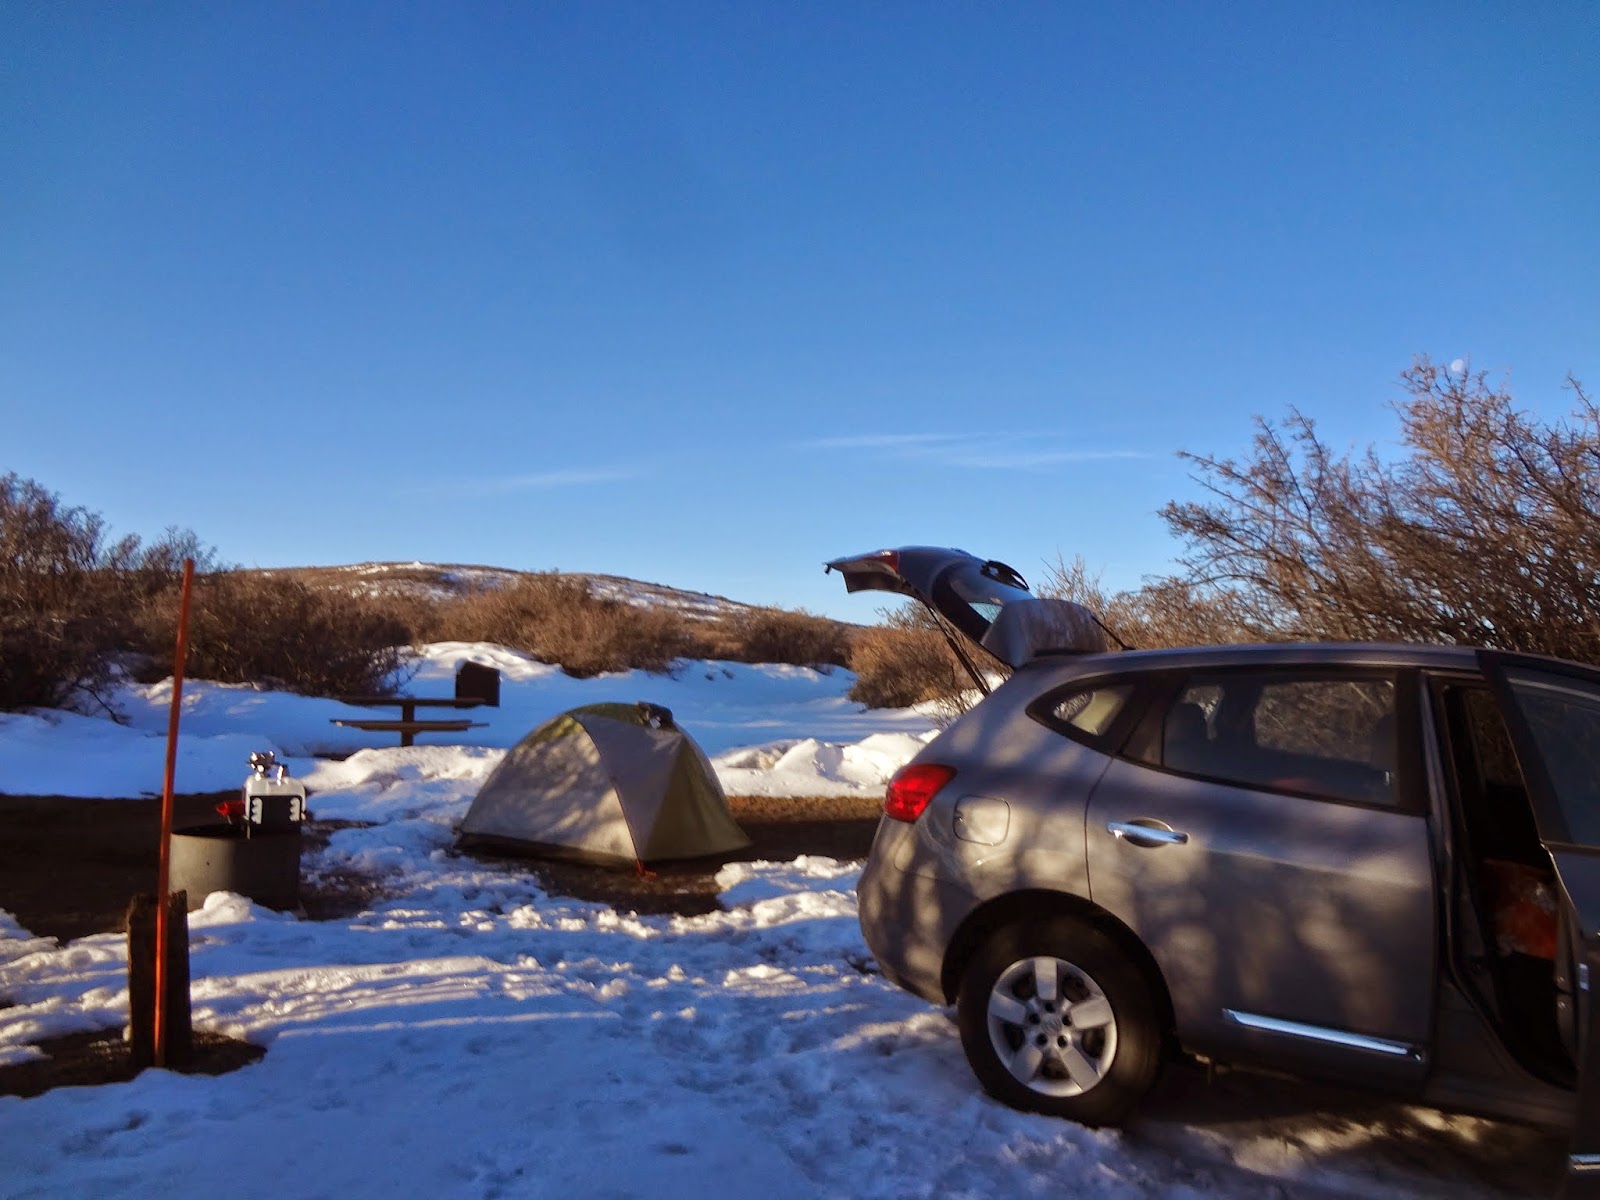
Anthony quickly set up the tent and I tested out our stove attachment! As the sun was setting, I was pretty convinced that there were all sorts of wild animals hiding the trees and behind the snow banks. I was rather jumpy, especially in the huge silence. The only noises were the ones we were making.
We made quick work of the food and then cleaned up. I made sure to put the clothes I cooked in back in the car. There are bear boxes for food and trash, so we wanted to be careful. Between the jet lag, the travel exhaustion, and the lack of campfire, we went to bed early. We did poke our heads out later on that night to see the stars. The stars were bright but the moon was so bright that I was surprised to find out that there wasn't a light on the tent!
We woke up early/got up after a chilly night of 15F and went to the visitors center. We read the exhibits, watched the movie, and learned about this little known national park. The 20 minute movie was very informative and I recommend checking it out at the beginning of the visit. It tells you how it was found, has great scenes, and how the park is important now.
Keep in mind that during the winter the South Rim road is closed for winter activities with maintained cross country ski trails and show shoes are available to rent in the visitor center. If we had more time we would have walked out to see some of the canyon overlooks. The North Rim road is also closed for winter weather.
We are going to try and make our way back out there in the warmer weather to view the canyon and be able to do a few other hikes. The area is very steep and only experienced folk should hike down into the canyon.
Fun Facts (from the guidebooks, nps.com, and the visitor center)
  • 20,000 visitors a year
  • Established Oct 21 1999
  • Deeper than it is wide in some areas
  • Was formed by uplifted hard rock and then cut with slow continuous erosion of fast moving water
  • The 48 mile river drops an average of 96 feet per mile and 480 feet in one two mile stretch
  • The first explorers to successfully navigate the area used rubber air mattresses
  • The narrowest part of the river is 40 feet across
After spending sometime warming up we set out of a couple very short hikes. The first hike was a short mile hike from the back of the visitor center and goes to a  scenic overlook that juts out into the canyon. It was short, easy to get to, not super steep. It is along the edge of the canyon and there are areas that do not have railings, so watch your footing!


The second hike was Rim Rock Nature Trail (1 mile round trip) that starts at the visitor center parking lot and ends at the campground. We didn't do the whole walk but we were able to get a closer look of the depth of the canyons and soak up the view.

Mesa Verde National Park, Colorado
Three hours south of the Black Canyon is Mesa Verde National Park. This was the home to the ancient Puebloans and they built their homes into the walls of the cliffs using mud and rocks. Since being discovered in 1888 by some cowboys lost in a snowstorm it is estimated that the Puebloans lived there for about 75-100 years after building their cliff dwellings, without leaving any indication of why they left. Opened in 1906, the park has over 4,800 archaeological sites, that includes over 600 cliff dwellings and sites date from A.D. 550 to 1300. There are approximately 600,000 visitors a year.
Mesa Verde National Park has had many many wildfires in the past and there are still charred areas where you can see the trees and vegetation starting to come back. In fact, most of their service roads are for fire prevention.
We found a great A&A Mesa Verde RV Park just outside the national park. They opened early for the season which was great for us! There was only one other person in the campground.
The spaces were big with campfires grates and picnic tables at each site and there were trees or awnings available for shade. Also available was a dish sink, washer and dryer, a pool, mini golf course, hot tub, free wi-fi, and a playground. The bathrooms were clean, the water was hot, the staff was friendly, and the park was far enough from the road you didn't hear all the cars going past. We were in a shaded area and it was perfect for our tent. Thank you for an excellent stay!
After setting up the tent we went to explore the park. We started with the Chapin Mesa Museum. There were many artifacts such as pottery, basket weaving, tools, arts, and crafts as well as a bunch of dioramas (yes, think shoe boxes and figures but on a huge fancy scale). I also recommend the 25 minute intro movie to give you a basis of historical background. We grabbed a map, watched the movie, then went to explore Spruce Tree House.
There are several cliff dwellings to explore, but since we were there in the winter, most was not open. To get to the Spruce Tree House you walk down a ½ mile paved (rather steep) sidewalk with a couple switchbacks to get to the bottom where the house is located. There was a ranger on hand to ask questions and we were able to pick up a guide book. If you return it you don't have to pay, they use the honor system.
It was a tight squeeze!
This is one of the main preserved areas and you are able to get fairly close to the homes. There is even a kiva you can go into and get a taste for what it would have been like to live there. One of the many things I learned there is that the people were short. What I had mistaken for windows was actually what they used as a door!
Next we drove the Mesa Top Loop which takes you around many kivas, pithouses, and early pueblo villages. The road goes past some great views of the cliff dwellings. It was recommended that we do this in the afternoon as the lighting would be better for viewing the cliff dwellings across the canyons.
Once the sun started to set we went back to the campground for dinner and to plan the next day.
While the night dipped to 30F, during the day it was 50-60F.
We woke up early and drove back towards the Chapin Mesa Museum. Just before the Spruce Tree House there are two trails. The Petroglyph Path Loop and Point Lookout.
We started with the 2.4 mile Petroglyph Path loop. It is estimated to take 2 hours, but we did it in an hour and a half. The trail goes along the inside of the canyon, it includes were some steep stairs and tight squeezes between rocks. A nice touch that is throughout this park is that most of the plant life is labeled so you can have an idea of what you are looking at.
If you want a short version, do the reverse of the trail. There is a mostly flat walk, a rock scramble down to the next path, and the petroglyphs will be right there. There is no note at the beginning of the trail warning about the steepness or the rock scrambles, so check with the ranger if you have any concerns prior to beginning the hike.
What is a Petroglyph and what is a Petrograph? A Petroglyph is a carving into rock and a petrograph is an image drawn or painted onto rock.
Point Lookout
As we started to head to the park exit we stopped at Park Point. This was a .2 mile, 15-30 minute walk to the highest point in the park. We stayed about 30 minutes to take pictures of the amazing views.
The last stop at Mesa Verde National Park was Point Lookout. A 2.2 mile hike estimated to take 2 hours. The trailhead is at the back of the campground in the amphitheater. The campground was closed so we were the only one on the trail at that time. We half ran the trail and it took us about 30 minutes to the top and 30 minutes back down. There was a great view but if you only have one day at the park and are not able to explore too much, see the houses and there are plenty of views on the drive out to the museum.


We left Mesa Verde and continued heading southwest. The landscape is starting to flatten out and we are heading into the desert! One hour later we arrived at Four Corners. We thought it was a National Monument, but it was on Navajo reservation land.
Two items of note: 1) its a tourist trap 2) its not the actual intersection point.
We paid $6 to get into the area. We parked and followed the masses into an area surrounded by stalls. There were a few Native Americans selling items like dream catchers, magnets, postcards, and knickknacks. In the middle of all the stalls was the metal circle that all tourists are looking to take their picture with it.
Luckily we were off season, I can't imagine touching that hot metal circle that was baking in the 100+ degree sunshine. I also can't imagine waiting in line to take my picture with the circle. After about 5 minutes we went to go read some of the plaques that lined the area. The plaques noted that this was not the actual intersection point but is the one most often used. The original boundaries were off due to the tools and manual measurements of the 1800s.
Long story short, no need to go.


We almost skipped this incredible place! We were debating going straight up to Moab, UT to explore Arches. We didn't know much about the Natural Bridge National Monument and we would have to go almost 2 hours out of the way to reach the place. But then we figured, why not since we were already out here and when else would we get a chance to see this place? If it is terrible we would just leave and start driving back.
We drove to the entrance, read the warnings (bubonic plague area(?!), stay away from mice, look out for snakes, etc), then went to find a campsite. There are only 13 sites available for tents and for RVs. All of them were filled that night! This was one of the most beautiful campgrounds I have been too. Our site (#4) overlooked a mountain range, had the sunrise and sunset, and trees blocking the other sites. The site had a picnic table, fire place and grate, and a sandbox for the tent. The bathrooms were pit toilets with hand sanitizer. There is no running water other than the visitor center.
Owachomo Bridge
Anthony started to set up the tent then to make a fire and I started to unpack and get dinner ready. This was such a peaceful evening. As the fire was dying down we were taking periodic looks at the sky. Yes, this is where we saw the Milky Way. It was a stripe of foggy stars across the sky, faint, but it was there! We learned that in the winter we are facing out towards the galaxy so the stars are lighter. The moon was also very bright.

"We live in the Milky Way Galaxy, this means that every time we gaze at the night sky we are looking at the Milky Way Galaxy. More exactly the spiral arm closer to the galactic center one part of the year and in the other part we see the near edge of the spiral arm farther from the galactic center. Due to nebula and dust clouds, we can’t see the center of the Milky Way (in visible light) at any time." http://www.youcanseethemilkyway.com/ (also has light pollution map and more information)

Natural Bridge is 40 miles from the nea
rest town, that that nearest town is rather small. What makes Natural Bridge so special? It is one of three places in the united states with zero light pollution. In the summer they do telescope events. There are only 13 sites available on a first come first served basis. So I'm not sure what you do if you go out that way and there are no places to stay.
The night dipped to around 30F but during the day it was 50-60F. The next morning we packed up then worked on the paved 9 mile scenic drive. If we were staying longer there is a 8.6 mile loop that will have you pass each bridge Owachomo, Sipapu, and Kachina. During the drive we got out at all the scenic overlooks but also did the walks down to the main bridges when available. The scenic overlooks have a mix of paved walkway, uneven stone steps, even ladders!
After the drive we went to check out the visitors center.  
Lucky we did as the ranger was able to help us plan the rest of our trip! We had concerns about having enough time to explore Arches (1 day or more?) and Canyonland (huge place and entrances to different districts are not near each other). He recommended we go to explore the Needles District, then drive up to Moab for the night. Explore Arches, and then do Island in the Sky district of Canyonland.

Final note, we did see a couple bugs starting to come out for the summer. We noticed because so far there haven't been any bugs out! I don't know if the area is very buggy during the summer.


Newspaper Rock Archaeological Site
We started our 2 hour drive towards the Needles District of Canyonland. We had a quick stop to see the petroglyphs at The Newspaper Rock Archaeological Site that are right off the road. The petroglyphs was a very big display of them. No one knows what they mean or why they were done in the first place.
Canyonland is a huge national park with three main areas: Needles, the Maze, and Island in the Sky. The park is split by the Colorado and Green Rivers. Established in September 1964 this park is mostly undeveloped. If you had a car with 4WD this would be a place to have one! There are many full day and overnight backpacking hikes in this region. In the past, the park was used for mining uranium in the and for cattle ranchers. Specifically the growth of America's nuclear arms program created a high demand for uranium in the 1950s. The impact of these activities can still be seen today in the grounds and roads they used.
This region only gets an average of 10 inches of rain a year and we were there for one of the storms! Clouds rolled in, the temperature dropped 30 degrees, and the rain came down. This lasted for about 15 minutes until blue skies suddenly appeared and the temperature came back up to the 60s! But that was the extent of rain for the whole week!
We arrived at the entrance of the park and went right to the visitor center. We chose to do the Chesler Park Viewpoint hike which was about 6 miles (or if you have more time do the loop for 11 miles) and it took us 2 ½ hours with a 30 minute break at the turn around point. To get to the Elephant Hill trail head you drive on a paved road that changes to a single lane, winding, bumpy, up and down dirt road and ends in a parking lot. I don’t recommend taking an RV or a having a trailer hitched to your car for this drive.

This was a great hike! The path was a lot of ups and down, some tight squeezes between rocks, across several flat parts, and among into the needles. There are limited trail blazes (rock piles) so pay attention to ensure you stay on the trail. It would be very easy to get lost. Bring lots of water, sun block, a hat, and layers as the weather can change drastically between shade and sun. There was also a breeze so you didn't feel the sun.

As we drove out of the park we drove over to the Big Spring Canyon overlook. If we had more time I think I would have liked to do the hike. Then we left to head up towards Moab, UT to go check out Arches.


Balance Rock!
While we couldn't get a place to stay that night, we found a nearby RV park, Slickrock Campground. They had showers and empty campsites, our only two requirements! We quickly set up the site and showered. Overall the campground was a standard RV park. It was loud, the bathrooms were kind of dirty, and the sites were small. We would try a different campground next time if we had some more flexibility.
We went next door for dinner at Buck’s Grill House. Anthony picked this place as they had been showcased on the Paradise Food. I had a veggie burger and Anthony had a regular burger. It was a little expensive, but filled us up!
The next morning we continued our nomadic ways and packed up the site, and drove to Arches. We started at the visitor center to get a hiking map then we went off to see all the overlooks and scenic spots. 

Seven hours was plenty for us. Almost all the overlooks had crowds and lines to take pictures. We felt this took away a lot of the experience so we didn't linger at most spots. On the other hand, if you are interested in auto touring, all of the overlooks are short hikes (15 minutes or less), potentially paved walkways, and you don't need to leave your vehicle for very long. I could see this as a definite perk during the summer months.
The North and South Windows
Hikes
Balance Rock, 10 minute walk around hike on a gravel trail
The Windows/Turret Arch/Double Arch, 30- 60 minutes, trail varies from paved to rock scrambles
Landscape Arch, 45 minutes, 2.1 miles, very pretty but can't get close due to a recent bridge collapse.
Landscape Arch
Delicate Arch, 30-45 minutes up and 30-45 minutes back, 3 miles round trip but we spent about an hour relaxing at the top chatting with others.
Delicate Arch
Delicate Arch
The difference between an Arch and a Bridge: While the final result looks the same, the difference lies in how the formation came about. An arch is formed from frost action or seeping moisture and a bridge is carved out from moving water erosion.


At the end of the day we drove out to next Arch View RV resort which is closer to the Island in the Sky entrance.

One day was plenty for us. We started the morning with a sunrise hike to Mesa Arch, 1 mile round trip, easily followed path. This was very crowded and we showed up about 40 minutes before sunrise. There were about 40 people there. Was it worth it? Maybe, but you could probably scout out some other east facing arches to view. The concept of seeing the park for the first time as the sun came up over the mountains was very exciting.


Grand View Point Overlook; easy 2 mile hike. This was a flat trail with occasional stairs carved into the rocks. Great views of the canyons on either side and you can also see the Needles district off to the distance. One of the interesting parts of the landscape is that you can see the old roads that were used by ranches and for mining.

Upheaval Dome Overlook Trail, 1.8 miles, easy hike with rock scrambles. They do not know what caused this crater but it was very cool. The inside of the crater is a different material then the outside of the crater. There is one scenic viewpoint that is easy to get to and only a .4 mile walk. However, if you go to the second overlook there is a much better view. Follow the rock cairns, this path is over the rocks and there is a little bit of scrambling involved.

A pleasant surprise that we almost skipped was Whale Rock. This was a fun walk/rock scramble over a long flat rock that rises up high with a great view. It was very peaceful up there. It was 1 mile round trip.

One of the last activities we did was the 4WD road to Goose Neck Overlook. We had an incredible view of the Colorado River.
Switchbacks of the dirt road


Arch View RV resort was hot. There was no shade and the grills are set up under trees so I was worried we were going to set a tree on fire the whole time. If you go in the summer bring a tarp or something to sit under. The bathrooms were ok. We would stay there because the convenience of location.

Our last stop on the way to the airport, we did the 23 mile Historic Rim Rock Scenic Drive. This takes you through lots of beautiful scenary, a cool echoing canyon, and a bit of historic information along the road.

Don't Bust the Crust! This was one of the most interesting facts that I learned on this trip. In deserts the soil is alive! We saw this special dirt all over Natural Bridge, Canyonlands, Arches, and Colorado National Monument. There are signs all over telling you to stay on the path and to not disturb that natural growth in the area. 

Cryptobiotic soil is easily damaged from people walking on it. Of many years the untouched soil houses lots of desert algae turning it into a crumbly mound that looks similar to lots of small ant hills. This is very important for the ecosystem and with giving the desert plants a chance to live.


CONCLUSION
Well, thanks for following along on our wonderful excursion! We had a great time and are excited for our next adventure! I hope this has motivated you to go and explore some of the natural wonders that exist in our own country! Let me know if you have any questions! Happy Travels!!!
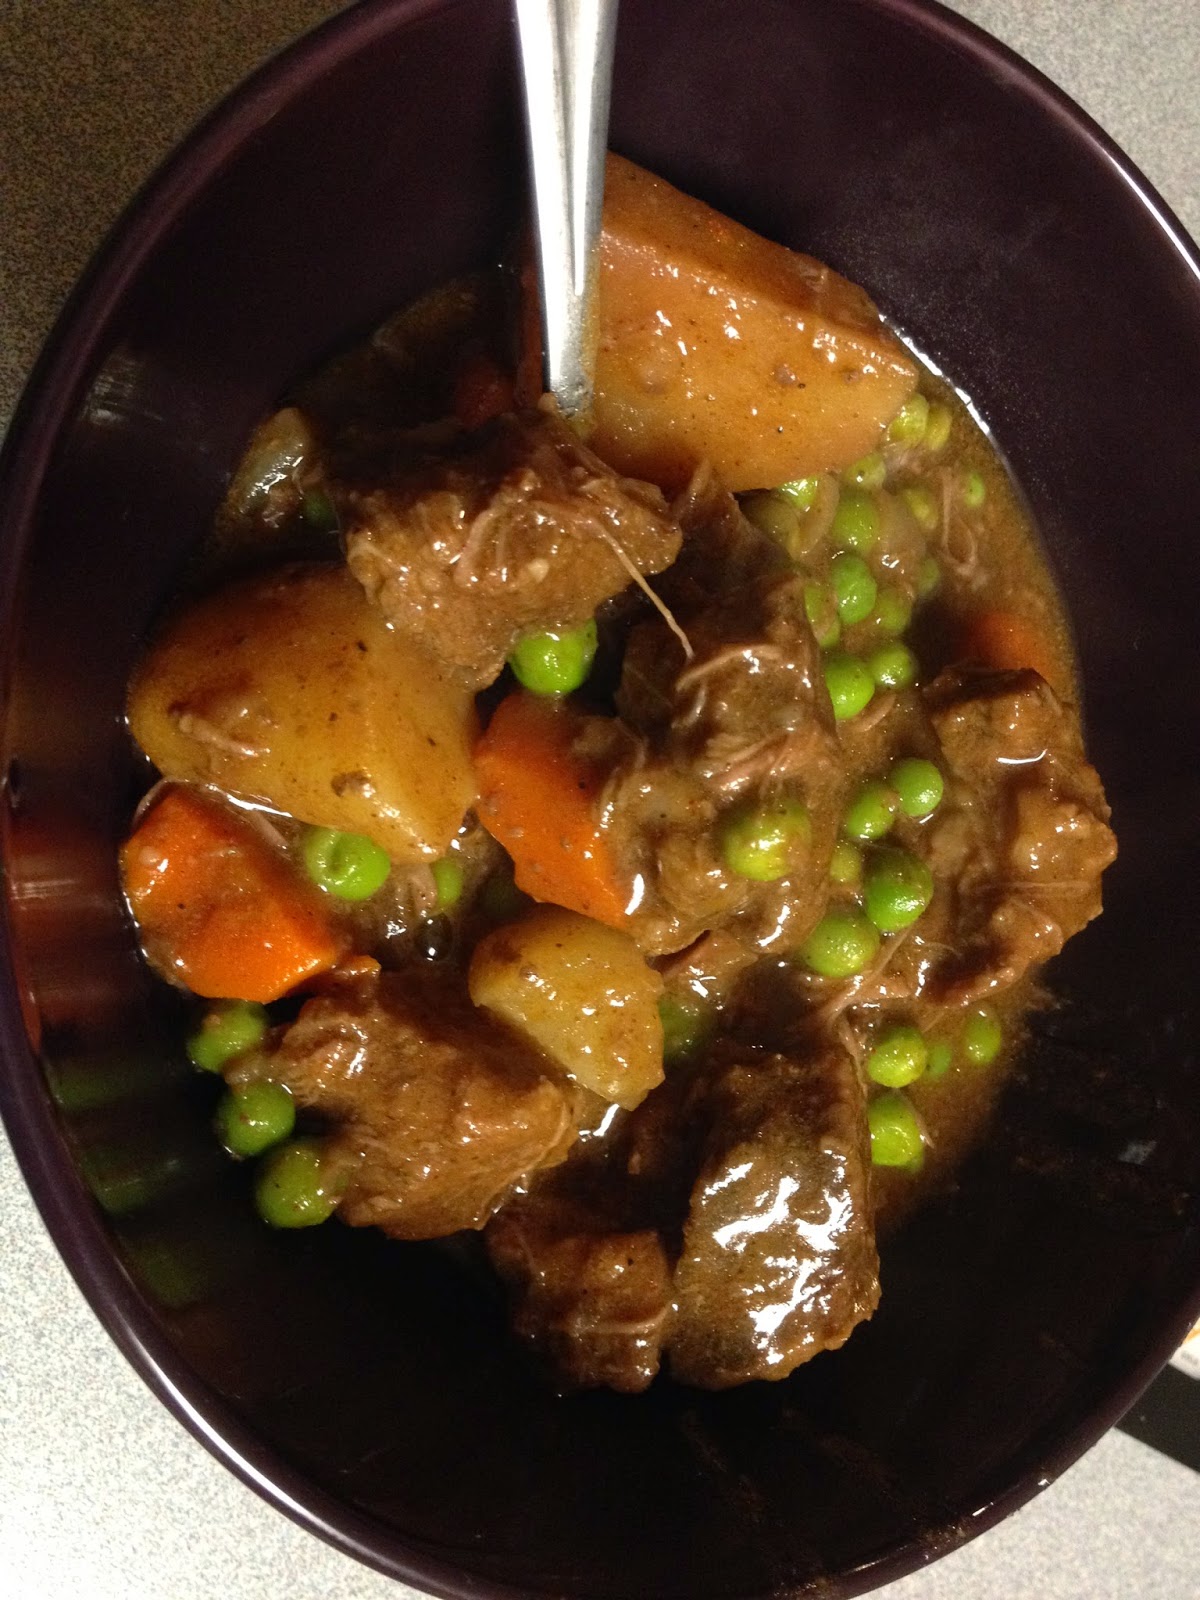