Showing posts with label salt. Show all posts

Wednesday, January 25, 2017

Baked Ginger-Soy Chicken Wings

I made these for New Years and a couple times since! Super easy. Get the frozen Tysons wings or you can get the wingettes from the store. It is cheaper to get the wings with first, second, and third parts...but then you have to spend a lot of time cutting the third parts off. I recommend paying the extra ten cents to have it already cut!

Changes: Instead of straining the sauce I left the ginger pieces in and tossed the wings in with it. I drizzled the rest of the sauce over the wings when everything was done being cooked.

Crispy Baked Ginger-Soy Chicken Wings
adapted from Epicurious

Sauce
1/4 cup honey
2 tablespoons soy sauce
3 large garlic cloves, crushed
1 2x1 inch piece of ginger, peeled, sliced

Wings
2.5lbs chicken wings
1 tbsp vegetable oil
1/2 tbsp kosher salt
1/4 tsp fresh ground black pepper

Sauce

  • Bring all ingredients and 1/4 cup water to a boil in a small saucepan, stirring to dissolve honey.
  • Reduce heat to low; simmer, stirring occasionally, until reduced to 1/4 cup, 7-8 minutes. 
  • Strain into a medium bowl. 
  • Let sit for 15 minutes to thicken slightly. 
Note: Can be made 5 days ahead.  Cover; chill; Rewarm before using.

Wings

  • Preheat oven to 400°.  
  • Combine oil, salt, pepper, and wings in a large bowl; toss to coat. 
  • Place wings on cookie sheet covered in tin foil or silpat mat and spread out in a single layer. 
  • Bake wings until cooked through and skin is crispy, 45-50 minutes. 
  • Dip wings in ginger-soy sauce and toss to evenly coat. Place wings back in a single layer on prepared rack and bake until glaze is glossy and lightly caramelized, 8-10 minutes.

Friday, September 23, 2016

Argentinian Beef Empanadas

Like all dumplings these are a labor of love! This took a while but the end product?! Flaky, light, and delish!!! I will be making these again. They freeze/reheat well too! I used the tomato sauce can with both ends cut off as my cookie cutter.

Argentinian Beef Empanadas
Adapted from: Turntable Kitchen
Makes approximately 16 5 inch empanadas

For the dough:
4 1/2 cups of flour
3 teaspoons of salt
2 stick of cold unsalted butter, diced
2 large egg
2/3 cup of ice water
2 tablespoon of distilled white vinegar

For the filling:
1 pound of lean ground beef
2 tablespoon of smoked paprika
2 tablespoon of ground cumin
1 red bell pepper, seeded and diced
1 large onion, finely chopped (or 6 tbsp dried onion minced)
4 tablespoon of capers
olive oil
2 hard-boiled egg, roughly chopped
1 cup of chopped, canned tomatoes (1 6oz can tomato paste)
salt and pepper, to taste

1 egg, gently beaten with a fork (for the egg wash)

1. Combine Butter, Salt, and Flour in the food processor until reaching a sandy texture.
2. In a separate small bowl, beat the egg, water and vinegar together with a fork. Pulse into the dry mix until just combined.
3. Place it on a lightly floured surface and use a light hand to knead it gently a few times before forming it into a flattened ball. Wrap the dough in plastic wrap and refrigerate for an hour.
4. To make the filling, heat approximately olive oil in a large skillet over medium-high heat. Add the onion and cook until it begins to soften. Add the pepper and continue cooking. Next, add the diced tomatoes with their juices and let cook for a few minutes.
5. Add the beef, use the spoon to crush it up in the frying pan. Stir in the spices and capers. Season with salt and pepper, to taste. Cook until the beef has browned. Stir, occasionally, so that the meat cooks evenly. Stir in the hard boiled egg and let it cool.
6. Preheat your oven to 425 degrees F. Remove the dough from the refrigerator and roll it out until it is about 1/4 inch thick. Cut out roughly 4 inch round circles in the dough then use your fingers to spread it to about a 5 or 6 inch circle. Place 3 heaping tablespoons of filling in the center and fold the circle into a half moon. Pinch and fold the edges to seal them and place onto a prepared baking sheet. Continue to do this with the remaining dough and filling.
7. Once you’ve formed all of your empanadas, brush them with the egg wash. Bake the empanadas for approximately 25 minutes (until golden brown). You can freeze formed empanadas in a freezer bag and also refrigerate uneaten empanadas.

Tuesday, July 12, 2016

Cilantro Lime Rice

Cilantro Lime Rice
Adapted from Culinary Hill
Serves 2-4

INGREDIENTS:
2 Cups basmati or long-grain rice
2 ¼ Teaspoons salt, divided
1 bay leaf
1 Teaspoon olive oil
2 Tablespoons finely chopped cilantro
2 Tablespoons fresh lime juice
1 Tablespoon fresh lemon juice

DIRECTIONS:
To cook long-grain rice in a rice-cooker, add rice, water (according to manufacturer's instructions), 2 tsp salt, bay leaf, and oil. Close rice cooker, plug in, and turn on. Cook according to manufacturer's instructions.
When the rice is finished, remove bay leaf. Stir in cilantro, lime juice, and lemon juice. Add additional salt to taste. Serve hot or at room temperature.

Monday, January 25, 2016

Soft Ginger Cookies

As part of my bridal shower gift people gave me one of their favorite recipes! This is my Auntie Janet's cookie recipe. I made them bite sized but they are great as large cookies too! I would describe them as a soft ginger snap. They are easy to make ahead and travel easily.

These are perfect with a nice cup of tea!


Soft Ginger Cookies
makes 24

2 1/4 cup flour
2 tsp ground ginger
1 tsp baking soda
3/4 tsp ground cinnamon
1/2 tsp ground cloves
1/4 tsp salt
3/4 cup butter
1 cup sugar
1 egg
1/4 cup molasses
2 tbsp sugar

Preheat oven to 350F
Combine flour, ginger, baking soda, cinnamon, cloves, and salt.
In large mixing bowl beat butter on low until softened. Gradually add sugar and beat until fluffy.
Add egg and molasses, beat well.
Stir dry ingredients into beaten mixture.
Shape into 1 1/2 inch balls.
Roll in the 2 tbsp sugar and place on a cookie sheet.
Bake about 10 minutes or until light brown and puffed.
Let stand for 2 minutes before transferring to a wire rack.

Saturday, January 23, 2016

BBQ Chicken

Catching up on some posts with this snowy snowy weather!!

BBQ  was a crowd pleasing surprise! I baked the chicken in the oven as we are having a big snow storm but the kids asked for me to make it again! Yay! I couldn't find my brine recipe I used over the summer so I made this one up. When you brine chicken it will keep it more moist especially when it needs to cook for a while, this made such a difference!

Normally I'm all about my silpat mat, but for this it didn't work as planned and I'd recommend using tin foil to line your cookie sheet instead.

I served this with our other family favorites: White Rice and Oven Roasted Broccoli!

BBQ Chicken
Brine
2 tbsp brown sugar
1 cup apple juice
1 cup warm water
2 tsp salt
2 tsp soy sauce

4 Chicken breasts, cleaned and butterflied
BBQ Sauce

Combine all the ingredients for the brine. Soak the chicken for 2-4 hours. I let the chicken defrost while it soaked in the brine.

Grill Directions
Preheat grill on high
Remove chicken from brine and shake to remove some of the water.

Oven Directions
Preheat oven 400F.
Remove chicken from brine and shake to remove some of the water.
Place chicken on foil lined cookie sheet.
Bake 15 minutes.
Remove from oven, cover in bbq sauce, bake 7 more minutes.
Remove from oven, flip, cover in bbq sauce, bake 7 more minutes
Continue until chicken is cooked thru
When chicken is cooked, one file time... flip, cover in bbq sauce, broil on high for about 5 minutes.

Wednesday, January 20, 2016

Butter Spritz Cookies

Catching up from my holiday baking... My brother and his girlfriend got me a cookie press a couple years ago and I've been wanting to try it but it seems so intimidating!! These cookies were tedious but very pretty! I'll make these again but they are special occasion cookies and not ones I'd want to make every day.

Don't bother using your nice silpats or new nonstick pans. Our old burnt cookie sheets worked best for this! It took some practice but by the end the dough was the right temperature and the cookies were coming out smoothly.

These were dainty and light cookies that can be changed for the holiday based on the sprinkles you use!

Pressed Sugar Cookies
adapted from Williams - Sonoma
makes 100ish cookies

2 sticks unsalted butter, at room temperature
1 cup sugar
1 egg
2 1/2 tsp vanilla extract
1/2 tsp salt
2 1/2 cups sifted all-purpose flour
Colored sugars or icings for decorating

Preheat an oven to 375°F.

Using a stand mixer, combine the butter and sugar. Beat on high speed until light and fluffy, scraping down the sides of the bowl as needed. Add the egg, vanilla and salt and continue beating until well mixed. Using a spoon, stir in the flour until blended. Let chill about 30 minutes.

Pack the cookie dough into a cookie press according to the manufacturer's instructions. Fit with the desired-shaped cookie plate and press the dough out onto ungreased baking sheets (count to 5 and pick straight up), spacing the cookies 1 inch apart. Cover with sprinkles.

Bake until the cookies are light golden, about 10 minutes.
Transfer the cookies to wire racks and let cool. Decorate with icings as desired. Store in an airtight container at room temperature for up to 4 days. 

Thursday, December 31, 2015

Scallion Pancakes

I love scallion pancakes. It is an unhealthy relationship and NONE of the Chinese restaurants by me make them!! It is quite the tragedy. So, I decided that for New Years I wanted to make Wonton Soup and Scallion Pies! 

These are very few and simple ingredients, but I won't lie, these are a labor of love here and did take about an hour and a half to make, rest, and cook. But it was worth it!! 

Light, not greasy, scallion-y, and probably $2 to make eight good sized pancakes! One of these babies would run you at least $4.95 in the restaurant!! 

I was making breakfast pancakes in the oven and doing dishes while the dough was resting, so it was very productive!

A similar recipe are my Mexican tortillas!

Happy New Year!!!!!

Scallion Pancakes
Adapted from The Kitchn (check out the site for pictures for each step!)
makes 8 pancakes, serves 12 once you cut into wedges?

2 1/2 cups white flour
1 cup boiling water)
Oil such as vegetable, sesame, or shortening
Coarse kosher salt
1/2 cup, about 1 bunch scallions, finely chopped (scallions = green onions)
High smoke point oil for the pan, such as vegetable, canola, or peanut oil

Mix and knead the flour and water until it forms a smooth dough. This will take about 5 minutes by hand (or less by mixer). Coat this ball of dough lightly in sesame oil and put it back in the bowl. Cover the bowl with a damp cloth and let the dough rest for about 30 minutes.

Split the dough into 4 equal parts. **Don't skip this step** Lightly oil your rolling surface (I used olive oil) and roll out one part of the dough. Roll until it is a thin rectangle at least 12 x 9 inches. (think thin enough to see the grain of your counter tops)

Lightly brush the top of the dough with more sesame oil (if you think its needed), then sprinkle it evenly with chopped scallions and kosher salt (about 1/2 to 1 tsp per rectangle).

Starting from the long end, roll the dough up tightly - jelly roll style, creating one long snake of rolled-up dough. Cut in half.

Take one of these halves and coil into a round dough bundle (like kindergarten arts and crafts pottery). Let it rest while you repeat this process with the rest of the dough.

Roll a coiled dough bundle into a flat, smooth, round pancake. Stack between layers of saran wrap.

Heat a large frying pan over medium-high heat, and oil it with a drizzle of canola, vegetable, or peanut oil (I used olive oil since that is what I have in my house). When the pan is hot, add one pancake. It should sizzle, but not burn. Cook for 2 minutes on one side or until golden brown. Flip and cook another 2 minutes. Repeat for remaining dough coils.

Cut the pancake into wedges with a pair of kitchen scissors, and serve immediately with soy sauce or another dipping sauce.
Make-Ahead Tip: If you would like to make a few pancakes but save the rest for later, you can save the dough in the fridge for up to 5 days. Just make sure the dough is oiled and well-covered. You can also roll out individual pancakes and stack them between well-oiled layers of wax paper.

Sunday, November 1, 2015

Pancakes

Pancakes are a weekend breakfast staple in our household. However, I really dislike that they take a long time to make and the chef doesn't get to eat with the rest of us. We also would prefer the kids to eat homemade pancakes with minimal ingredients vs Eggo Waffles - so I was looking for a way to mass produce pancakes in a quick efficient manner. 

We found this recipe because it is specific to almond milk and we normally don't have regular milk at home. The almond milk keeps the pancakes softer and the edges won't crisp up as much. 

I have a whoopie pie pan that I have never used and thought this would be the perfect excuse for it! When I make whoopie pies I use a small cookie scoop to ensure the sizes are the same. I purchased the pan when I was on a breakfast sandwich kick and thought this would be perfect to create sandwich sized egg patties. 

If you don't have one of these pans you can also use muffin tins and put enough batter in them to cover the bottom. I think they would poof up to become mini pancakes.

If the kids were willing to eat square pancakes then I would try making them in a 9x13 pan and cutting them. That would probably be the easiest way...but a girl can dream right?

I tripled the pancake batter below and created 40 silver dollar size pancakes in about 40 minutes (includes getting out the ingredients, making the batter, doing dishes, and cooling time). This did take a while but while the pancakes were baking I was able to do other things around the kitchen (like the dishes!). We stored some in the fridge and others go into the freezer. To warm we microwave them for 20-30 seconds (if not frozen) and about 45 seconds if frozen.

From a visual these are very pale pancakes but the kids liked them better that way, if you want them to be darker/more golden you can add a little butter in each hole before adding the batter. Also use the melted butter in the batter instead of the oil. 

These pancakes are pale, soft and fluffy and cakey! Enjoy!

Slightly lumpy pancake batter

2 tablespoons of batter for each hole

Let cool 3 minutes before removing from the pan

Pile of warm fluffy pancakes!

The perfect size for  mini sausage sandwiches!
Pancakes
Adapted from Silk Almond Milk
makes about 13 mini pancakes

1 cup unbleached all-purpose flour or whole wheat pastry flour
1-2 tablespoon sugar or honey
2 teaspoon baking powder
1/2 teaspoon salt
1 cup Almond milk, any flavor but Chocolate (or regular milk)
2 tablespoon oil or melted butter
1 egg
1 teaspoon vanilla (optional)

Whisk together flour, sugar, baking powder and salt in a small bowl.
In a separate bowl, whisk together Silk, oil and egg.
Add flour mixture to egg mixture and stir just to moisten—a few lumps are fine.
Griddle: 
Cook pancakes on a griddle over medium heat. 
Pour 1/4 cup of batter on the pre-heated pan. 
When larger bubbles start to form and the edges are turning slightly cooked, flip the pancake. It takes about 1:30-2:00 per side.  
Serve immediately or let cool and store in airtight container in the fridge.

Whoopie Pie Pan:
Pour 2 tablespoons of batter into each hole. 
Bake at 375F for 9-12 minutes. If too pale you can toss under the broiler for a 30 seconds. 
Serve immediately or let cool and store in airtight container in the fridge.

Thursday, October 8, 2015

Rotisserie Chicken Dry Rub

Instead of eating deli meat for lunch we have been making rotisserie chicken! I triple the spice amounts below and store the rub so it is on hand.

If you chill in the fridge it will create nicer slices.


Rotisserie Chicken Dry Rub
2 tbsp paprika
1 tsp onion powder
1 tsp white pepper
2 tsp garlic powder
1 tsp salt

Combine above spices in a container with a top and then store in a cool dry place.

Use: Coat chicken until covered, approx 1 - 2 tablespoons for each chicken breast. Drizzle olive oil  on the top and rub onto the chicken. Bake at 400F for 25-45 minutes.

Wednesday, October 7, 2015

Slow Cooker Orange Chicken

Very flavorful! I did not brown the chicken prior to putting into the slow cooker because I was worried that it would over cook. Would I make this again? Maybe. If I did - I would prepare it differently. I didn't think the slow cooker aspect was necessary. As the slow cooker only needs 4 hours (at a maximum), it is tough to start when you would normally be at work.

If I was trying to save time, next time, I would make the sauce the night before and clean and cut the chicken up. Then that evening I would fry/brown/crisp the chicken while the rice was cooking.

But the flavors were great and we did finish it off quickly!

Slow Cooker Orange Chicken
Adapted from The Recipe Critic
Serves 4

3-4 boneless chicken breasts, chopped into small pieces (approx 2 pounds)
3 tablespoons cornstarch
2 tablespoons vegetable oil
1 teaspoon rice wine vinegar
2 tablespoons soy sauce
½ teaspoon sesame oil
¾ cup orange marmalade
2 tablespoon brown sugar
½ teaspoon salt
½ teaspoon ginger
1 teaspoon garlic
pinch of pepper
Sesame seeds (optional)
Scallion, sliced (optional)
  1. In the crock pot bowl mix the rice wine vinegar, soy sauce, sesame oil, marmalade, brown sugar, salt and pepper. 
  2. In a ziplock bag, add the cornstarch and chicken. Shake to coat. 
  3. Add chicken to the crock pot OR Pour vegetable oil in the skillet and brown the sides of the covered chicken. The chicken doesn't need to be fully cooked since it is going in the crockpot.
  4. Add chicken into crockpot with the sauce mixture. 
  5. Stir.
  6. Cook on low 4-5 hours or high 2-3 hours.
  7. To serve, sprinkle with sliced scallion and a handful of sesame seeds!

Thursday, September 17, 2015

Sauerbraten (German Pot Roast)

The husband travels to Germany on occasion and was craving some German Pot Roast also known as Sauerbraten! I looked at many different recipes and decide that Alton Brown wouldn't send me in the wrong direction.

I confess that I did make changes to the original recipe. I omitted the Juniper Berries as those were not available at Wegmans. I did not sear the meat prior to marinating. I also used the slow cooker on low for about 12 hours instead of cooking in the oven.

Many of the reviews said that there were too many gingersnaps and to use 1/2 the amount of sugar. I followed those tips however I think it needed the full amount of both (18 cookies instead of 10 and 1/3 cup of sugar instead of 1/4). The broth/liquid wasn't thick enough and it was very acidic/tangy. I did throw in 2 potatoes that were wilting on my counter tops as well.

I would also vent the slow cooker lid to reduce the liquid and help make it less soupy.

The slow cooker the meat became more pot-roast like instead of slice-able. Tender and yummy, just not what (I believe) it should have resembled.

This was served over fresh and homemade spaetzle!

Sauerbraten
Adapted from Alton Brown
Serves 2 1/2 very hungry adults

2 cups water
1 cup cider vinegar
1 cup red wine vinegar
1 medium onion, chopped
1 large carrot, chopped
1 tablespoon plus 1 teaspoon kosher salt, additional for seasoning meat
1/2 teaspoon freshly ground black pepper
2 bay leaves
6 whole cloves (1/4 to 1/2 tsp ground cloves)
12 juniper berries (optional)
1 teaspoon mustard seeds
1 (3 1/2 to 4-pound) bottom round (I used Chuck Roast)
1 tablespoon vegetable oil
1/4 cup sugar
18 dark old-fashioned gingersnaps (about 5 ounces), crushed
1/2 cup seedless raisins, optional

In a large saucepan over high heat combine the water, cider vinegar, red wine vinegar, onion, carrot, salt, pepper, bay leaves, cloves, and mustard seeds. Cover and bring this to a boil, then lower the heat and simmer for 10 minutes. Set aside to cool.

Pat the bottom round dry and rub with vegetable oil and salt on all sides.

When the marinade has cooled to a point where you can stick your finger in it and not be burned, place the meat in a non-reactive vessel and pour over the marinade. Place into the refrigerator for 3 days. If the meat is not completely submerged in the liquid, turn it over once a day.

After 3 days of marinating, preheat the oven to 325 degrees F.

Add the sugar to the meat and marinade, cover and place on the middle rack of the oven and cook until tender, approximately 4 hours.

Remove the meat from the vessel and keep warm. Strain the liquid to remove the solids. Return the liquid to the pan and place over medium-high heat. Whisk in the gingersnaps and cook until thickened, stirring occasionally. Strain the sauce through a fine mesh sieve to remove any lumps. Add the raisins if desired. Slice the meat and serve with the sauce.

Wednesday, September 16, 2015

Spaetzle


While tasty I did NOT have the correct technique. These were a pain to make and made a mess of my kitchen!

The dough was very sticky and elastic-y. It was like a very thick pancake batter. This made it difficult to push through the metal colander. It was also problematic when the colander fell into the boiling water and all the dough cooked into each little draining hole.

Next time, I'll put it in a plastic bag and cut off the corner off it. Then I'll dribble the spaetzle dough into the hot water. When it floats it is ready to be fished out of the water!

I served this with our Sauerbraten pot roast!
sticky batter!


connected chopsticks with twist ties
to make a frame. This sort of worked...
balanced the colander over the
 boiling water. How could this end poorly?


Spaetzle Dumpings

Adapted from All Recipes
Makes 2 servings (even though the recipe says this would serve 6)

1 cup all-purpose flour
1/4 cup milk (almond milk worked)
2 eggs
1/2 teaspoon ground nutmeg (optional)
1 pinch freshly ground white pepper
1/2 teaspoon salt

  • Mix together flour, salt, white pepper, and nutmeg. Beat eggs well, and add alternately with the milk to the dry ingredients. Mix until smooth.
  • Press dough through spaetzle maker, or a large holed sieve or metal grater.
  • Drop a few at a time into simmering liquid. Cook 5 to 8 minutes. Drain well.
  • Optional: Saute cooked spaetzle in butter or margarine. Sprinkle chopped fresh parsley on top, and serve

Tuesday, August 25, 2015

Pizza Dough

This had rave reviews from the family! There was silence while we all ate and a few thumbs up signs were flashed. I was asked to make it again too! Hurrah!

I made the dough in the morning before work and let it sit on the counter covered with plastic wrap all day. The dough rolled easily and I baked on a silpat mat.

I used canned tomato sauce that I doctored up with garlic power and Italian seasoning. The grown up pizza had brisket, pepperoni, and red onion. I used a mix of Mexican and mozzarella cheese. The kids decided to turn theirs into calzones and used mozzarella cheese and pepperoni.

Pizza Dough
Adapted from Piecrust and Pasta
Makes 4 half sheet size pizzas 

4 1/2 tsp active dry yeast (2 packets)
1 teaspoon honey
2 cups warm water, 110 to 115 degrees F
6 cups all-purpose flour
2 teaspoon kosher salt
2 tablespoon extra-virgin olive oil, plus additional for brushing
cornmeal

In the bowl of the mixer dissolve the yeast and honey in the water. Let sit for 5 minutes.
Add the flour, salt and olive oil. With the dough hook, mix on low speed for about 5 minutes. 
Place dough in a well oiled bowl and cover with plastic wrap.
Let it rise for at least one hour - two hours and up to the whole day. 

[Note: For overnight, put it into an oiled zipper freezer bag to refrigerate or freeze. Before using, let come to room temperature on the counter. It will expand so if your bag is small, you may want to transfer to a bowl for the duration.]

Preheat the oven to 450 degrees F.
Pinch off a piece of dough the size of your fist. Liberally sprinkle your counter with cornmeal and roll the dough ball with a floured rolling pin to a thin circle about 1/8 thick. Add your favorite toppings and bake 15 minutes or until browned on the edges and the cheese bubbles.

Friday, August 21, 2015

Quick Rise Bread

I was making pasta and sauce for dinner and really wanted some fresh bread to go with it. Since it was getting late in the day I needed bread that would rise quickly and I didn't want something that would be too dense. 

This recipe was perfect! I halved the recipe and then split the dough into 6 blobs. These blobs were put into an oiled jumbo size muffin tin. The bread had a nice crispy crust and the inside was soft.

I'll be making these again!

Quick Rise Bread
Adapted from: Food.com
Makes 12 fist size rolls or 2 loaves of bread

5 cups white all-purpose flour
2 tablespoons yeast
2 tablespoons sugar
1 teaspoon salt
2 cups warm water (110 F - 115 F)
1⁄4 cup cooking oil

In stand mixer with a dough hook add 4 cups flour, sugar, salt, and oil.
In small bowl combine water and yeast. Let it sit for 5 minutes. 
On slow speed, add yeast mix into the flour mix.
Add the remaining flour in increments until dough is no longer sticky.
Knead for about 5 minutes until dough is elastic and smooth.
Place dough back into bowl and cover with a damp towel and let it rise until double its size- about 1/2 hour. (I put it in my oven on the Proof setting for 35 minutes).
Punch it down and divide dough into two pieces (or into the muffin tins).
Preheat oven to 400F.
Roll pieces long enough to fill two well oiled loaf pans and leave to rise until dough has reached the 
rim of the pan. (I put into the oven once it preheated and didn't wait for it to rise to the rim of the pan).
Bake loaves for 40 minutes. Rolls bake for 20-25 minutes.

Wednesday, May 27, 2015

Maple Walnut Vinaigrette Salad Dressing

My neighbor makes this dressing all the time so I had to steal it from her :) Thanks Angela! This Maple Walnut Vinaigrette Dressing is adapted from The Yummy Life.

It took about 5 minutes to take all the ingredients out and put it through the food processor. This made about 9 oz of dressing which is almost a regular size bottle of dressing.

Enjoy!

Maple Walnut Vinaigrette Salad Dressing
approx 9 servings

1/2 cup pure maple syrup
1/2 cup walnuts
1/4 cup apple cider vinegar
1 teaspoon salt
1/2 teaspoon ground white pepper or 1/4 tsp black pepper
1 teaspoon ground dry mustard
1/8 - 1/4 teaspoon garlic powder
1/4 c olive oil

Combine all ingredients except the oils in a food processor. 
Blend until well combined and walnuts are pureed. 
With food processor running, pour olive in a slow steady stream through the feed tube. 
Transfer to jar or other airtight container and chill in fridge.

Note: If the dressing is thicker than you like, add water 1 tablespoon at a time until it's the desired consistency.

Sunday, March 8, 2015

Brown Butter Toffee Chocolate Chunk Cookies

This takes a bit more effort but based on everyone's responses it was worth it! These are soft, chewy, salty, sweet, chocolate-y, and actually pretty good! 

I think these cookies would be better larger rather than my normal small bite size cookies if only because it was more difficult to sprinkle the salt. 

Keep your eyes on the browning butter. It is similar to making caramel where nothing happens and then it happens all at once! 

And you do need to wait a couple minutes before removing the cookies from the baking sheet otherwise they will become awkward oval shapes and you'll have to eat them because they are funny looking :)

Brown Butter Toffee Chocolate Chunk Cookies
Adapted from Two Peas and Their PodYield: 32 cookies

1 cup unsalted butter, at room temperature
1 cup packed brown sugar
1/2 cup granulated sugar
1 large egg
1 large egg yolk
2 teaspoons vanilla extract
2 1/4 cups all-purpose flour
1 teaspoon cornstarch (if you don't have any use an extra tablespoon of flour)
1 teaspoon sea salt
1 teaspoon baking soda
1 cup chocolate chunks or chocolate chips (milk or dark)
1/2 cup chopped Heath  or Skor or toffee candy bars
Coarse sea salt, to sprinkle on top

Place 1 stick of butter in a medium skillet. Melt the butter over medium heat, swirling it in the pan occasionally. The butter will foam and pop. Continue to swirl the pan often. Remove pan from heat once the butter starts to brown and smells nutty. There will be small brown bits on the bottom. The butter should be an amber color. Pour butter into a small bowl and cool to room temperature, about 20 minutes.

While the brown butter is cooling, in the bowl of a stand mixer, combine the remaining 1/2 cup butter with dark brown sugar and granulated sugar. Beat until creamy and smooth, about 3-4 minutes. Add the cooled brown butter and mix until smooth.

Add the egg, egg yolk, and vanilla and mix until combined.

In a medium bowl, whisk together flour, cornstarch, salt, and baking soda. Gradually mix in the flour on low speed until just combined. Stir in the chocolate chunks and toffee chunks.

Chill dough for at least 30 minutes.

Preheat oven to 350 degrees F. Line two baking sheets with Silpat baking mats and set aside.

Remove dough from fridge and form into 2 tablespoon sized cookie dough balls. Place on prepared baking sheets, about 2 inches apart. Sprinkle with sea salt.

Bake cookies for 10 minutes or until slightly brown around the edges. Remove from oven and allow the cookies to cool on the baking sheet for 2-3 minutes. Transfer to a wire cooling rack and cool completely. Store cookies in an air-tight container for 2-3 days. These cookies also freeze well.

Saturday, May 18, 2013

The Easiest Flour Tortillas

I wanted to make some tortillas to go along with my salsa poached chicken and cilantro lime rice. I found the tortilla recipe here.

This took about 10 minutes to make the dough and another 20 minutes to make all the tortillas. While they were cooking I assembled the rice and the chicken. Very easy and worth making fresh. These also heat up well if you make them the day before.

The only thing that I changed was swapping butter instead of lard or shortening.

Enjoy!

Update 4/2/2014: Let dough rest 20-40 minutes before dividing and rolling out. The dough will roll easier after resting.

Dough ball

I made a half batch, each ball is a little
smaller than a lime

Salsa Poached Chicken, Cilantro Rice,
Homemade Yogurt, and Fresh Tortillas

Flour Tortillas

Makes 24

4 cups all-purpose flour
1 teaspoon salt
2 teaspoons baking powder         
6 tbsp butter
1 1/2 cups water

Combine flour, salt, baking powder, and butter in a food processor. Pulse until the dough starts to look crumbly. Slowly add the water and mix until the dough comes together; Knead a few turns until dough comes together looks smooth and elastic.

Let dough rest 20-40 minutes.

Divide the dough into 24 equal pieces (break in half, break each of those halves into half, etc) and roll each piece into a ball.

Preheat a large skillet over medium-high heat. Use a rolling pin to roll a dough ball into a thin, round tortilla. Place into the hot skillet, and cook until starting to get big bubbles (think pancakes) and golden; flip and continue cooking until golden on the other side. Place the cooked tortilla in a towel to keep warm; continue rolling and cooking the remaining dough.


Wednesday, April 11, 2012

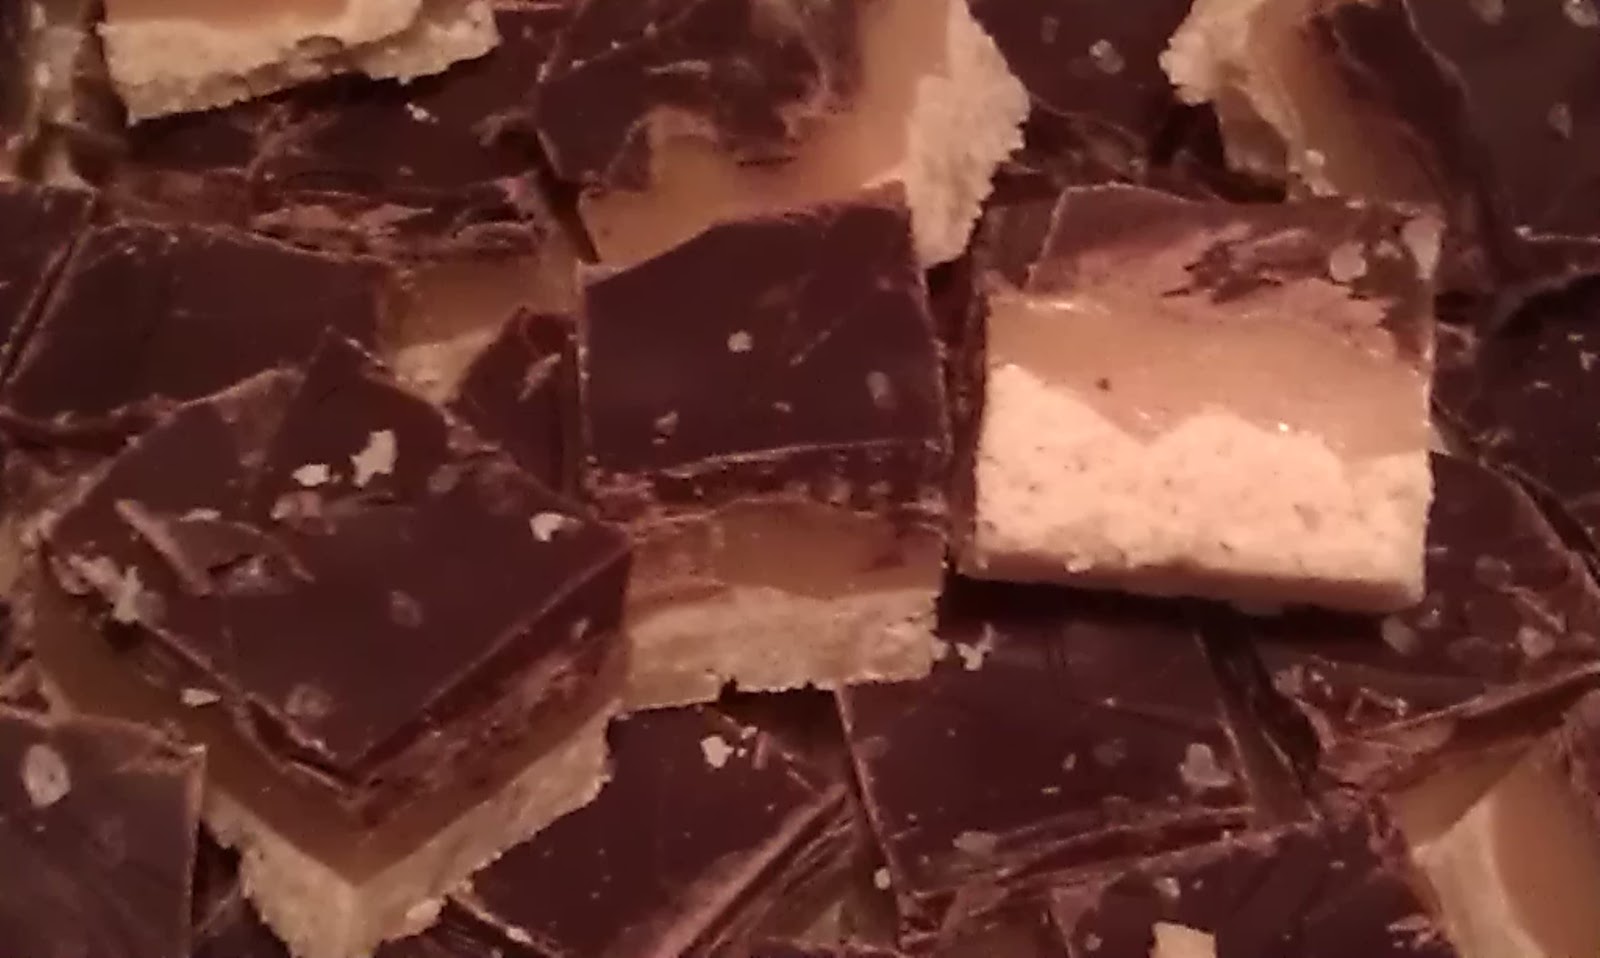
Salted Caramel Chocolate Shortbread "Twix" Bars

I found this recipe on Pinterest the other day and I have been waiting to create them! I also looked at this website because it was similar and had some more instructions. It is also called Millionaires Shortbread.

The layers of shortbread, caramel, and chocolate just sounded amazing. What really intrigued me? The sprinkle of salt on top of the chocolate.

I looked over many shortbread recipes and finally decided to go with the original recipe. I used brown sugar instead of plain white sugar and added in 2 tsp of vanilla extract. I blended the sugar and butter, in my stand mixer, until it was creamed, this took about a minute. In a separate bowl I combined the flour, baking powder, and the salt. I mixed it all in with a fork. Then I combined it together until it formed a crumbly mixture.

I put the mixture into the pan lined with parchment paper and put it in the preheated 325F oven for about 15 minutes. (When it was done I put it in the fridge to cool quickly, next time I might make the shortbread the day before so it has time to crisp up more).
Crumbly mixture
Pressed
Baked


While the shortbread was in the oven I started on the caramel. After reading the reviews I decided to half the caramel amount, I'm glad I did and was happy with the end result. In my medium saucepan I put the butter, sweetened condensed milk, sugar, and light corn syrup. I heated it over medium stirring occasionally until the butter was melted and sugar dissolved. Then I turned it on high and stirred constantly until the mixture came to a boil. I mean constant stirring. Don't stop stirring! Once it reached a boil turn it down to about a med low heat so it simmers (little bubbles). Keep stirring! It took about 10 minutes for it to turn a light amber color. Then I took it off the heat. I let it cool for a few minutes but not long enough for it to get hard and too sticky. (Next time I will add a tsp of vanilla).

Melting
Boil
Simmer
I poured the caramel over the cooled shortbread and spread it out. I let it sit for a few minutes and then I spread the semi sweet chocolate chips over the top and continued to spread them out as they melted. Let it sit for a few minutes. (Next time I'll use good chocolate instead of store brand chocolate chips). Then sprinkled with the coarse salt.


I let it chill in the fridge overnight before cutting. When I took it out the next morning to cut I took the entire thing out of the pan and put it on a cutting board to chop up. I made about 1x1 squares or smaller because these are very rich. They are also great being bite sized.

Overall? This was a great recipe. Very easy and not too time consuming. It also makes a lot! It would be easy enough to double the recipe if you had large parties to go to as well. They look fancy and aren't as complicated as they look. 

I might try a different shortbread recipe next time, Paula Dean has a good one for Pecan Shortbread. So I might try that one as a base.

But, just have patience with the caramel and don't stop stirring!

Salted Caramel Chocolate Shortbread Bars
Adapted from Annie's Eats
Makes approx 100-120 pieces depending on desired size

For the shortbread layer:
2 cups all-purpose flour
2 tsp. baking powder
¼ tsp. salt
1 cup (2 sticks) unsalted butter, at room temperature

½ cup brown sugar
2 tsp vanilla

For the caramel layer:
½  cup (1 sticks) unsalted butter, cut into pieces
½  cup sugar
2 tbsp. light corn syrup

1 (14 oz.) cans sweetened condensed milk

For the chocolate layer:
8 oz. semisweet or bittersweet chocolate, finely chopped

Coarse sea salt, for sprinkling

Shortbread
Preheat the oven to 325° F.  Line a 9 x 13-inch baking pan with parchment paper.  In a small bowl combine the flour, baking powder and salt. Stir with a fork to blend, and set aside.  In separate bowl beat the butter, vanilla, and sugar until well blended, about 1-2 minutes.  Mix in dry ingredients just until incorporated (crumbly).  Transfer the dough to the prepared baking pan and press in an even layer over the bottom of the pan.  Bake 15-18 minutes or until golden.  (If the crust puffs up a bit while baking, just gently press it down while it is cooling.) Let cool completely.

Caramel
Combine the butter, sugar, corn syrup and condensed milk in a medium saucepan over medium heat.  Heat, stirring occasionally, until the butter is melted.  Increase the heat to medium-high and bring to a boil.  Reduce the heat to maintain a simmer, stirring constantly.  Continue simmering and stirring until the mixture turns an amber color and thickens slightly.  Pour the mixture over the shortbread layer, smooth the top, and allow to cool completely and set. 

Layer caramel over shortbread, sprinkle chocolate over the warm caramel and spread it out as it melts. Sprinkle salt over the chocolate.

Chill 2 hours until ready to cut and serve.

Enjoy!