Showing posts with label butter. Show all posts

Friday, September 23, 2016

Argentinian Beef Empanadas

Like all dumplings these are a labor of love! This took a while but the end product?! Flaky, light, and delish!!! I will be making these again. They freeze/reheat well too! I used the tomato sauce can with both ends cut off as my cookie cutter.

Argentinian Beef Empanadas
Adapted from: Turntable Kitchen
Makes approximately 16 5 inch empanadas

For the dough:
4 1/2 cups of flour
3 teaspoons of salt
2 stick of cold unsalted butter, diced
2 large egg
2/3 cup of ice water
2 tablespoon of distilled white vinegar

For the filling:
1 pound of lean ground beef
2 tablespoon of smoked paprika
2 tablespoon of ground cumin
1 red bell pepper, seeded and diced
1 large onion, finely chopped (or 6 tbsp dried onion minced)
4 tablespoon of capers
olive oil
2 hard-boiled egg, roughly chopped
1 cup of chopped, canned tomatoes (1 6oz can tomato paste)
salt and pepper, to taste

1 egg, gently beaten with a fork (for the egg wash)

1. Combine Butter, Salt, and Flour in the food processor until reaching a sandy texture.
2. In a separate small bowl, beat the egg, water and vinegar together with a fork. Pulse into the dry mix until just combined.
3. Place it on a lightly floured surface and use a light hand to knead it gently a few times before forming it into a flattened ball. Wrap the dough in plastic wrap and refrigerate for an hour.
4. To make the filling, heat approximately olive oil in a large skillet over medium-high heat. Add the onion and cook until it begins to soften. Add the pepper and continue cooking. Next, add the diced tomatoes with their juices and let cook for a few minutes.
5. Add the beef, use the spoon to crush it up in the frying pan. Stir in the spices and capers. Season with salt and pepper, to taste. Cook until the beef has browned. Stir, occasionally, so that the meat cooks evenly. Stir in the hard boiled egg and let it cool.
6. Preheat your oven to 425 degrees F. Remove the dough from the refrigerator and roll it out until it is about 1/4 inch thick. Cut out roughly 4 inch round circles in the dough then use your fingers to spread it to about a 5 or 6 inch circle. Place 3 heaping tablespoons of filling in the center and fold the circle into a half moon. Pinch and fold the edges to seal them and place onto a prepared baking sheet. Continue to do this with the remaining dough and filling.
7. Once you’ve formed all of your empanadas, brush them with the egg wash. Bake the empanadas for approximately 25 minutes (until golden brown). You can freeze formed empanadas in a freezer bag and also refrigerate uneaten empanadas.

Wednesday, May 4, 2016

Scones

I had a dream I was drinking black tea and eating a scone. Which must be a sign that I needed to try and make some scones!! Apparently scones are very basic but sound fancy and intimidating.

This was a fantastic basic recipe that could be adapted for many different flavors. You could add different dried fruits. I've included the footnote that is from the All Recipes site.

There are quite a few steps...but don't worry! It really comes together nicely and these scones were elegant, flaky, and so tasty!!

Would I make them again? Yes. Would I only make them on special occasions? Probably. While they weren't a ton of work - they are rather unhealthy with all the butter and sugar and I probably shouldn't eat them all the time!

Scones
Adapted from: All Recipes
Makes 8 scones

2 cups all-purpose flour
1/3 cup sugar
1 teaspoon baking powder
1/4 teaspoon baking soda
1/2 teaspoon salt
8 tablespoons unsalted butter, sliced into tablespoons, very cold right from the fridge
1/2 cup raisins (or dried currants), optional
1/2 cup plain Greek yogurt
1 large egg

Directions
  • Preheat oven to 400 degrees.
  • In a food processor: mix flour, 1/3 cup sugar, baking powder, baking soda and salt. Add sliced butter. Pulse until texture of coarse sand.
  • In a small bowl, whisk yogurt and egg until smooth.
  • Add wet mix into food processor and pulse until starting to combined.
  • Put on the counter, lightly floured, and start to knead. The dough will be sticky in places, and there may not seem to be enough liquid at first, but as you press, the dough will come together.
  • Pat into a 7- to 8-inch circle about 3/4-inch thick. Sprinkle with remaining 1 tsp. of sugar. 
  • Use a sharp knife to cut into 8 triangles; place on a Silpat lined cookie sheet, about 1 inch apart. 
  • Bake until golden, about 15 to 17 minutes. Cool for 5 minutes and serve warm or at room temperature.

Footnotes
Cranberry-Orange Scones
Follow the recipe for Simple Scones, adding a generous teaspoon of finely grated orange rind (zest) to the dry ingredients and substituting dried cranberries for the raisins.
Lemon-Blueberry Scones
Follow the recipe for Simple Scones, adding a generous teaspoon of finely grated lemon rind (zest) to the dry ingredients and substituting dried blueberries for the raisins.
Cherry-Almond Scones
Follow the recipe for Simple Scones, adding 1/2 tsp. almond extract to the sour cream mixture and substituting dried cherries for the raisins.

Monday, January 25, 2016

Soft Ginger Cookies

As part of my bridal shower gift people gave me one of their favorite recipes! This is my Auntie Janet's cookie recipe. I made them bite sized but they are great as large cookies too! I would describe them as a soft ginger snap. They are easy to make ahead and travel easily.

These are perfect with a nice cup of tea!


Soft Ginger Cookies
makes 24

2 1/4 cup flour
2 tsp ground ginger
1 tsp baking soda
3/4 tsp ground cinnamon
1/2 tsp ground cloves
1/4 tsp salt
3/4 cup butter
1 cup sugar
1 egg
1/4 cup molasses
2 tbsp sugar

Preheat oven to 350F
Combine flour, ginger, baking soda, cinnamon, cloves, and salt.
In large mixing bowl beat butter on low until softened. Gradually add sugar and beat until fluffy.
Add egg and molasses, beat well.
Stir dry ingredients into beaten mixture.
Shape into 1 1/2 inch balls.
Roll in the 2 tbsp sugar and place on a cookie sheet.
Bake about 10 minutes or until light brown and puffed.
Let stand for 2 minutes before transferring to a wire rack.

Wednesday, January 20, 2016

Butter Spritz Cookies

Catching up from my holiday baking... My brother and his girlfriend got me a cookie press a couple years ago and I've been wanting to try it but it seems so intimidating!! These cookies were tedious but very pretty! I'll make these again but they are special occasion cookies and not ones I'd want to make every day.

Don't bother using your nice silpats or new nonstick pans. Our old burnt cookie sheets worked best for this! It took some practice but by the end the dough was the right temperature and the cookies were coming out smoothly.

These were dainty and light cookies that can be changed for the holiday based on the sprinkles you use!

Pressed Sugar Cookies
adapted from Williams - Sonoma
makes 100ish cookies

2 sticks unsalted butter, at room temperature
1 cup sugar
1 egg
2 1/2 tsp vanilla extract
1/2 tsp salt
2 1/2 cups sifted all-purpose flour
Colored sugars or icings for decorating

Preheat an oven to 375°F.

Using a stand mixer, combine the butter and sugar. Beat on high speed until light and fluffy, scraping down the sides of the bowl as needed. Add the egg, vanilla and salt and continue beating until well mixed. Using a spoon, stir in the flour until blended. Let chill about 30 minutes.

Pack the cookie dough into a cookie press according to the manufacturer's instructions. Fit with the desired-shaped cookie plate and press the dough out onto ungreased baking sheets (count to 5 and pick straight up), spacing the cookies 1 inch apart. Cover with sprinkles.

Bake until the cookies are light golden, about 10 minutes.
Transfer the cookies to wire racks and let cool. Decorate with icings as desired. Store in an airtight container at room temperature for up to 4 days. 

Wednesday, December 30, 2015

Stove Top Beef Stew

Brrrr it was cold today! I really was craving some beef stew! In our house the beef stew is very basic and heavy on the meat, potatoes, and carrots.

I had planned on making it in the slow cooker but errands (including the grocery store where I was getting dinner ingredients) took longer than expected. So I cobbled together several recipes to make some beef stew on the stove!

I wish I had grabbed some bread for this because then the meal would have been perfect!

Do I prefer my stove top beef stew or my slow cooker beef stew? The stove top beef stew was very rich because it had added butter and the potatoes/carrots were on the crunchier side - but that could have been because I was rushing to get dinner on the table! The easier version is easily the slow cooker but if you have the time then making it on the stove is a great option!

Stove Top Beef Stew
adapted from Food NetworkOnce Upon a Chef, and Delish
serves 6-8

Olive oil for searing
1/2 cup flour
2-3 lbs beef chuck, cut into 2-inch cubes
2 tbsp unsalted butter
2 small onions, cut into sixths (or blitzed in the food processor)
3 tsp garlic powder
1 can tomato sauce
2 cups cold water
2 cups chicken or beef broth, homemade or low-sodium canned
2 tsp thyme
2 bay leaves
1 tbsp red wine vinegar
1 tsp Worcestershire Sauce
2 tbsp balsamic vinegar
2 lbs medium red potatoes, quartered
4 medium carrots, cut into 2-inch pieces
1 bag frozen peas
salt & pepper

Heat a large Dutch oven with a tight-fitting lid over medium-high heat. Pour in enough oil to fill the pan about 1/4-inch deep. Spread flour out on a plate. Season half the beef generously with salt and pepper, then dredge in the flour. Shake off the excess flour, and add to the pan. Saute the meat, uncovered, stirring only occasionally, until well-browned, about 8 minutes. Using a slotted wooden spoon, transfer the beef to a plate. Repeat with the remaining beef.

In the same pot with the beef grease and such, add the onion and garlic. Cook, stirring, until lightly browned, about 5 minutes. Add the tomato sauce and cook, stirring, until lightly browned, about 1 minute more. Return the beef to the pot and add the red wine vinegar, Worcestershire sauce, balsamic vinegar, water and broth, and bring to a boil. Cover and set to low. Stew the meat until tender, about 1 1/2 hours. I stirred mine about every 15 minutes to keep it from sticking but I also struggle with the temperature of my stove.

Add the potatoes and carrots and bring back to a simmer. Stew, uncovered, on top of the stove, stirring occasionally, until the liquid has thickened and the beef and vegetables are tender, about 30 minutes to 1 hour.  Season with salt and pepper to taste. Divide among bowls and serve immediately.

Sunday, November 1, 2015

Pancakes

Pancakes are a weekend breakfast staple in our household. However, I really dislike that they take a long time to make and the chef doesn't get to eat with the rest of us. We also would prefer the kids to eat homemade pancakes with minimal ingredients vs Eggo Waffles - so I was looking for a way to mass produce pancakes in a quick efficient manner. 

We found this recipe because it is specific to almond milk and we normally don't have regular milk at home. The almond milk keeps the pancakes softer and the edges won't crisp up as much. 

I have a whoopie pie pan that I have never used and thought this would be the perfect excuse for it! When I make whoopie pies I use a small cookie scoop to ensure the sizes are the same. I purchased the pan when I was on a breakfast sandwich kick and thought this would be perfect to create sandwich sized egg patties. 

If you don't have one of these pans you can also use muffin tins and put enough batter in them to cover the bottom. I think they would poof up to become mini pancakes.

If the kids were willing to eat square pancakes then I would try making them in a 9x13 pan and cutting them. That would probably be the easiest way...but a girl can dream right?

I tripled the pancake batter below and created 40 silver dollar size pancakes in about 40 minutes (includes getting out the ingredients, making the batter, doing dishes, and cooling time). This did take a while but while the pancakes were baking I was able to do other things around the kitchen (like the dishes!). We stored some in the fridge and others go into the freezer. To warm we microwave them for 20-30 seconds (if not frozen) and about 45 seconds if frozen.

From a visual these are very pale pancakes but the kids liked them better that way, if you want them to be darker/more golden you can add a little butter in each hole before adding the batter. Also use the melted butter in the batter instead of the oil. 

These pancakes are pale, soft and fluffy and cakey! Enjoy!

Slightly lumpy pancake batter

2 tablespoons of batter for each hole

Let cool 3 minutes before removing from the pan

Pile of warm fluffy pancakes!

The perfect size for  mini sausage sandwiches!
Pancakes
Adapted from Silk Almond Milk
makes about 13 mini pancakes

1 cup unbleached all-purpose flour or whole wheat pastry flour
1-2 tablespoon sugar or honey
2 teaspoon baking powder
1/2 teaspoon salt
1 cup Almond milk, any flavor but Chocolate (or regular milk)
2 tablespoon oil or melted butter
1 egg
1 teaspoon vanilla (optional)

Whisk together flour, sugar, baking powder and salt in a small bowl.
In a separate bowl, whisk together Silk, oil and egg.
Add flour mixture to egg mixture and stir just to moisten—a few lumps are fine.
Griddle: 
Cook pancakes on a griddle over medium heat. 
Pour 1/4 cup of batter on the pre-heated pan. 
When larger bubbles start to form and the edges are turning slightly cooked, flip the pancake. It takes about 1:30-2:00 per side.  
Serve immediately or let cool and store in airtight container in the fridge.

Whoopie Pie Pan:
Pour 2 tablespoons of batter into each hole. 
Bake at 375F for 9-12 minutes. If too pale you can toss under the broiler for a 30 seconds. 
Serve immediately or let cool and store in airtight container in the fridge.

Sunday, October 11, 2015

M&M Cookies

I ran out of M&M's so I used some chocolate chips too. These are so yummy! One of the kids told me, "These are the best things we have made!" 

If you double the recipe use 3 sticks of butter. If you half the recipe, continue to use the full egg.
When creaming the butter and sugar continue to cream until there are no visible butter chunks.
To ensure the cookies look similar and stay poofy - refrigerate the dough for 1-2 hours or over night! It isn't necessary but does make them look better.

Red’s Ultimate M&M's Cookie
Adapted from So Tasty So Yummy
makes 4 dozen

1 cup butter, softened
½ cup granulated sugar
½ cup firmly packed light brown sugar
1 large egg
1 teaspoon vanilla extract
2 cups all-purpose flour
½ teaspoon baking soda
1/8 teaspoon salt
1 12-ounce package M&Ms, approx 2 cups

Preheat oven to 350°F. In large bowl, cream butter and sugars until light and fluffy. Beat in egg and vanilla.

In medium bowl, combine flour, baking soda and salt; blend into butter and sugar mixture. Stir in M&Ms. Drop dough by heaping teaspoonfuls 2 inches apart onto ungreased cookie sheets.

Bake 10 to 13 minutes or until edges are lightly browned and centers are still soft. Cool 1 minute and place on wire racks to cool completely. Store in airtight container.

Tuesday, September 15, 2015

Gingerbread Cookies

Super easy! I made the dough the night before and refrigerated the dough overnight. Leave the butter and egg on the counter for 1-2 hours so it is at room temperature. The butter will cream better if it is on the warmer side. 

When cutting out the cookies keep the other portion of dough in the fridge. Instead of re-rolling the scraps right away, use the chilled dough and put the scraps into the fridge. Alternate until the dough is all used up. 

We made cats, mice, and men! The icing recipe is the one I used with the sugar cookies. This takes food coloring very easily and hardens quickly. I used the recipe without the almond extract and did not add any coloring. Once the icing is dry the cookies are able to be stacked. 

We are looking forward to making these around the holidays!

Gingerbread Cookies
Adapted from Wegmans Recipes
Makes 3-4 dozen (depends on cookie cutter size)

2 sticks unsalted butter, softened
1 cup packed light brown sugar
1/2 tsp salt
1 large egg, room temperature
1/3 cup molasses
1 tsp baking soda
1 tsp ground cinnamon
2 tsp ground ginger
1/4 - 1/2 tsp ground cloves
3 cups all-purpose flour
Icing from Sugar Cookie recipe

In a stand mixer add butter, brown sugar, and salt to mixer bowl. Cream on medium speed until combined and lightened, scraping bowl and paddle as needed.

Add egg; mix to combine. Add molasses; mix to combine. Turn off mixer.

Sift together baking soda, cinnamon, ginger, ground cloves, and flour into separate bowl. Add dry ingredients to molasses mixture. Mix on low just until combined.

Separate dough in half and form each half into a disk. Wrap each in plastic wrap. Refrigerate at least 3 hours or overnight.

*****

Preheat oven to 350 degrees.

Using rolling pin, roll out one disk of dough on lightly floured surface to a circle about 1/4-inch thick.

Cut out cookies. Transfer to parchment paper-lined baking sheet, spacing about 1/2-inch apart.

Bake one sheet at a time on center rack of oven 12-14 min, or until cookies are firm but not dry. Cool for 2 min and remove from baking sheet.
*****

Chef Tip from Wegmans:

To control the thickness of any rolled-out cookie dough, use rubber rolling pin rings or roll it between two thin strips of wood or Plexiglas (1/4-inch thick). They will help ensure even thickness of the final product.

Incorporate some of the "scrap" dough into the next piece of dough to be rolled out. This way, you won't be left with only scrap dough when finished.

Turn the sheet pan around halfway through the baking process to ensure even baking of the final product.

Set the timer for about half the time recommended, especially with new recipes. This lets you fine-tune the baking time without fear of over-baking the cookies.

For a crispier cookie, bake additional 2-4 minutes. 

Wednesday, August 12, 2015

Rice Pilaf

I grew up eating the boxed rice pilaf and I had a craving for it the other day. The boxed stuff has a lot of sodium so I was curious about making it at home from scratch. This was so easy and I don't know why people use the boxed mix.

I will give you a warning...red onion turns green so you should use the white onion.

Rice Pilaf
Adapted from All Recipes 
Serves 4

2 tablespoons butter
1/2 cup orzo pasta
1/2 cup diced white onion
2 cloves garlic, minced
1/2 cup uncooked white rice
2 cups chicken broth or veg broth
1/2 cup slivered almonds (optional)

Melt the butter in a lidded pot over medium-low heat. Stir in almond and orzo pasta until golden brown. Add onion and cook until onion becomes translucent, then add garlic and cook for 1 minute. Mix in the rice and chicken broth. Increase heat to high and bring to a boil. Reduce heat to medium-low, cover, and simmer until the rice is tender, and the liquid has been absorbed, 20 to 25 minutes. Remove from heat and let stand for 5 minutes, then fluff with a fork.

Friday, July 17, 2015

Soft Cut-Out Sugar Cookies

WOW this is my 200th post!! I'm glad its a festive recipe!

I made these fun decorated sugar cookies for a bachelorette party!

The dough was easy to work with, the recipe is easy to double, and they were quite tasty!

The Sugar Cookie recipe was adapted from Sallys Baking Addiction. The icing recipe is adapted from All Recipes.

I doubled the cookie recipe and it made 60 cookies. The cookies were about 3 inches big. I used the Wilton 4 Piece Wedding Cookie Cutters. Unfortunately the bells did not frost easily and didn't look like bells so the evidence was consumed.


This is a recipe for softer sugar cookies but if you prefer a crispier cookie roll the dough thinner and cook for an extra minute.

You'll want the eggs and butter to be room temperature but you want the dough to be cold when you are ready to work with it.

While my dough was cooling in the fridge I made these cinnamon/sugar Snickerdoodle cookies!

I let the cookies cool for about 6 hours before adding the icing. After icing them I let them harden for 4 hours before stacking and bagging them.

It was about 2 hours of effort (making dough, cutting, putting in the oven) but a lot of other hours of waiting while chilling the dough and cooling the cookies and drying the icing.

Note: I also use this icing for my Gingerbread Cookies!


I made these for a fundraiser! How cute!!

Soft Cut-Out Sugar Cookies
Adapted from Sallys Baking Addiction
Yields: 18 medium size cookies or 30 smaller cookies

COOKIES
3/4 cup unsalted butter, slightly softened to room temperature
3/4 cup granulated sugar
1 large egg, at room temperature
2 teaspoons vanilla extract
1/4 teaspoon almond extract (optional)
2 and 1/4 cups all-purpose flour
1/2 teaspoon baking powder

In your stand mixer beat the butter until creamed and smooth.
Add the sugar and beat on high speed until light and fluffy.
Add the egg, vanilla, and almond extract and beat on high until fully combined.

In a different bowl mix the flour and baking powder.
With the mixer on low slowly add in the flour until just combined.

Chill dough in fridge for about an hour or up to a day. If more than an hour, cover the dough so it doesn't dry out.

Remove dough from fridge and divide the dough in half. Put on piece on floured surface and put other half in the fridge. Roll to about 1/4″ thickness and cut into desired shapes. Put on cookie sheet (with parchment paper or Silpat mat) and place back in the fridge for 10-20 minutes. This allows the dough to firm back up and prevents spreading.

Re-roll the remaining dough and continue cutting until all is used. I alternated pieces in the fridge and pieces to work with so that the dough was a little cooler.

Bake for 8-11 minutes, until very lightly colored on top and around the edges. My cookies took 10 minutes. Allow to cool on baking sheet and then transfer to a wire rack to cool completely before icing.

Make the icing and decorate the cooled cookies!

ICING
Adapted from All Recipes
Makes enough for 1 dozen cookies

1 cup confectioners' sugar
2 teaspoons milk
2 teaspoons light corn syrup
1/4 teaspoon almond extract (optional, I would omit next time)
Food coloring (Wilton Gel Food Colors)
Sprinkles

In a small bowl, stir together confectioners' sugar and milk until smooth. Beat in corn syrup and almond extract until icing is smooth and glossy. If icing is too thick, add more corn syrup or milk by the 1/4 tsp.

Divide into separate bowls, and add desired food coloring to each. The food colors I used were very strong and ONE drop was plenty.

Put frosting into bag and snip the corner to easily frost the cookies. An easy way to add the frosting into the bag is to use a drinking glass and that holds it open while you put the frosting in.

Monday, June 15, 2015

Vanilla Cheesecake with Graham Cracker Crust

After you go camping and you have leftover graham crackers...what to do?? So far I've made Martha Stewart's Key Lime Pies and now these yummy mini cheesecakes!

I've adapted this recipe from Tyler Florence's Ultimate Cheesecake recipe. Overall I halved the recipe. Instead of 1.5 eggs I used 2 eggs. Instead of 1 cup sour cream I used 1 cup of vanilla Greek yogurt. I omitted the lemon zest and vanilla extract. I reduced the sugar from 1/2 cup to 1/4 cup after reading a bunch of other recipes.

I didn't have any blueberries or fresh fruit to turn into a sauce to drizzle over the top so I put a little Strawberry Jam on mine.

These came out very soft unlike traditional cheesecakes. They freeze well. They are also delish out of the freezer and defrosted for about 10 minutes!

Vanilla Cheesecake with Graham Cracker Crust
makes 8 mini (6 oz ramekin) servings

Crust:
2 cups finely ground graham crackers
1/2 teaspoon ground cinnamon
1 stick unsalted butter, melted

Filling:
1 (8oz) block, softened cream cheese
2 eggs
1/4 cup sugar
1 cup vanilla Greek yogurt

Preheat the oven to 325 degrees F.
In a food processor pulse the graham crackers, cinnamon, and melted butter.
Spoon into the glass bowls and use another bowl to press the crackers in. Put it to the side.
Using an electric mixer or stand mixer, beat the cream cheese on low speed for 1 minute until smooth and free of any lumps. 
Add the eggs, 1 at a time, and continue to beat slowly until combined.
Gradually add sugar and beat until creamy, for 1 to 2 minutes.
Add vanilla yogurt, scrape down the sides of the bowl as needed. 
Pour the filling into the crust-lined pan. 
Put the ramekins on the cookie sheet and then place in the oven. 
Place a large pan of water in the bottom rack of the oven. 
Bake for 30 minutes. The cheesecake should still jiggle (it will firm up after chilling). 
Crack the oven door and let the cheesecake sit for another 30 minutes. 
Chill in the refrigerator, loosely covered, for at least 4 hours. 

Sunday, January 25, 2015

Pasta Sauce: Tomato + Onion + Butter

I started to eat then realized...wait! Picture! :)
I read about this pasta sauce recipe on Smitten Kitchen and since I have an onion lazing about on the counter... I decided this would be perfect for lunch!

I cracked open 2 cans of tomato sauce, chopped the onion in half, cut a hunk of butter and plopped it all into my pot. Let it simmer for 45 minutes and volia! Time to eat!

I will say that I was skeptical to make pasta sauce without any Italian seasoning or garlic...but I gave it ago! Next time I would add it just for the taste test opportunity.

This sauce was very very rich and very very good. I was very surprised at how much onion flavor came through and now I will never feel the need to chop up an onion for pasta sauce again!

Now what to do with the soft, sweetened, tomato sauce coated onion? I tried a nibble of the onion and it was quite tasty. One of the suggestions was to eat the onions on some warm bread.

Pasta Sauce: Tomatoes, Onion, and Butter
serves 3

2 cans tomato sauce (or diced tomatoes or whole peeled tomatoes, plus juice)
5 tablespoons butter (salted or unsalted)
1 medium-sized yellow onion, peeled and halved
Salt to taste

Put the tomatoes, onion and butter in a heavy saucepan over medium heat.
Bring the sauce to a simmer then lower the heat to keep the sauce at a slow, steady simmer for about 45 minutes.
Stir occasionally, crushing the tomatoes against the side of the pot with a wooden spoon.
Remove from heat and take out the onion.
Add salt to taste and keep warm while you prepare your pasta.

Saturday, October 11, 2014

Peanut Butter Cookies

Cookie time! I made this recipe with some homemade peanut butter. But other then that it is a very basic cookie dough and most people will have all the ingredients on hand.

I used a small cookie scoop so these cookies are all bite sized. I'm not sure why but I almost always make cookies that are small. But between the size and the sticky dough, the criss cross pattern was not meant to be. The recipe recommended rolling the cookies in granulated white sugar then doing the criss cross. If I did that, I would have reduced the white sugar in the cookies to 3/4 cup. But rolling the cookie in the sugar would have prevented the fork from sticking. Another thought that I think could have helped was if the cookies were larger and the fork was floured or buttered. 

Long story short, instead of making the fork prints - I gently pressed them flat with my fingers. That means I touched EVERY COOKIE! Touch it you take it, right?

Since I didn't want to wait 3 hours to chill the dough so I put it in the freezer for 30 minutes then popped it in the fridge for another 15 while I waited for the oven to free up. Yes, I would love to have double ovens in my kitchen!

What was interesting was the difference in the cookies with chilled batter vs not chilled batter. In this picture the top left is the 1st sheet from the fridge, top left is the 1st sheet without the criss-cross, bottom left is the 2nd round of cookies. Then I put the dough in the fridge between the 3rd and 4th cookie. Taste didn't change but the look certainly varied.

Regardless, these cookies didn't spread very much and I was able to fit 20 cookies on a regular sized cookie sheet.

The recipe said they would look kind of underdone when I take them off the sheet so I probably overcooked them, but we all thought they were great! I cooked them for 12 minutes.

The recipe below is adapted from Sally’s Baking Addiction. The site says that the cookies will store at room temperature for up to one week and that the baked cookies or dough will freeze for up to 3 months.

Peanut Butter Cookies
Makes 80 small cookies

1 cup unsalted butter, softened to room temperature
1 cup granulated sugar
3/4 cup light brown sugar
2 large eggs, room temperature preferred
2 tsp vanilla extract
1 cup creamy peanut butter
3 cups + 2 tbsp all-purpose flour
1 tsp baking soda
1 tsp baking powder
1/2 tsp salt

Using a stand mixer with paddle attachment, cream the butter and sugars until smooth. Add the egg and mix on high until combined, about 1 minute. Scrape down the sides and bottom of the bowl as needed. Add the vanilla and peanut butter and mix on high until combined. Set aside.

In a separate bowl, toss the flour, baking soda, baking powder, and salt together. Add the dry ingredients to the wet ingredients and mix on low until combined. Dough will be thick, yet very sticky. Cover dough tightly and chill for at least 3 hours in the refrigerator.

Preheat oven to 350F degrees. Line two large baking sheets with parchment paper or silicone baking mats.

Press fork into the tops to create the criss-cross pattern. Bake for 12 minutes or until very lightly browned on the sides. The centers will look very soft and undone. The cookies will continue to "set" on the baking sheet during this time.

Saturday, September 6, 2014

Chicken Rice Soup

While it is almost 90F… fall is coming! I swear it! So here is a quick and easy chicken soup recipe that you can quickly assemble for those cool evenings. The roux will create a creamer thicker broth for the soup.

If you are cooking for picky kids puree the onion, garlic, and celery in the food processor. You’ll get the flavor but none of the texture. Rice can be substituted for pasta. Left over chicken would work too. And any veggies that may be having a slow death in your crisper drawer could be included in this as well! Flavors that would be tasty would include a few slices of ginger in the broth while cooking (remove before serving) or lemon juice in the broth.

This soup freezes well, just omit the rice/pasta. When you are ready to eat make the pasta/rice when the soup is heating up and then combine. This prevents the rice/pasta from being gummy and mushy.

Chicken Rice Soup
Makes 4-6 servings

2 tbsp oil
Small Onion, diced
3 garlic cloves, minced
3 carrots, sliced
3 stalks of celery, sliced
4 tbsp flour
2 tbsp butter
1 tbsp seasoning (oregano, Italian seasoning, or parsley)
1 can of corn (optional)
4-5 cans of chicken broth (it seems like a lot of broth but it will absorb and thicken as then soup sits in the fridge)
3 chicken breasts (cooked)
1 cup brown rice (uncooked)
Salt and pepper

To Cook Chicken:
Preheat oven to 350F. Season chicken with salt and pepper. Cook for about 30 minutes. When it is done take it out and let it cool. Shred and put aside.

To Cook Rice:
1 cup rice in 1 ½ cups of liquid (I do a split between water and chicken both). Bring to a boil then reduce to a simmer. When liquid is mostly absorbed (after approx. 25 minutes) turn off the heat and put aside.

To Make Soup:
While the chicken and rice are cooking, start making the soup! Heat large pot. Add a little oil and add in the garlic, onion, carrots, and celery. Season with salt and pepper. Let it sauté 5 minutes. Add butter and stir into the veggies. When melted add in the flour. Stir to coat the veggies. Add in seasoning of your choice. Season with salt and pepper. Add ½ can of broth and stir so the broth doesn’t become lumpy. When broth is smooth add in rest of the broth. Add chicken and rice when they are done cooking.

Thursday, January 9, 2014

Homemade Nilla Wafers

Homemade Nilla wafers?? These don't have the dry crumbly texture of the Nilla wafers, but these are great buttery bite sized cookies that I used in banana pudding! These were eaten too fast to take a picture.

The outside is a crispy cookie/carmel/buttery cookie and the inside is sweet and soft.

The recipe is from Serious Eats.

Vanilla Wafers
makes about 100 1 inch cookies

Ingredients
1 stick unsalted butter, softened
¼ teaspoon salt
1 cup sugar
1 large egg white
1 ½ teaspoons vanilla extract
1 tablespoon milk
1 1/3 cups AP flour
3/4 teaspoon baking powder

Cream butter, salt, sugar and vanilla. Beat in egg and milk until well incorporated.
Whisk together flour and baking powder and add to butter mixture. Mix until just combined.
Use a cookie scoop to create the same sized cookies. This made 3 cookie sheets of cookies, they spread a little but not too much so you can put many cookies (I did 5 x 6 cookies per sheet).

Bake at 350°F for about 15-20 minutes, until cookies are lightly browned. Cool completely before storing. 

Friday, May 31, 2013

Yellow Cupcakes and a Classic Chocolate Butter Cream Frosting

The last two cupcakes...
Birthday Party! I made some yellow cupcakes and a chocolate butter cream frosting.

The cupcakes were dense, similar to a pound cake. I would use that for a short cake type of cupcake, but not for a frosted type cake... Because these cupcakes were so dense they did not rise a lot, so fill them 3/4 of the way.

However, since I made coffee cake with the sour cream, I think that I mixed the sour cream in too soon/over mixed the batter. The coffee cake was very light and fluffy, so I feel that the cupcakes should have been as well. Anyone want to be a taster for me for my next batch?

The chocolate butter cream was delish! However make sure the butter is softened and been at room temperature for at least an hour. Otherwise the butter pieces will stay chunky and the frosting won't be as smooth.

Perfect Yellow Cupcakes
(adapted from Can You Stay for Dinner )
makes 12 regular size cupcakes or 24 mini + 3 regular

1 ½ cups all-purpose flour
¾ cup granulated sugar
2 teaspoons baking powder
½ teaspoon salt
8 tablespoons unsalted butter, room temperature
½ cup sour cream
2 large eggs, room temperature
2 teaspoons vanilla extract

Preheat the oven to 350 degrees F. Line a 12 cup standard sized cupcake tin with paper liners.

Whisk flour, sugar, baking powder, and salt in the bowl of a standing electric mixer. Add butter, sour cream, eggs, and vanilla. Beat at medium speed until smooth and satiny, about 30 seconds. Scrape down sides of bowl and mix until smooth and no clumps of flour are visible.

Evenly divide the batter among the cups in your prepared pan. Bake until cupcake tops are pale gold and a toothpick inserted into the center comes out clean, 20 to 22 minutes. Remove the cupcakes from the pan carefully and let them cool completely on a wire rack.

Chocolate Butter Cream Frosting
Adapted from
Makes 3 cups
1 cup unsalted butter (2 sticks or ½ pound), softened (but not melted!) 
3 - 3 1/2 cups confectioners (powdered) sugar
½ cup cocoa powder
½ teaspoon table salt
2 teaspoons vanilla extract or 1 teaspoon almond extract
4 tablespoons milk or heavy cream
Cream butter for a few minutes in a mixer with the paddle attachment on medium speed. Turn off the mixer.

In separate bowl combine powdered sugar and cocoa into the mixing bowl. Turn your mixer on the lowest speed (so the dry ingredients do not blow everywhere) until the sugar and cocoa are absorbed by the butter.

Increase mixer speed to medium and add vanilla extract, salt, and milk/cream and beat for 3 minutes.

Note: If your frosting needs a more stiff consistency, add a little more sugar. If your frosting needs to be thinned out, add additional milk 1 tablespoon at a time.

Monday, February 4, 2013

Chicken Pot Pie

Chicken pot pie is one of my favorite comfort foods and is tastes great as a leftover. When I was in college I realized that I should make the crust separate from the filling so I could make individual servings and not have a soggy crust. It would taste fresh made instead of leftovers! And cooks faster than having to heat it in the oven or risk a soggy crust in the microwave.

This recipe was adapted from my own kitchen and from Simply Scratch. I like to think that this is a straightforward recipe with no random ingredients. It cooks quickly and makes quite a bit. I only used 3 chicken thighs and it could have used probably an additional one. I am actually really happy with how this recipe came out and wouldn't change any of the seasonings.

Note: The chicken could cook in the pot with the rest of the meal instead of in a frying pan. Add the chicken (small dice) in just before adding in the liquids. Cook a few minutes then add the potatoes and about 1 cup of stock. Stir around to create the thickened gravy. Add the rest of the stock and simmer until potatoes are fork tender and chicken is done.  

Another option is to use a rotisserie chicken from the store.

Fork tender potatoes literally means, when a fork is poked into the potato that it will come off the fork easily.

Enjoy!
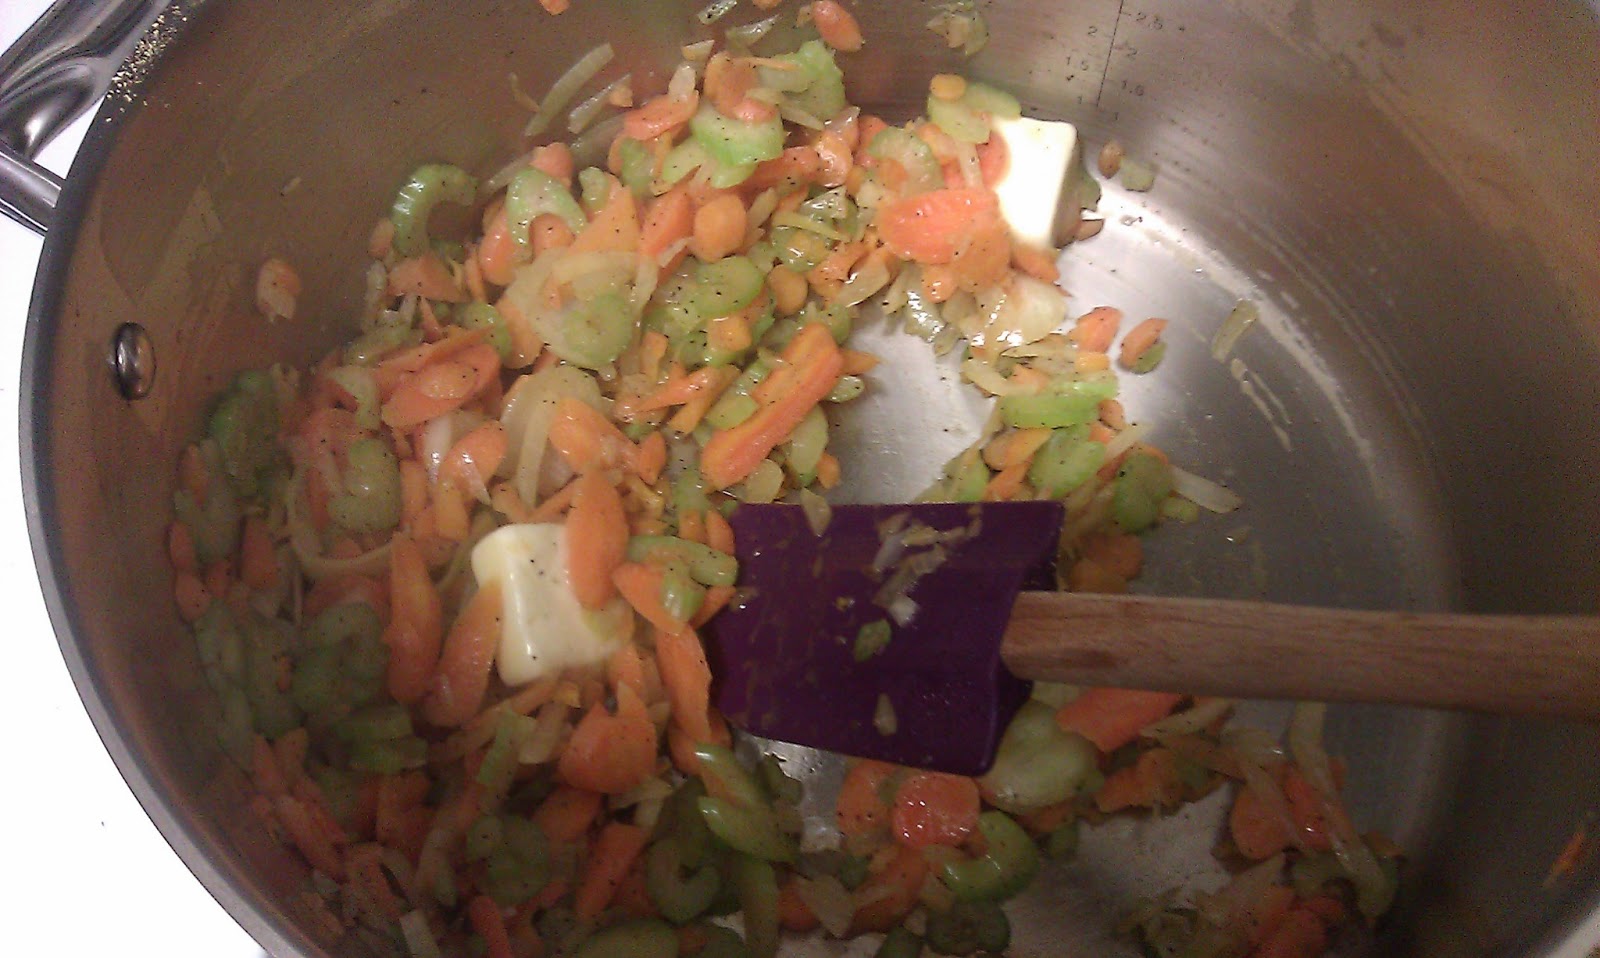
Saute the veg in some oil
Cover in the flour
Add butter
Meanwhile cook some chicken
Add liquids, potatoes, seasonings
Add chicken and frozen veggies when potatoes
are tender and liquid is thickened

Top with a biscuit!


Chicken Pot Pie
serves 4

3 - 5 pieces of chicken thighs, or breast
3 tbsp Butter
2 whole Carrots, peeled and diced small (or about 1 ½ cups of baby carrots)
2 Celery Stalks, diced small
1 small Onion, peeled and diced small 
3 medium Potatoes, diced small
1/2 cup Flour
2 - 3 cups Chicken Broth, warmed
1-1/2 cups Whole Milk
1 tablespoon Dried Parsley
1 teaspoon Dried Thyme

1 teaspoon Kosher Salt, more or less to taste
1 1/2 teaspoon Black Pepper, more or less to taste
1 bag frozen mixed veggies (Mine was a country mix with carrots, peas, green beans, corn, and lima beans)
1 can of Pillsbury biscuits (cooked according to directions for as many servings as you want)

Heat a frying pan and add some oil. Season chicken with salt and pepper. Cook chicken until done (no pink inside), dice.

Melt 1½ tablespoons of butter in a large pot. Add in the diced carrots, celery, onions, salt, and pepper (1 tbsp) cook. Cook until the onions are soft and translucent and the carrots are soft, approx 5 minutes. Add another 1½ tbsp of butter and stir until melted. Add in flour, stir until all the veggies are coated with the flour and the flour isn’t white anymore.

Pour in ½ cup to 1 cup of the chicken broth and stir until slightly thickened. Pour in the rest of the chicken broth, milk, potatoes, parsley, and thyme. Simmer, stirring occasionally until thickened and potatoes are fork tender (approx 10-15 minutes).

Add more flour in about ¼ cup at a time if broth/gravy isn’t thick enough.

Add chicken and frozen veggies. Once the veggies are warmed it is ready to serve!