Thursday, April 26, 2012

Three Pea Chicken Salad

I found this spring time Three Pea Chicken Salad recipe in Bon Appetit magazine, April 2012, also found here. This chicken salad caught my eye because I adore sugar snap peas (I eat them out of the bag). I have seen many recipes using yogurt/Greek yogurt as a substitute for mayo and I was really interested in tasting/texture changes. And finally, I've never poached chicken and this was going to either be great or an epic disaster.

Thankfully this came out great! I think it tasted even better the next day. Of course, I made some changes in the recipe due to my budget and ingredient availability. 

Dried tarragon for fresh, Lemon flavor Greek yogurt instead of plain and that also takes care of the lemon juice/zest part of the recipe as well. I used one shallot. Chives were forgotten at the grocery store. I omitted snow peas since I couldn't find them.

And so begins our adventure, poaching chicken. (The recipe said you can substitute rotisserie chicken but I had some frozen chicken breast already instead of buying one). I put half the shallot, garlic, and tarragon in the frying pan. Added chicken (cut in half or quarters so it would fit in the pan). Covered in water. Covered pan. Set to boil. Once it started to boil I took it off the burner and let it sit for another 25 minutes. I think it took longer for mine because my chicken was still frozen in the middle... oops. Very easy. Once the chicken is done cooking take it out of the pan and cut it into whatever size pieces you like. Small dice, shredded, chunky dice... its your call. I think I would shred it into bite size chunks next time. Let the chicken cool before mixing it into the dressing.

Meanwhile, I sliced the de-stringed sugar snap peas. My knife skills aren't very delicate so I cut them on a diagonal into pretty bright green bites. I poured the frozen peas into a bowl and combined them with the snap peas.

Dressing: chop the shallot and the garlic very fine or you'll end up with some harsh bites in the salad. With a whisk or fork combine oil and yogurt. Next mix in the rest of the shallot, rest of the garlic garlic, some salt & pepper, the rest of the tarragon, and some parsley. Stir it together until its all mixed in. 

Then I added the peas and cooled chicken to the dressing. Put into my lunch containers and added some chopped walnuts to the top.

I ate it out of the bowl with a piece of bread on the side to nosh on.

My thoughts? Yum! Fresh! Light! Pretty healthy too. I let a couple friends at work try a bite and they asked for the recipe and said it was very tasty. This would be great for a nice luncheon and be pretty easy to make in a large batch. The most time consuming part was cutting the peas, but if you want to take short cuts get the de-stringed ones and that should help reduce the time by quite a bit.

The recipe says it makes 4 servings, I had 3 big servings because that was going to be my full lunch without any sides.

Spring Chicken Salad
Time: 30 Min
Servings: 3-4

Ingredients
2 tsp dried tarragon
1 lg shallot, minced
2 garlic cloves, 1 smashed, 1 minced
1 lb skinless, boneless chicken breast (2 chicken breast)
salt & pepper
6 oz container lemon Greek yogurt
3 tbsp olive oil
1/2 lb sugar snap peas
1 c frozen peas
2 tbsp finely chopped parsley

Place 1/2 tarragon, 1/2 shallot, smashed garlic, and chicken into frying pan. Add water to cover by 1 inch or as much as you can. Season with salt and pepper. Bring water to a boil. Remove pan from heat, keep covered. Let stand until chicken is cooked. 15-25 minutes. Transfer chicken to a plate and let cool. Shred or dice chicken.

Whisk yogurt, oil, remaining shallot, garlic, and tarragon, and parsley in a bowl. Season with salt and pepper. Combine with peas and chicken.

Option: Serve open face sandwiches over toasted bread and/or lettuce.

Enjoy!!!


Wednesday, April 11, 2012

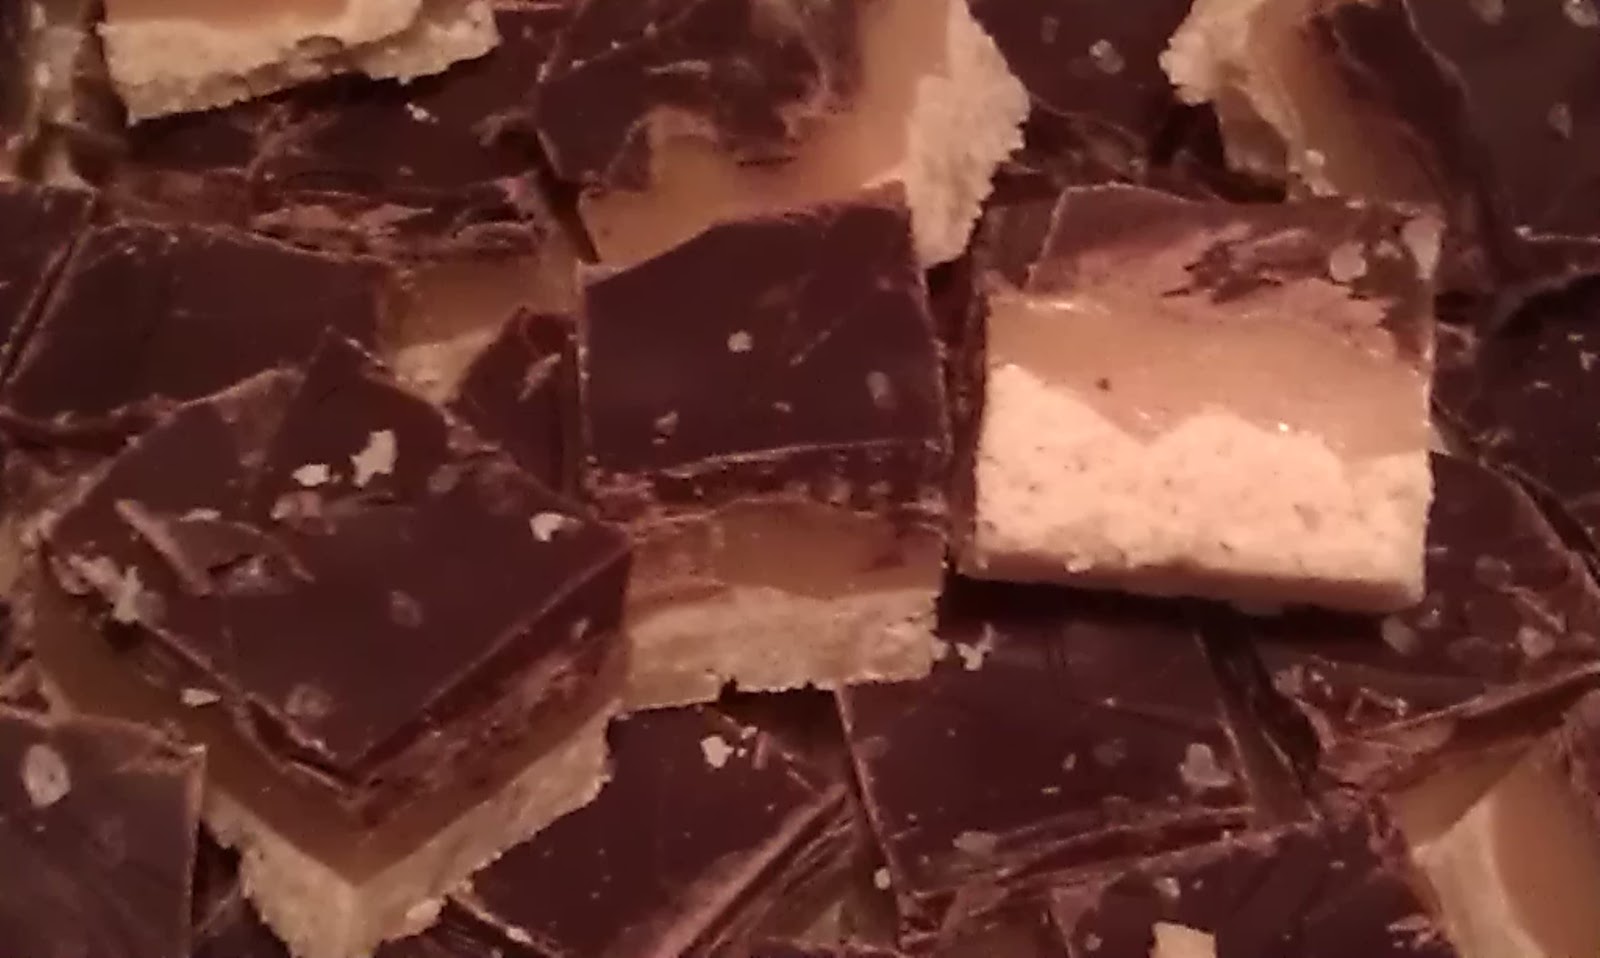
Salted Caramel Chocolate Shortbread "Twix" Bars

I found this recipe on Pinterest the other day and I have been waiting to create them! I also looked at this website because it was similar and had some more instructions. It is also called Millionaires Shortbread.

The layers of shortbread, caramel, and chocolate just sounded amazing. What really intrigued me? The sprinkle of salt on top of the chocolate.

I looked over many shortbread recipes and finally decided to go with the original recipe. I used brown sugar instead of plain white sugar and added in 2 tsp of vanilla extract. I blended the sugar and butter, in my stand mixer, until it was creamed, this took about a minute. In a separate bowl I combined the flour, baking powder, and the salt. I mixed it all in with a fork. Then I combined it together until it formed a crumbly mixture.

I put the mixture into the pan lined with parchment paper and put it in the preheated 325F oven for about 15 minutes. (When it was done I put it in the fridge to cool quickly, next time I might make the shortbread the day before so it has time to crisp up more).
Crumbly mixture
Pressed
Baked


While the shortbread was in the oven I started on the caramel. After reading the reviews I decided to half the caramel amount, I'm glad I did and was happy with the end result. In my medium saucepan I put the butter, sweetened condensed milk, sugar, and light corn syrup. I heated it over medium stirring occasionally until the butter was melted and sugar dissolved. Then I turned it on high and stirred constantly until the mixture came to a boil. I mean constant stirring. Don't stop stirring! Once it reached a boil turn it down to about a med low heat so it simmers (little bubbles). Keep stirring! It took about 10 minutes for it to turn a light amber color. Then I took it off the heat. I let it cool for a few minutes but not long enough for it to get hard and too sticky. (Next time I will add a tsp of vanilla).

Melting
Boil
Simmer
I poured the caramel over the cooled shortbread and spread it out. I let it sit for a few minutes and then I spread the semi sweet chocolate chips over the top and continued to spread them out as they melted. Let it sit for a few minutes. (Next time I'll use good chocolate instead of store brand chocolate chips). Then sprinkled with the coarse salt.


I let it chill in the fridge overnight before cutting. When I took it out the next morning to cut I took the entire thing out of the pan and put it on a cutting board to chop up. I made about 1x1 squares or smaller because these are very rich. They are also great being bite sized.

Overall? This was a great recipe. Very easy and not too time consuming. It also makes a lot! It would be easy enough to double the recipe if you had large parties to go to as well. They look fancy and aren't as complicated as they look. 

I might try a different shortbread recipe next time, Paula Dean has a good one for Pecan Shortbread. So I might try that one as a base.

But, just have patience with the caramel and don't stop stirring!

Salted Caramel Chocolate Shortbread Bars
Adapted from Annie's Eats
Makes approx 100-120 pieces depending on desired size

For the shortbread layer:
2 cups all-purpose flour
2 tsp. baking powder
¼ tsp. salt
1 cup (2 sticks) unsalted butter, at room temperature

½ cup brown sugar
2 tsp vanilla

For the caramel layer:
½  cup (1 sticks) unsalted butter, cut into pieces
½  cup sugar
2 tbsp. light corn syrup

1 (14 oz.) cans sweetened condensed milk

For the chocolate layer:
8 oz. semisweet or bittersweet chocolate, finely chopped

Coarse sea salt, for sprinkling

Shortbread
Preheat the oven to 325° F.  Line a 9 x 13-inch baking pan with parchment paper.  In a small bowl combine the flour, baking powder and salt. Stir with a fork to blend, and set aside.  In separate bowl beat the butter, vanilla, and sugar until well blended, about 1-2 minutes.  Mix in dry ingredients just until incorporated (crumbly).  Transfer the dough to the prepared baking pan and press in an even layer over the bottom of the pan.  Bake 15-18 minutes or until golden.  (If the crust puffs up a bit while baking, just gently press it down while it is cooling.) Let cool completely.

Caramel
Combine the butter, sugar, corn syrup and condensed milk in a medium saucepan over medium heat.  Heat, stirring occasionally, until the butter is melted.  Increase the heat to medium-high and bring to a boil.  Reduce the heat to maintain a simmer, stirring constantly.  Continue simmering and stirring until the mixture turns an amber color and thickens slightly.  Pour the mixture over the shortbread layer, smooth the top, and allow to cool completely and set. 

Layer caramel over shortbread, sprinkle chocolate over the warm caramel and spread it out as it melts. Sprinkle salt over the chocolate.

Chill 2 hours until ready to cut and serve.

Enjoy!

Skillet Pasta

Whilst I was perusing my Martha Stewart Living, April 2012, I found this great pasta basic recipe! The article is titled "Rethink your pasta routine"

So here we go, skillet pasta in under 20 minutes (maybe 30 minutes if you are slower at prepping)!


"1 Create a flavor base.
your pasta water is coming to a boil, heat olive oil or butter in a pan, and cook some onions, leeks or garlic. This is also when you'd introduce cured meat or sausage.

2 Build another layer.
This could mean adding mushrooms, tomatoes, or seafood to the pan or blanching a green vegetable right in the pasta water.

3 Toss in the pasta.
Cook your pasta until just underdone. Then scoop it straight from the pot into the pan. Add a little pasta water to create a silky sauce.

4. Finish with a flourish.
Take the pan off the heat, and add one final layer of flavor: a sprinkle of herbs, cheese, breadcrumbs or even crunchy sea salt."

 So what did I do?

Step 1: Create a flavor base.
While the pan was heating I diced up some onion and a carrot (because I have carrots and always forget to eat them). Once the 1/4-1/2 of sweet onion, 1 small-ish carrot, and 1 tsp garlic powder was in the pan I turned the pasta water on.  Then I added my meat. I used 2 spicy Italian chicken sausages and a chicken breast. I love using sausage because it has all the flavorings already there, you rarely have to add much to the dish. Only spice additions was about a tsp of red pepper flakes because I like my food a little spicy.

Step 2: Build another layer.
I blanched my mushrooms in my salted boiling pasta water (30 seconds) and then tossed them into the pan with the meat. Then I added in 2 cups of dried egg noodles to the boiling water. Cook pasta according to package directions, but be sure to get them out at al dente (probably about 4-6 minutes). They will cook more in the frying pan.

(2a. Here is where timing comes into play, make sure your meat is cooked all the way before you add the pasta in.)

Step 3: Toss in the pasta.
Add pasta to the frying pan. There was quite a bit of liquid from the meat and the mushrooms so I didn't add in any pasta water. In fact I added a tbsp of corn starch to thicken the liquid into more of a sauce. I also added in my ricotta cheese at this point and started to combine until it was the creamy texture I wanted.

Step 4: Finish with a flourish.
Nope, I just didn't do anything here. I added some cracked pepper but that was it.

This made about 2-4 servings. I was hungry so, for me it was dinner and tomorrows lunch. But if you have small kids or are serving it with salad/bread/having dessert etc, you can probably feed more folks.

Enjoy!

Monday, April 9, 2012

Pasta, Leeks, Peas, and Lemon

I found this recipe in Martha Stewart Living, April 2012. This a great light tasting dish that can be prepared in less than a half hour.

What is a leek? A leek is a type of onion. Similar to a scallion that has many layers and that you have to peel. You need to wash leeks carefully, there can be a lot of dirt stuck between the leaves. To wash them I sliced the bottom of the stalk off (like celery) and then peeled all the layers. I washed each piece then cut them into small slices.

Snow peas. Are. Amazing. Crisp and crunchy and sweet, they are probably one of my favorite veggies. They are very versatile and are a great addition to salads and pasta dishes. Peas can be blanched (cooked in a boiling water for 2 minutes), raw, or stir fried. I generally nosh on them raw.

Egg noodles are pasta but it has a little bit of a different texture. Most times they are flat and similar to a fettuccine or linguine, just short. If you don't have egg noodles on hand regular pasta would work just fine.

Leeks in the pan
I melted some butter over med heat in a big frying pan, when it was melted I tossed the sliced leeks into it. I continued to stir them around to ensure the cooked and didn't start to brown. The recipe calls for lemon zest. I didn't have any lemons on hand so I put in 1/4 tsp of lemon extract. (I have made this with lemon and without lemon, I think the lemon was nice but its not necessary if you don't have it on hand). This took about 5-6 minutes. Remove pan from heat.

Meanwhile I started to boil some water in a medium size pot. When the water was boiling I blanched the snow peas for about 2 minutes. I tossed the peas into the frying pan with the leeks and then put the egg noodles into the boiling water. The noodles only took about 5 minutes to cook. I strained the noodles out of the water and into the frying pan with the snow peas and leeks. You want to save the pasta water for when add the ricotta cheese. This combination creates a sauce for the veggies and pasta.

I omitted the Pecorino Romano cheese because I don't care for too much cheese. I think next time I make this I would include dice chicken or grilled chicken.You can also sub for whatever fresh veggies you have on hand (e.g. asparagus or broccoli) and onion or scallion for onions. This will change the cooking times though, so be aware. :)

Snow peas and leeks in the pan
Also, If making this for 4 people and this is the main dish without any other sides, I would use the whole pound of pasta.

Egg noodles, Leeks, Snow peas, and Lemon

Serves approx 4  
  • Coarse salt and freshly ground pepper
  • 3 tbs unsalted butter
  • 2 medium leeks (white and pale-green parts only), cut into thin half-moons and rinsed well
  • 2 lemons
  • 1/2 pound sugar snap peas, trimmed and cut in half crosswise (optional)
  • 3/4 pound dried pappardelle or other flat egg noodles
  • 1/2 cup fresh ricotta cheese
  • 2 ounces Pecorino Romano cheese, grated (3/4 cup)
  1. Bring large pot of salted water to boil. 
  2. Melt butter in big frying pan over med heat. Add leeks and some salt to the frying pan. Cook until leeks are soft and begin to become soft and tender (7-9 minutes). Remove from heat. Add the lemon zest (or lemon extract) to the leeks with some pepper.
  3. When the water is boiling add the peas to the water and blanch about 2 minutes. Transfer to a plate or into the frying pan.
  4. In the water the peas just blanched in add the pasta and cook until al dente (4-5 minutes). Don’t drain the water but add pasta to the frying pan. If you haven’t added the peas to the frying pan do this now. Stir in pasta water ½ cup at a time and alternate with the ricotta and cheese until the pasta is covered in the creamy sauce.
Enjoy!


Sunday, April 8, 2012

Barley Salad with Hebs

I found this recipe in Martha Steward Living, April 2012 (also here). Made it as a side dish with my roast beef. Very easy! I added a tsp of garlic powder because I think everything is better with garlic!

The recipe also recommends any green herbs that you have on hand and lists basil, mint, chives, parsley, or dill.
 
Barley Salad with Herbs
serves 6

1 c barley
2 tsb diced onion
1 tbs Dijon mustard
1/4 c olive oil
1/4 c fresh chopped parsley
1 tsp garlic
Salt
Pepper

Cook barley according to package instructions.
Meanwhile mix onion, mustard, olive oil, and parsley as well as salt and pepper.
Combine barley with dressing.
Serve warm.

Friday, April 6, 2012

Roast Beef


I was inspired to make a roast beef today, so I went out and bought some an oven roast and called several family members to figure out how to do it.

I purchased a little over 2lb oven roast, used a knife to poke holes in, and put pieces of onion into it. Next I covered it in salt, fresh cracked black pepper, and garlic powder and then popped it in the 350F oven for 45 minutes. I was hoping for a medium rare roast, but it was still raw in the very center. I put it back in the over for another 15 minutes and it was perfect. (However, before putting it back in the oven, I turned it off and let the meat rest about 15 minutes. Then I cut it down the center and saw how raw it was so I put it back in the oven and turned the oven on at 350 and put it in for 15 minutes, so the oven was still reheating up, so I have no idea what that will do to your timing.)

Don't forget to let it rest 15-20 minutes after taking it out of the oven.

Medium rare is internal temp of 140 but it keeps cooking after it comes out, so I took it out at 120. It was still raw in the middle. I found this site which has some recommendations for cooking times. You should also start with a room temperature piece of meat as well (mine was directly from the fridge, that that would affect the cooking time as well).

I don't know why I put the carrots and onions around the pan, it really didn't need too and it wasn't in the oven long enough for them to cook etc. So don't do it. :)

Also, the picture makes the roast look a lot bloodier than it is, but I tried to make beets before I cut the roast. Beets didn't go so well.

I had some friends over the next day and we made some awesome open face sandwiches. We sliced the roast beef thinly and put it on fresh french bread. Topped it with cheese and broiled it until the cheese melted. We ate them too fast to take pictures. Yum!

Roast Beef

2lb Oven Roast
1/4-1/2 medium sliced Onion
Salt
Pepper
Garlic Powder

Preheat oven to 350F.
Use knife to insert onion pieces into the roast.
Cover the roast with salt, pepper, and garlic powder.
Put into oven and let it cook for approximately 40-60 minutes or when internal temperature reaches 120-140 (for medium rare).

Enjoy!!

Tuesday, April 3, 2012

Chicken and Veggie Stir Fry

My mom makes the best stir fry. I have no idea how she does it, but it always tastes awesome. Stir fry is a very basic idea with some mixture of veggies, some form of protein, and cooked in one pan. Last night I looked at what I had in the fridge and decided to attempt my own version of a stir fry. I defrosted my chicken breast, chopped up my veggies (broccoli, mushrooms, and carrots), and heated up a frying pan.

Once the pan was hot, I added some olive oil and the spices and stirred that around for about 30 seconds. Then I couldn't decide on cooking times for the veggies and chicken. So I put them all in the pan at the same time. In my mind, all the flavors could cook together. (If you were wondering, the mushrooms didn't need to cook as long as the broccoli and chicken. Next time I would probably throw them in a minute or two after the other ingredients). Once the chicken was mostly cooked I added a tbs or so of soy sauce (a few splashes) and some water and let that cook down.

Now, when my mom makes this type of dish she always manages to make a gravy/sauce using corn starch and water mixed into the frying pan with all things being cooked. I couldn't remember the ratio, but I decided about a 1/4 cup of water and a tbs of corn starch was a good place to start. After all, you can always add more! So into the pan it went. I stirred it around until (approx 2-3 minutes) and you can see the gravy start to thicken up. I wanted a little more so I added some more water and corn starch. Be patient during this step because it does take a few minutes to thicken. Eventually I decided I was hungry and that the amount of gravy was good enough. You can play around and add more until it suits your tastes.

Finally, I topped it with some cracked ground pepper.

And I have to admit, while it didn't exactly taste like my mom's stir fry, it was pretty close. And this is a dish I would feel comfortable making for when I have friends over.

Also, I wish I had onions to put in it. If you have onions on hand, I'd toss in a half of a large onion to the stir fry. Put it in the pan after you heat the spices and let it get a little translucent. Then add the rest of the veg.

Chicken and Veggie Stir Fry
makes 2 servings

Olive Oil
1 tsp Garlic Powder
3/4 tsp Ground Ginger

1 small head Broccoli
2 Carrots
6 Mushrooms
1 Chicken breast- sliced into thin strips or diced into bite size pieces
Splash of water
Soy Sauce
Ground pepper

1/4 c water and 1 tbs corn starch - combined

1. Heat pan over medium high.
2. Once pan is hot, add oil, add spices. Mix approx 30 seconds/fragrant
3. Add veggies* and chicken.
4. Stir occasionally, once chicken (not very pink anymore) and veggies are mostly cooked (stick a fork in veggies to determine if they tender enough for you) add soy sauce and some water
5. Add water/cornstarch mixture a little at a time until desired gravy is there. It will take a little time to thicken so be patient.
6. Serve over rice or pasta or whatever you'd like. You could even put it in a tortilla like a taco, or on top of a flat bread and it it like pizza.

*Depending on the veggies used you may have to adjust the cooking timings.

Enjoy!!

Sunday, April 1, 2012

Cake Pops

My best friend S. bought me a BabyCakes cake pop maker this past Christmas and I have neglected to try it out. So for St. Patrick's Day (yes, it was a few weeks ago), my friend from work and I decided to make some cake pops for work. I did a little research on the best type of recipes and how the machine works.

The machine is lovely purple and contains little wells waiting to be filled with tasty batter. It is basically a waffle maker but instead of a waffle mold it has holes the size of munchkins.

Now, recipes for this machine are fairly elusive. When you search for "cake pops" most recipes that come up are the cake pops that you bake a cake, crumble cake and mix it with frosting, and roll into balls. I was looking for a dense cake mix that would rise in the wells. Many of the reviews said that if you use a basic cake mix the cakes won't rise into a nice round ball shape, they might be a little flat.
Thick batter, don't over mix!!

After reading many reviews and not finding any answers I just picked a recipe and went with it. The recipe called for a boxed cake mix (used yellow cake mix), add an instant pudding packet (store brand), swap milk for the water (I only had light cream so I used that), omit oil, use eggs as directed on the cake mix box. Easy enough?

We mixed the batter, plugged in the machine, and waited for it to preheat. It only took a few minutes. Next we filled the wells so the bottom was almost full, closed the machine, and it took 2-3 minutes for the cakes to be cooked. As you can see in the image from dipping them in the candy coating, they are a little dark. We used toothpicks to roll and dip the pops and then placed them on a parchment paper covered cookie sheet. We let them chill for a few minutes so the candy coating could harden.

Dipping in the candy coating
Also, don't over mix the candy coating. Over mixing it makes it thick and goopy and it won't cover the pops nicely. We added green food coloring to half of the batch after mixing it in the frosting was too thick to cover them smoothly. That was when we decided to make a glaze. It made them look like munchkins. Yum!

Used a toothpick to dip them, removed toothpick prior to serving
We chose not to use the sticks...because we just didn't there was no real reason why. And the cake pop machine did get very hot, we did unplug it a few times when making them.

But the cakes were moist and soft and everything you could hope for in a cake pop. I refrigerated them over night, brought them to work and served them at room temperature. They were one of the first desserts to disappear!

Note: I think they are better with the yellow cake mix than the chocolate cake mix. But then again, I'm not a big chocolate fan...


Cake Pops
Makes approx 60 cakes

1 box mix
Use milk for the water (as directed by cake mix box)
Eggs (as directed by cake mix box)
1 instant pudding mix
Wilton Candy Coating

  1. Combine box mix and pudding mix, stir together.
  2. In separate bowl, combine Milk and Egg until eggs are pretty scrambled.
  3. Combine wet and dry ingredients. Add food coloring if desired.
  4. Plug in and preheat cake pop machine.
  5. Fill wells with batter and bake approx 2-3 minutes. Check carefully but wait at least this long.
  6. Remove with fork and let cool on racks before frosting.
  7. Follow instructions on candy coating for melting.
  8. Roll cakes in the frosting (add sprinkles here if you'd like!), place on parchment paper covered cookie sheet, and chill.

Glaze Recipe
From All Recipes; amounts below are for 6 servings, used it to cover about 15 cakes.

1 tablespoon and 2-1/4 teaspoons butter
2/3 cup confectioners' sugar
1/2 teaspoon vanilla
1 tablespoon and 1 teaspoon hot water or as needed

1. Melt butter.
2. Combine above ingredients except water.
3. Adding water slowly until desired consistency is reached.

Enjoy!

Saturday, March 31, 2012

Bone Marrow Registry

The Story:
A few weeks ago I needed to fill my gas tank and I was being all sorts of spastic. I hadn't been to that gas station in a while and I just couldn't remember if I had to go in first, could start pumping gas first, had to flip a lever, had to push buttons, I was just struggling and tried all the wrong options first. Anyways, this particular gas station has TV sets at each pump to tell you the weather and generally random news that isn't very important. BUT on this particular semi-spastic day, I finished pumping gas at the end of a very moving commercial regarding a little boy with aplastic anemia and how this particular case is so far along that it will be fatal without a bone marrow transplant.
I always watch those commercials and feel bad/sad for the family, but I never feel any connection to the families. Most of the time I feel how lucky and blessed that we aren't going through what the family is going through. However, this time it was different. Kyle needs a donor who is Asian and Caucasian. This may sound horrible, but it had never occurred to me that recipients would need specific combinations of races and I realized the impact the lack of donors registered within that criteria.

As someone who fits that criteria I knew I needed to find out more.

The Decision:
I took some time to research and to think about the procedures (bone marrow transplants and peripheral blood stem cell donations) as well as what it means to be a match for someone (I've included some facts and some of the donor criteria at the bottom). I spoke to several of my friends whose first responses were, "The recovery is supposed to be really painful!" However, I realized I was always replying back, "But you could be saving a life!" For me, one week of recovery pain outweighs the possibility of saving a life and I knew it was time to start the registry process.

The Test:
I went onto the registry site and filled out an application to be entered into the registry. There are no locations near me so I had them mail me the the cheek swab test. The test contains the 4 q-tips to swab your cheek, some instructions with diagrams as well as a pre-paid return envelope to mail it back. I looked at the diagrams, swabbed the inside of my cheeks, and mailed the q-tips back. Now, I wait to be entered into the registry and will be contacted if I'm ever a match for anyone in the databases.

If I am considered as a potential match:
If my results come close to someone in need of a transplant they will do several more tests (cheek swabs and blood tests) and have a physical exam to make sure that I would be the best candidate. The procedures would be an outpatient procedures and depending on which procedure I was a match for I would be minimally impacted. The websites say the total time contribution for a bone marrow donor would only be a total of 30-40 hours over several weeks but you can always change your mind if you don't want to donate anymore.

For me, choosing to register as a donor is similar to selecting "Organ Donor" on my license. It is an opportunity to give hope and potentially help save a life.
Some Facts (from marrow.org):
For every 540 donors there is 1 match.
It costs $100 to add a donor to the registry (cost for testing, searching patients, related costs).
Donors do not have to pay for anything, all costs (travel expenses, medical costs, etc) are covered by the National Marrow Donor Program. 
Most popular request are for peripheral blood stem cell (PBSC) donations which are non surgical.
Some Donor Criteria (from marrow.org):
Ages 18-60 (pref is to 18-44 because cells from younger donors lead to more successful transplants).
If you are healthy you are generally a good candidate (ig you can have allergies, piercings/tattoos, blood pressure, depression, etc don't matter).  Click here for more information.
If you are interested in learning more I have included the links below:
Kyle's Story: http://kyleneedsyou.org/
If you are interested in learning more about the registry or registering to become a donor: http://marrow.org/Home.aspx

Thank you for reading!


UPDATE: 

Just thought I'd share an update on this little boy Kyle (http://kyleneedsyou.org/) who inspired me to join the Bone Marrow Registry!

Kyle is responding to new medicine and his cells are starting to regenerate on their own and might not need a transplant. This was very unexpected for his family due to the severity of his condition, but there is still a high chance of relapse in the next 2-10 years and he would need a transplant right away if that occurs.

Since his family started the campaign to find a match, over 2,500 people of mixed ethnicity have joined the registry. Not only that, but 2 potential matches have also been identified for Kyle!

If you are interested in registering for the donor list or would like any additional information let me know!

Just sharing some love and thanks before the holidays!

Much Love,
Kat

Thursday, March 29, 2012

Oreo Cheesecake Cookies

My friend N. found this recipe online and really really really wanted me to make them. Since he bought me Oreos and chocolate chips the other day for the Slutty Brownies, I figured I could try these. I didn't find them to be as "cheesecake" as I was expecting, but they had an almost nougat-like, marshmallow-y center.

The Oreo crumbs do need to be in fine crumb form! I found that mashing them in a bag with a rolling pin just didn't do the job. So, I got to use my food processor! And wow did it make quick work of those yummy Oreos!

I used a cookie scoop when making these so they would be approximately the same size. I use my 1 tsp (?) cookie scoop. Its slightly smaller than the normal cookie scoop that most people have.

If you don't have a cookie scoop (aka small spring loaded ice cream scoops) and you make lots of cookies, I highly recommend investing in one. They are fairly inexpensive and make it much easier to create large batches of cookies.

The recipe was straight forward and easy to follow. I didn't make any changes to the recipe aside from halving it.


Oreo Cheesecake Cookies
Yield: about 4 dozen cookies

½ cup unsalted butter, at room temperature
3 ounces cream cheese, at room temperature
1 cup granulated sugar
1 teaspoon vanilla extract
1 cup all-purpose flour
½ cup chocolate chips
1 cup Oreo cookie crumbs

1. Preheat oven to 375 degrees F. Line a baking sheet with parchment paper.

2. Cream butter and cream cheese until smooth.

3. Add sugar and vanilla extract. Mix until the ingredients are well-combined. Add flour and mix until flour is incorporated. Stir in the mini chocolate chips.


4. Put the Oreo crumbs into a bowl. Scoop the soft dough into about 1½ to 2″ balls and then roll in the cookie crumbs. Place the cookie balls on the baking sheet. Bake for 12 to 15 minutes, or until the edges are golden and the tops are slightly puffed.

5. Cool on the pan for 2 minutes before transferring to a wire rack to cool completely. Store in an airtight container.
Enjoy!