Sunday, October 28, 2012

Great Smoky Mountain National Park & Mammoth Cave National Park

Off on another whirlwind adventure with Nate!! (Well, a few weeks ago)

Day 1
Drive to Great Smoky Mountain National Park in Gatlinburg, TN. Set up the tent at Elkmont Campground. Very nice campground but no showers.

First Views
We had dinner at Smoky Mountain Brewery, pizza was great! We also had the homemade pretzels which were warm and yummy. Nate enjoyed the sampler of their home brews.

After, we explored part of Gatlinburg. There are many touristy shops in the area as well as moonshine tasting.

Here are some first views of TN:


This area was very interesting in that the tourist attractions and hotels are all built up along the main entrance roads to the park. Very convenient for food but its a strangely commercialized area. There are also many of the same restaurants in Gatlinburg as well as Pigeon Forge.

Day 2, Monday
Cloudy morning. Hiked Laurel Falls, one of the more well known trails. It is right near the entrance, about 2 miles or so round trip. It started to pour right after we got back to the car.
 

We drove the Newfound Gap and around the highways as well as a section of Blue Ridge Parkway and one of the Foothills Parkway. We also took a turn off the main road and drove around some of the bases of the mountains. Very cool and so different from the White Mountain areas. The hills/mountains are so steep and sudden, the valleys between them are just a few feet across in some areas!
Trails off Newfound Gap... Hike to Maine anyone?!
 

There are actually mountains and views!


For breakfast we had pancakes at the Flapjack's Pancake Cabin, which after sampling almost all the breakfast places in the area, one of the best choices. For dinner we went to the Mellow Mushroom and had pizza again. They had all sorts of specialty and fancy pizzas to pick from.

We went to some more shops around Gatlinburg after and also purchased some moonshine! Nate liked the apple pie flavored one. We did the drive around the Roaring Fork Nature Auto Trail which was scary because its a one way steep winding paved/dirt road. It was dark by the time we were done and so it was probably not one of the better ideas... however, we survived.

There are booklets available at the start of the auto roads and trails that you can purchase for a dollar or something. Some areas you can get them at the visitor center, some are honor system.

Day 3, Tuesday
There be blue sky today!! We didn't want to pay for parking so we went to Pigeon Forge for breakfast. We ate at Smoky Mountain Pancake House.

We drove Newfound Gap Road and were able to stop and see things at the scenic outlooks.


One of the main attractions here is Clingman's Dome which is the highest point in the park! Because we did this a few times, we were able to see the differences as the clouds thickened and cleared out. We also went on one of the few days that it was warmer at Clingman's Dome than it was below the clouds!
The final ascent!
To Clingman's Dome!


Now that we can see the mountains, we notice there are tons of dead trees! Not just trees who have seasonally lost their leaves. Turns out there are two infestations currently at the park. The Hemlock Woolly Adelgid and the Balsam Woolly Adelgid which is mostly under control now. These are just two examples of why you see all the signs to not move or bring firewood from other places.


We did the section of Blue Ridge Parkway because we wanted to do the one way road of Heintooga Ridge Road around Balsam Mountain. On our way to this road, we pass a few areas such as Black Camp Gap and a picnic area. We also see Elk!! Elk were reintroduced to the park in 2001 and have been thriving in the area. The NPS has more information about the Elk here.

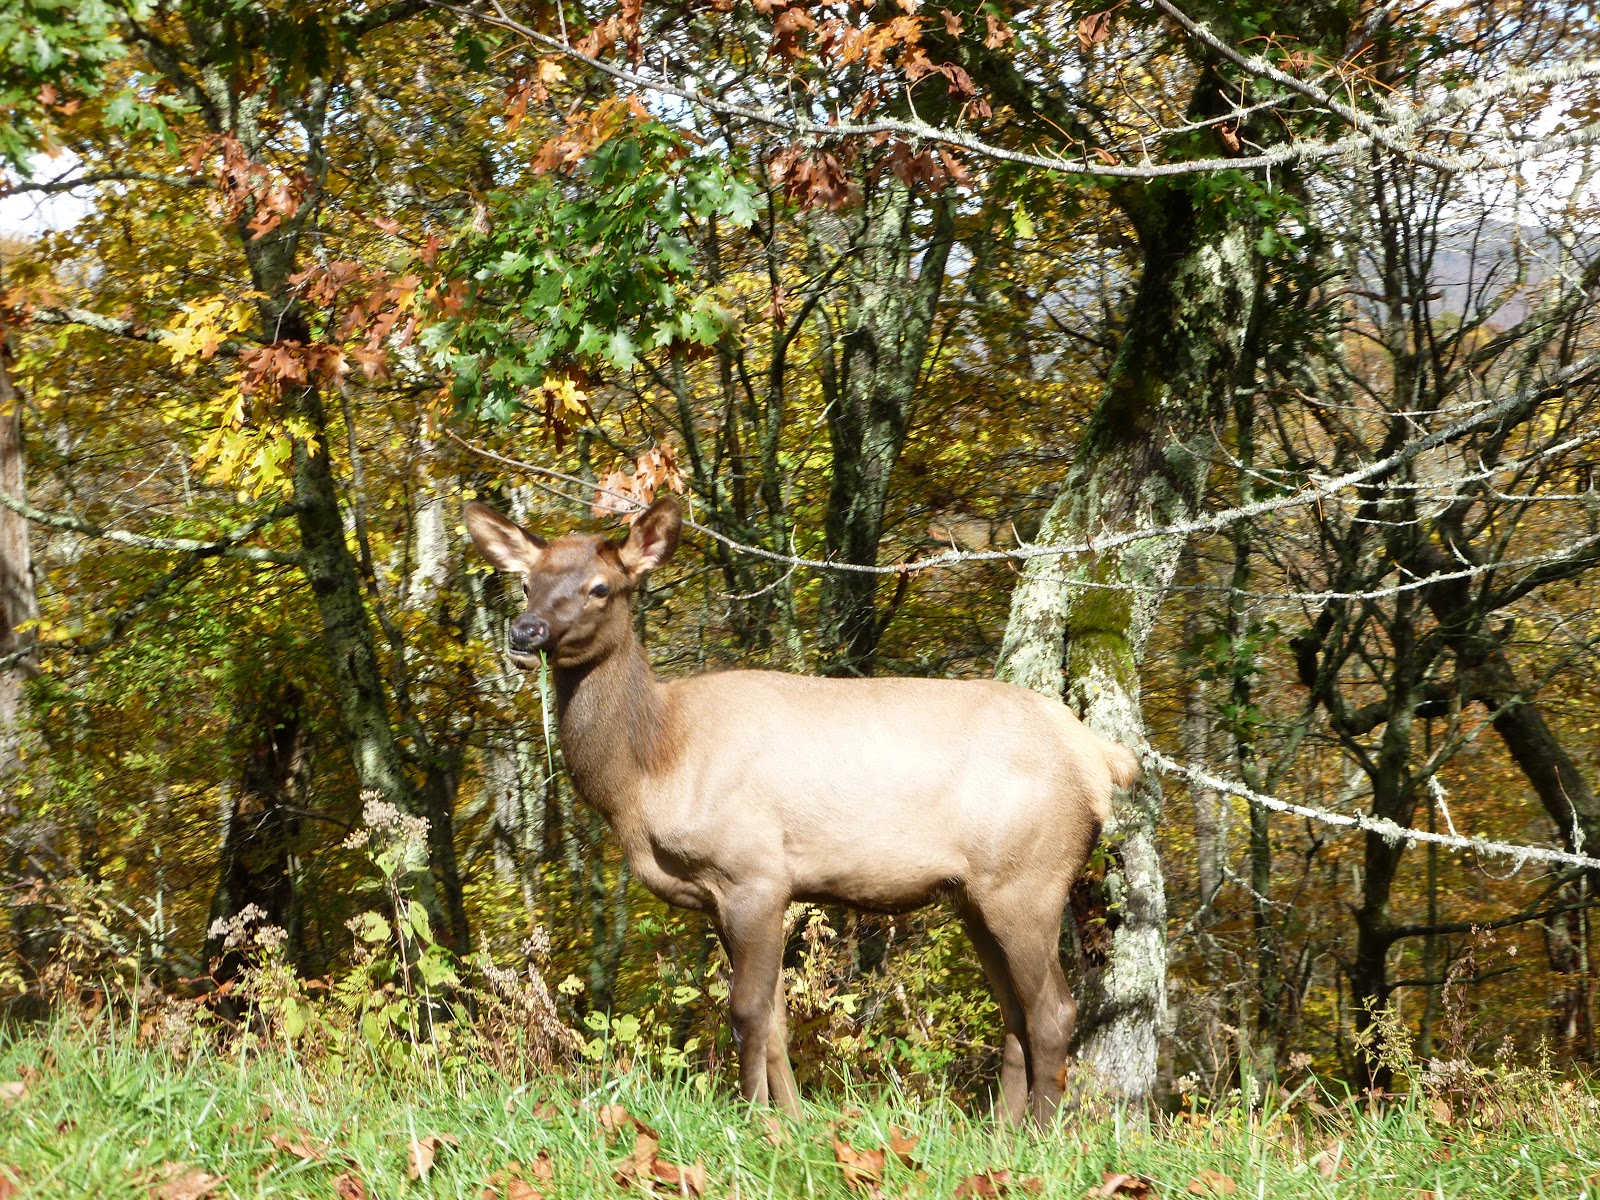
By this point, Nate is a certified expert driver (he also drove Mt. Washington Auto Road) and we took this road in first gear. It was about 2 hours of bumping along a scenic remote dirt road. There are a lot of hikes you can do along the road as well.


We took the Newfound Gap Road back to Pigeon Forge for dinner. We had an all you can eat family style meal at Mama's Farmhouse. This reminded me of buffet/dim sum. They used carts to bring you your food and clear your dishes but it was all you can eat. Food was tasty and there was plenty!


Day 4, Wednesday
We had breakfast at the Red Rooster Pancake House which was tasty, but was a regular breakfast place.

Ready for some traffic?? The tour book highly recommends the 11 mile drive around Cades Cove Loop Road but failed to mention the huge back up of traffic. This is a short historic drive that showcases several homesteads and churches. There are lots of pull offs and small hikes you can do.


There was a horse that looked like a cow... or a cow that looked like a horse! :P


We did the Abrams Fall's hike which is one of the more popular ones. This is a nice 5 mile round trip hike with lots of great views. It was fairly steep at some points, but very do able for those at varying levels of fitness.


After we hopped back into the car and drove to Nashville! For dinner we went to Jack's BBQ. It was cafeteria style so we were a little hesitant, the place could use a face lift. But the line was out the door when we left, and the ribs came right off the bone.


Day 5, Thursday
Breakfast at Cracker Barrel, then we drove to Mammoth Cave National Park. This was a mixed bag... the area was pretty, however it didn't compare to the Smokey Mountains. There was also not many restaurants and we hadn't planned for that. There wasn't much to do other than the cave tours. If we could redo this, we would have stopped here first and only spent a few hours to do the tour and used our extra day (that we now had) at the Smokey Mountains.

However, this was a very nice area if you have small kids and/or are looking to explore the water aspect of the area, I think it would be worth it. There are several short hikes (less than a mile) that are fairly flat, the campground sites were big, clean, and easy to park at. The bathrooms were clean too. We didn't look into the water part, but I heard there were rafting and kayaking along the Green River type adventures available.

We took the Historic Tour at 3:00 on a Thursday. We had a group of about 10 adults which was great. We could go a little faster, ask questions easier, and our tour guide could tailor it. Our tour guide Rick was great, he had been doing it for about 25 years and was quite knowledgeable. We saw tour groups earlier that day with up to 75 people.

Green River
The Historic Tour was pretty cool. The cave (so far) is just under 400 miles long and all contained under the national park. The history of the park goes back hundreds of years. There were slaves who were in there to find saltpeter which is used in gun powder AND food preservation (yum!) during the War of 1812. They have been giving tours there since the 1830s. The geological stuff about the cave was interesting, but I need to learn a bit more about rocks before it makes enough sense to me!

Hiking!
White Nose Syndrome is a disease which is killing of thousands of bats. It is a recently discovered disease. According to Wikipedia: 
"The condition, named for a distinctive fungal growth around the muzzles and on the wings of hibernating bats, was first identified in a cave in Schoharie County, NY, USA, in February 2006. It has rapidly spread and as of spring 2010, the condition had been found in over 115 caves and mines ranging mostly throughout the Northeastern US and as far south as Alabama and west to Missouri and into four Canadian provinces."
We had to walk over Lysol covered mats to help kill the potential fungus on our shoes. They also wanted to talk to anyone who had been in a cave since 2005 for extra preventive measures. It is tough since they aren't sure how it spreads.

Lunch was Subway, dinner was El Mazatlan Restaurant. We didn't know what to expect here, but the food was decent. It reminded me of a Plaza Azteca. The portions were good, food was fast and hot, but it wasn't anything special, but it wasn't bad either.

Day 6, Friday
We stopped at the Jim Beam distillery for a quick look see, but they didn't have anything too different than what you can buy at other places. Then we continued on our marathon drive home.We stopped for dinner at Ed's Steakhouse. We were hungry... but it wasn't a very impressive meal. The bread was good. but the service was slow, the food was pricier, and not cooked very well. If you can wait, I would go somewhere else.

Verdict: We would have done Mammoth Caves first. We would have looked at the water adventure things available. We would have brought an extra car charger for my phone. We would have packed more snacks. Pack warmly, during the day it was around low to mid 50s and at night it... I have no idea how cold it got, but it was chilly!!

Thanks for Reading and Happy traveling!!

Thursday, October 25, 2012

Kale, Canneleni Beans, and Sausage soup


Kale season!!! This is a pretty fast soup, can probably be made and cooked in a half hour. I went a little overkill on the kale because I think it is so tasty, but adjust according to your preferences. Kale will wilt, but not as much as spinach. You can also use less broth and serve it as almost a sauce over pasta too.

I like Italian sausage because it has all the seasonings in it. I add extra black pepper and garlic, but that is just my preference.
 
Kale, Cannellini Beans, and Sausage soup
makes 3-4 servings

1/2 cup onions, diced
1 tsp garlic powder
salt & pepper
5 -8 kale leaves
6 cups chicken broth, I do a big can and do 1/2 that can filled with water
1 carrot
1 celery stalk
2 hot Italian sausage, out of casings

Prep kale
Hold kale leaf by the stem, the leaf part pointing down to the cutting board. Use knife and slide it along the stem, separating the leaf off the stem. Cut kale to bite sized pieces. The stems are edible, but tougher and need extra time to cook.


Make soup

Saute onions, garlic powder, kale stems, carrots, and celery. Once starting to get soft add in sausage, kale, and broth. Let cook at a rolling boil until sausage is cooked through and kale is tender.

Serve over pasta if you'd like.

Sunday, October 21, 2012

Bacon, Broccoli, and Zucchini Quiche

I was looking for tasty and easy breakfasts to make for when friends came over. I thought quiche would be a good idea. I didn't know what recipe to use, but I figured you can't go wrong with Paula Dean's recipes!

Of course I made a few changes, most unplanned. I was out of eggs, so I used 5 instead of 6. I used broccoli and zucchini instead of spinach since the spinach was expensive. I considered kale but the store was out. Instead of heavy cream I used light cream and reduced it to 1 cup. I swapped Swiss cheese (which is a weird cheese) to mozzarella cheese (according to my friends, its not a real cheese). I read a review that said to add in a dash of nutmeg. I added it in, but I couldn't really taste it.

Refrigerated pie crusts sometimes come in packages of two, but you can always freeze the other. To defrost, I left it on the counter, it took about 30 minutes and rolled out fine.

The egg mix was delish! I would recommend trying different veggies to change the whole meal up.

To reheat: Preheat oven to 350F, heat slice for 10 minutes, turn off oven, let it stay in the oven for another 10. This heats it up nice while keeping the crust crispy.

Bacon and Veg Quiche
Makes 1 pan, 6-8 slices

5 eggs, scrambled
1 cup light cream
salt & pepper
dash of nutmeg (a very small pintch)
1 cup of shredded mozzarella cheese
4 pieces of bacon, cooked than crumbled
1/4 of a small onion, diced
1 cup of chopped broccoli
1 small zucchini, sliced
1 refrigerated pie crust

Cook bacon, drain frying pan as needed. Don't wash the pan, cook the onions for a few minutes. pull off the burner if the pan is too hot and onions start to brown. Add broccoli and cook approx 4-6 minutes.

In a bowl, combine scrambled eggs, cream, salt & pepper, nutmeg, bacon, and cheese.

Put the pie crust in the 9 inch round pan. Place zucchini in the bottom. Pour the egg mix over the top. Bake for 35 minutes at 325. I did the last 10 minutes at 350. Take it out when the top is set and starting to get a little golden.

Wednesday, October 17, 2012

Brown Butter Raviolis with Walnuts and Snap Peas (plus Roasted Asparagus)


One of my friends came over for dinner so we made a variation of the brown butter raviolis with chicken and walnuts. We wanted something lighter, so we omitted the chicken and added in snap peas. We also made a side of roasted asparagus. I've never had roasted asparagus before...it is pretty darn tasty. You should make some too. Roasted veggies are a very easy way to prepare veggies too.


Brown Butter Raviolis with walnuts and snap peas (plus roasted asparagus)
Serves 2
8 jumbo frozen cheese ravioli
1/2 cup walnuts, toasted
1 tsp olive oil
1/4 cup diced onion
1 clove garlic, minced
2 tbsp butter
Snap peas (2-3 handfuls, peeled the ends to get rid of the strings that are along the bean)
1/3 cup fresh sage leaves, sliced into ribbons
Asparagus (peeled from the base of the spiky top to the bottom of the stalk)

Raviolis
Cook according the to package directions.

Toasting Walnuts
Place the walnuts in frying pan on medium heat and toast for ~5 minutes, stirring frequently. Remove and chop.


The Rest of the Meal
Heat a tablespoon of olive oil in the frying pan. Add onions and garlic, saute until soften. Add butter and let it melt. Add the snap peas and the sage. Add the cooked raviolis and walnuts then stir to combine.

Roasted Asparagus
Put on cookie sheet, drizzle with olive oil. Sprinkle salt and pepper if you would like. Roast at 425F for 15 minutes.

Enjoy!!

Thursday, October 4, 2012

Apple Butter

Slowly making my way through all the apples... we are now at the ones with bruises and not really the kind you'd want to pull out and munch on. I've been craving apple butter and pop overs...

I read many recipes like this and this about apple butter and how long to cook it and what spices to add in and what apples to use and how many apples, etc. So per usual I made it up into my own recipe.

I used whatever apples were in my bag. I recall them being Spartan apples and Empire apples. It doesn't really matter which ones you use, but it will change the amount of sugar you will want to add to the butter as it could end up being more tart or more sweet. 

If you want to make apple sauce, you can do the same thing but take it out between the 4-8 hour mark, depends on how chunky you want your apple sauce to be.

Sugar and spice and everything nice!
Set it and forget it!!! (yay infomercials!)
about 6 hours in
Food processing at 12 hours (or immersion blender)
Look how smooth it is!! It was also hot.

Venting the top to remove moisture to help thicken. Yes, those are chop sticks.
Refrigerated over night

Apple butter and pb for breakfast!
I've decided that apple butter is pretty much up there on easiest things to cook and it smells awesome and looks impressive.

Next time I would try and make a Naked Apple Butter which has minimal spices and sugar added to it. I also want to try canning it for future use or gifts. This time around I'm going to freeze it in ice cube trays and then store in a Ziploc bag. It should store in the fridge for a few weeks.

There are many uses of apple butter some include (though not tested yet): mix in oatmeal, baking substitute, marinade, on toast, in a sandwich,

1 crock pot (8-12 apples) yields about 1 to 2 quarts of apple butter which is 3-4 jars.

I even have labels! (Thanks mom!)
Update: Since I first started writing this post, I made another batch with the rest of the apples (hallelujah!). I used 1 cup of sugar and 1/2 tsp cinnamon. I slow cooked it on low for 12 hours (over night), pureed it in the food processor, and then refrigerated it. I was going to work and 8 hours seemed a bit much. Already this one is thicker! I put it back in the slow cooker for another 3 hours with the top cracked to let it thicken some more. This one is a thicker, more tart, more apple-y tasting one.

Next time, I would try different spices such as nutmeg allspice or cloves next time. You can also combine different fruits by including some pears with the apples too

Apple Butter
8 med apples, peeled (optional) and sliced
2 cups sugar, I thought it was sweet and would try 1 cup next time
1/2 tsp nutmeg
1 tsp cinnamon, heaping

Combine it all in the slow cooker, set it to low. Leave it for 6 hours for an amazing smelling chunky apple sauce, 10-16 for apple butter. The longer you leave it in, the thicker and more condensed flavor it will have. When it was done I pulsed it in the food processor until smooth.

Wednesday, October 3, 2012

Turkey Chili

Nate and I love chili. Here is another easy chili recipe for you!

This one is a chunky meaty chili made from ground turkey or ground chicken, I go with whichever is on sale. Please note that this is a very spicy recipe!! What I have listed below has quite a kick and the original recipe calls for more spice that that!

Onions, Peppers, and Garlic
Add meat
Once meat is done, add spices and other things
Add sauce, tomatoes, beans, and corn

Serve with chips!
When you cook ground turkey it tends to clump instead of crumble like ground beef so when you put the meat in, stir it constantly and keep breaking it up with the back of your spoon.

If it is too spicy, add in a little at a time, some cocoa powder, cheese, sour cream, plain yogurt, etc.

Even though the recipe says to let it simmer for 50 minutes, I let it simmer for longer or until I'm ready to eat it. Just make sure you stir it otherwise the bottom might scorch.

This recipe freezes well.

Turkey Chili
makes approx 5 big servings

2 tbsp olive oil
1 onion, diced
5 cloves of garlic, minced
1 med green bell pepper, seeded and chopped
2 lbs of ground turkey/chicken
1 heaping tsp of chili powder, red pepper flakes, paprika, cumin
2 tsp dried oregano
1 tsp black pepper
1 tbsp Worcestershire sauce
1 (14.5 oz) can diced tomatoes
1/2 - 3/4 of a 16 oz jar of Salsa
8 oz can of tomato sauce
1 can of kidney beans
1 can of corn

Heat olive oil in a large pot over med heat. Add onion, garlic, green peppers and stir until onion is starting to look clear.

Add the meat, stir and break up the meat until it is no longer pink.

Add spices, Worcestershire sauce, tomatoes, tomato sauce, kidney beans, and corn. If you are hesitant, add in half of the spice and add more as it cooks down and you test it.

Let it simmer for about 50 minutes and stir occasionally.

Top with cheese and serve with chips!

Tuesday, October 2, 2012

Chicken with Caramelized Onions and Apples

Looking to cook your apples with things other than cinnamon and sugar? Try this savory dinner recipe! This unlikely combo is a filling and satisfying meal.

Onions!
Add Apples & Vinegar
Add Chicken!
Combine with Raviolis!

Chicken with Caramelized Onions and Apples

Olive Oil
1 small onion, thinly sliced
1 medium apple, diced (I used the crank apple peeler then cut the apple into 6ths)
1 tbsp apple cider vinegar
1 chicken breast, diced
Salt & Pepper

Heat oil in the pan, add onions. Cook for about 10-15 minutes until onions are golden and a deep brown
Add apple and vinegar, cook for 5 minutes or until apples are starting to get tender. Add chicken and season with salt and pepper. Saute in the same pan until it starts to get golden. [Depending on how big the pieces of chicken are, this could be added at the same time as the apple and vinegar.]

The original recipe says to serve with a slice of provolone cheese on top. I don't eat cheese like that or have it in the house. Instead, I made 4 jumbo raviolis according to the package directions. When the chicken was cooked I tossed the raviolis into the pan with a pat of butter and mixed it around get everything all nicely coated.

Monday, October 1, 2012

Apple Cinnamon Pancakes

Apple!? Yes of course! This is a very simple and straightforward recipe.

This is supposedly for 6 pancakes but I made two and I ate them both for dinner. I also made some bacon and considered making eggs... but that was beyond me. Anyways.

Heat a small pat of butter on a frying pan on medium heat.
Saute 1 small/med size apple with 3/4 tsp of cinnamon. Stir around for about 3-5 minutes. Apples should be tender but not mushy.

Meanwhile, combine your favorite pancake batter. Mine is store brand "just add water." To this 1 cup of plain buttermilk pancake mix, I add 2/3 water (according to the directions), plus an additional tsp of cinnamon and a tsp of vanilla. Combine but it should be lumpy.

Melt a small pat of butter in the frying pan, or use the pan that you just made bacon in. In the hot skillet, pour in the pancake batter and sprinkle in the apple pieces (you can always mix it in the batter, but don't over mix or you will have tough pancakes!).

When it starts to bubble at the top/the edges start to look like pancake edges/when you shake the pan it moves slides on the pan, shove a spatula underneath and attempt to flip it. Then let it cook up until its crispy on the outside and there is no runny batter leaking out the side.

Enjoy!


Friday, September 28, 2012

Apple Crisp

What is another dish that uses up lots of apples? Apple Crisp! Found this recipe on Allrecipes.com and it seemed worthy with all the reviews and rankings. So why not?!

This used 8 apples, almost 10 cups worth!

Apple Crisp
makes 12 servings

Dice/slice/chop the apples and put them in the 9x13 pan.
Combine 1 cup sugar, 1 tablespoon flour, 1 tsp ground cinnamon
   Note: recipe calls for 1/2 cup of water. We used it, it was very soupy. I would omit next time.
Combine 1 cup oats, 1 cup flour, 1 cup packed brown sugar, 1/4 tsp baking powder, 1/4 baking soda, 1/2 cup melted butter. Pour this mix over the apples. (Forgot to take a picture!)

Bake at 350F for about 45 minutes. It will be golden on the top and bubbling at the bottom.

Serve warm with whipped cream or ice cream!

Thursday, September 27, 2012

Mini Apple Pies

Made these last year and received some good reviews. So I brought it back for this year. Last year I was trying to find a good apple pie recipe and there are just so many out there! I looked and looked but just decided to pick this one.

This pie recipe is so easy! The crust is all made in my stand mixer, chilled for an hour. During that time I prep the apples. Chop em, cover them in cinnamon, sugar, and butter. When the dough is all set, roll it out, put it in the pie plate and then put in the apples.

For the mini apple pies, I used the left over topping from the Apple Strudel Muffins and some of the remaining dough. Last year I used Paula Dean's Crunch Topping to top some of the pies. (Also check out the apple crisp!)

Apple pie is a choice your own adventure, you can make so many different combos of toppings, crusts, sizes, and glazes.
Roll out dough (thinner than you would for regular pie), cut out circles for the muffin tins

Lines muffin tins, insert the dough
Add filling!!

Top with crumble, dough, or whatever you want!
Update 3/29 - Yum! I halved the recipe and oh man, in less than an hour we had hot fresh apple pies!

these little glass dishes were GREAT for this!


so flaky and yummy!!!!
updated 10/13/2015:


Apple Pie
makes 1 pie

Crust
2 1/2 cups flour 380g
1 tsp salt
2 tbsp sugar
1 cup butter
1/4 - 1/2 cup ice water

Filling
7 medium apples 780g, 3 granny smith, macintosh
1/2 cup sugar
1 tbsp lemon juice
1 tsp cinnamon
1/4 tsp salt
2 tbsp butter, melted
1 tbsp + 1 tsp cornstarch

In mixer (or food processor) combine flour, salt, sugar. Add butter and combine until it looks like coarse sand. Then slowly add the water. You are waiting for the dough to just come together in a ball. Wrap it in plastic wrap and refrigerate.

Meanwhile, slice the apples. Diced for smaller pies and larger slices for regular size pies. Combine with the rest of the filling ingredients and stir to combine. Cook on the stove for 5-8 minutes then put to the side to cool. 

Take the dough out of the fridge and flour the surface.

Now you have some options...

Hand Pies
Roll the dough very thin and use a bowl or really large cookie cutter into a circle. Fill one side with a couple tablespoons of the filling and fold in half. Pinch the edges together. Tip: cut the apples on the smaller side.

Mini Pies
(cupcake tins or glass pyrex dishes which are great because then you can serve them that way or pop covers on them for later!)
Roll the dough thinner than if you are making one big pie. Cut out a circle that is about 4 inches. This is big enough to go in the bottom of the muffin tin. I used cupcake papers to line the tins. Put the dough into the tin, add the filling, top with another thin piece of dough/crumble topping/strudel topping. Note: You can also place strips of parchment paper in the bottom of the cupcake tin and place the bottom layer of dough over that. When the pie is done baking you can use the strips as handles for taking them out of the tins.

9 Inch Pies
Roll the dough on a well floured surface. You can use the rolling pin to help you get the dough over the bottom. Place into the bottom of the pan, add filling, cover with more rolled dough, crumble topping, or strudel topping, etc. If you top with another piece of rolled dough be sure you put a slit into it so the steam can vent and the pie won't bubble over.

After the pies are assembled I do a milk wash (pour some milk in a bowl and use a pastry brush to "paint" the pie crust) and sprinkle with some sugar.

Bake at 425 for about 15 minutes and then drop to 350 for 30-40 minutes. The crust will be golden. Let the pie cool for a bit because the large ones won't slice well and the smaller ones will make you think you just ate lava.